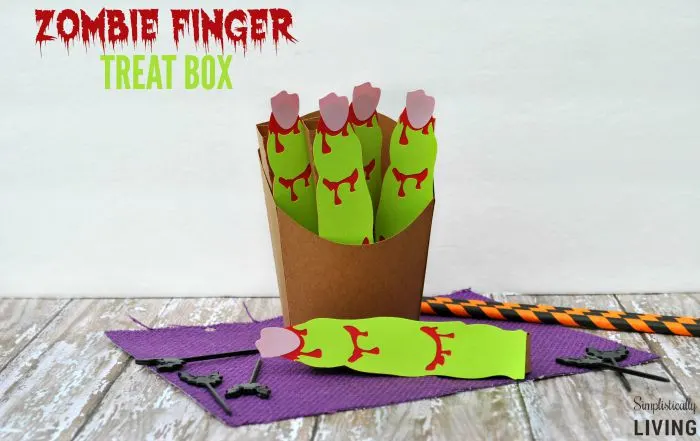
Zombies are a huge hit in our house and with Halloween nearing I thought it was only appropriate to create a zombie themed craft using my silhouette machine. This Zombie Finger Treat Box is easy to make and would be a fun addition to any Halloween party!

Don’t let these fingers fool you. Although they are a bit creepy, they do hold candy such as smarties. They would be really fun to make and have your kids pass out at their Halloween party at school for a finger licking good time!
What You’ll Need to Make a Zombie Finger Treat Box:
- Silhouette Cutting Machine
- Brown Cardstock
- Red Cardstock
- Green Cardstock
- Pink Cardstock
- Adhesive Glue or Tape
How to Make a Zombie Finger Treat Box:
- Head to the Silhouette online store and grab the 3D Zombie Finger Treat Box for just $0.99.
- Once you have purchased the file head over to your library in the Silhouette Studio Software and locate your file. Double click it to open it up.
- The file is already made up for you. To make it easy, highlight everything by right clicking and select release compound path, so you are able to move things around. After you release compound you will want to ungroup the images. This will make cutting each image easier.
- Now you can move the items on to the mat as you want to print them. Keep in mind you can make the file smaller but it will greatly reduce the size of your final product. I suggest leaving the images the default size.
- When each item is placed onto the mat they should look something like this:
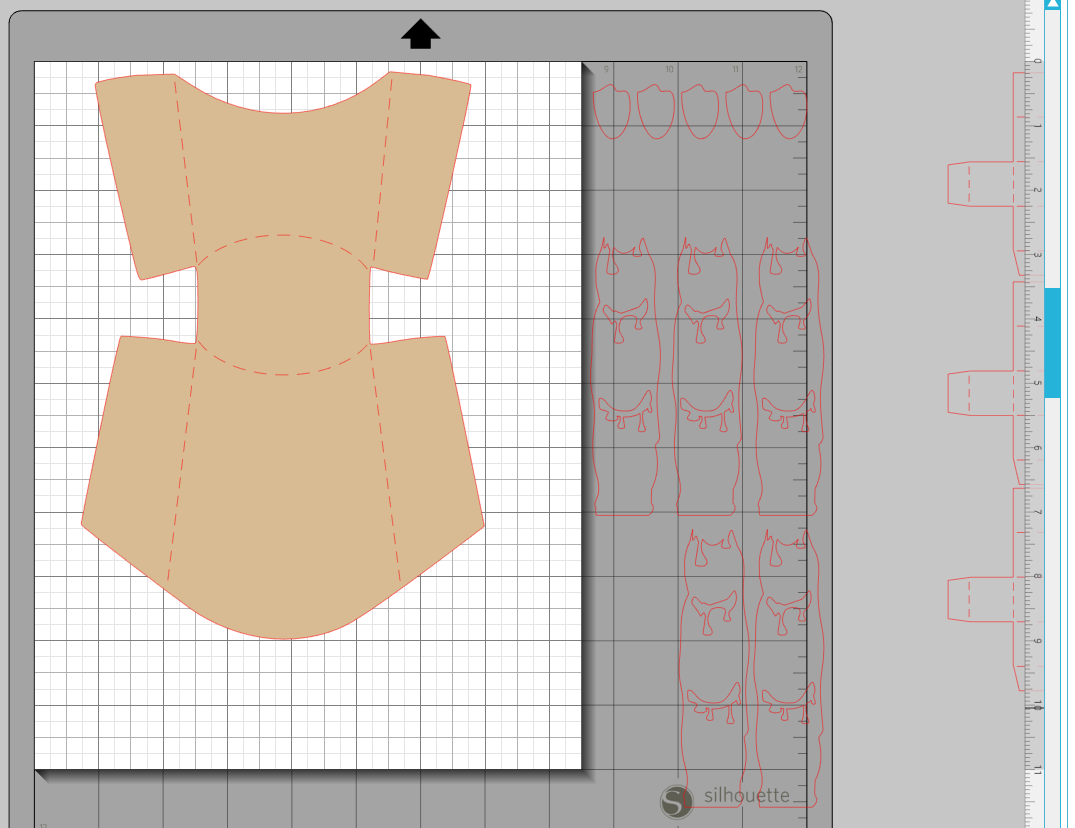

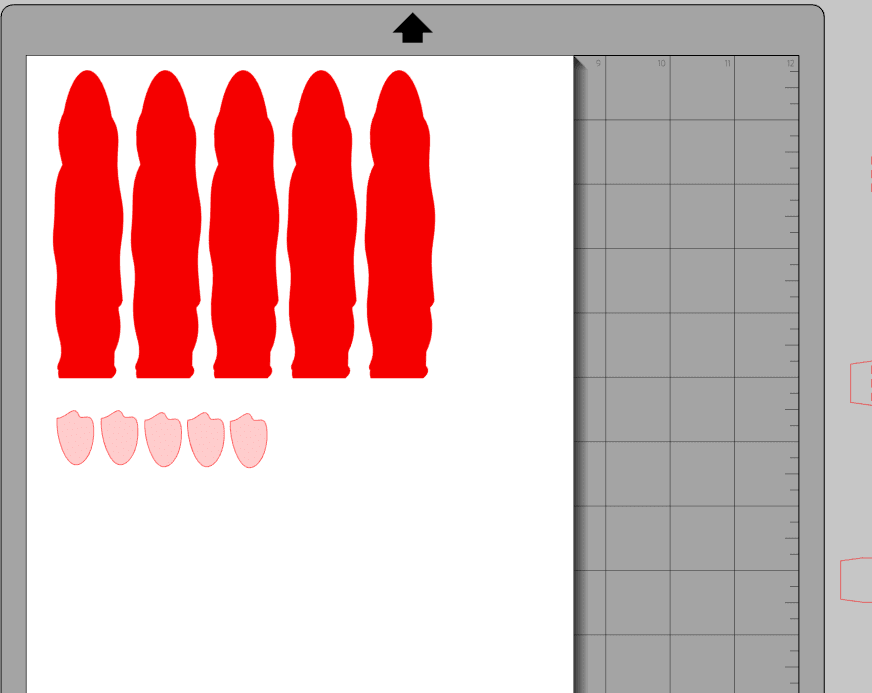
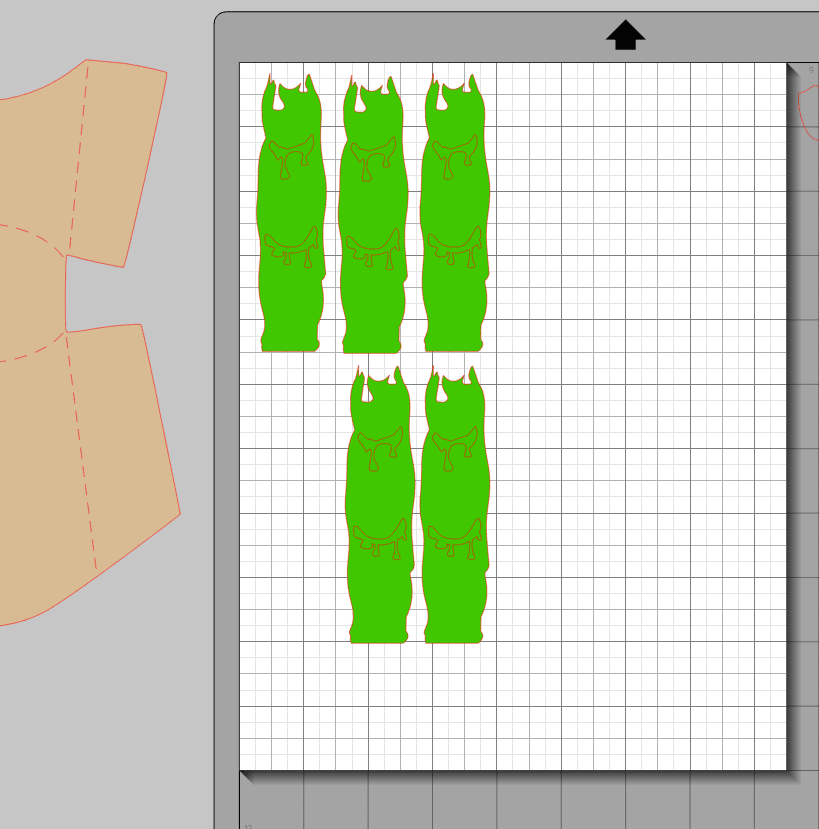
- You will cut out the box and pop up card boxes in brown cardstock. The underlying fingers will be cut in red cardstock, the top finger layer in green and the nail beds in pink.
- Once you’ve got your cardstock ready you will cut each item separately. Make sure you’re cut settings are on cardstock and at a blade of 3.
- Once everything is cut it is time to assemble the pieces. The box and finger boxes are so easy to put together. Simply follow the perforated edges to fold the cardstock into a box and apply the glue or tape to hold it together.
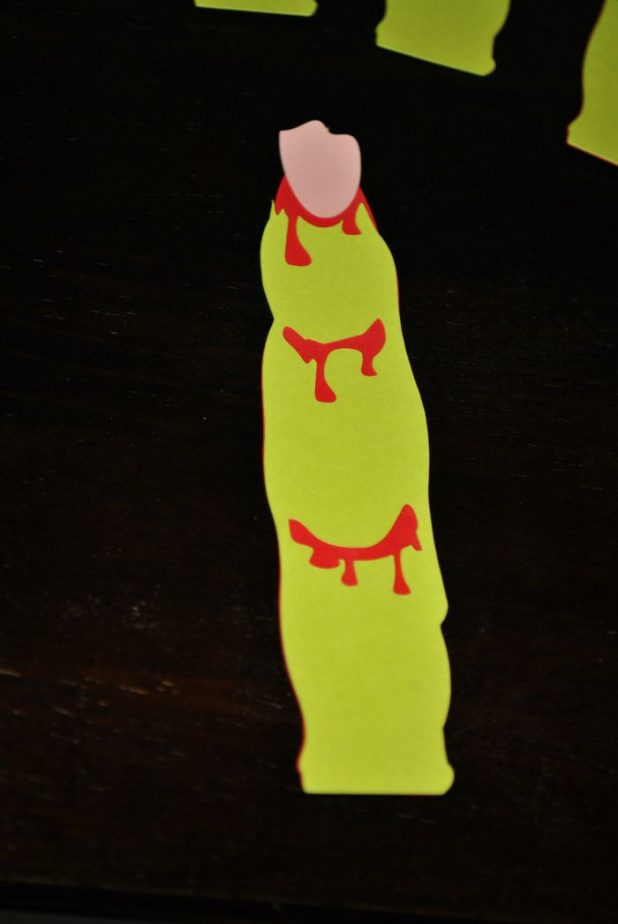
- The fingers get layered with red on the bottom, green on the top, and pink finger tips at the top of the finger. Again these can be held together by the glue or tape.
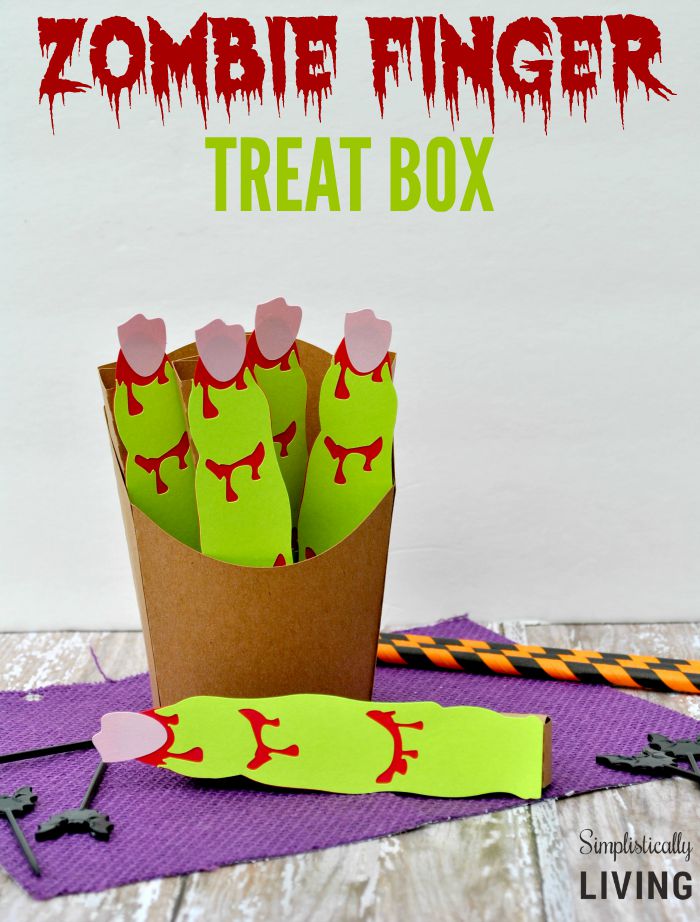
- Once it is all assembled you should have a finger that looks like the one pictured below and has a small box on the backside perfect for slipping candy into (tootsie rolls, smarties, etc. are perfect for these).

That’s it! You now have a fun Zombie Finger Treat Box!

Zombie Finger Cakes | Simplistically Living
Sunday 3rd of July 2022
[…] Want more Zombie recipes? Try our Zombie Eyeball Cupcakes and Zombie Finger Treat Boxes. […]
24 Halloween Craft Projects for Cricut or Silhouette | VCM
Tuesday 14th of April 2020
[…] See It HereJack Skellington Tee […]
24 Silhouette And Cricut Halloween Projects
Tuesday 2nd of October 2018
[…] Zombie Finger Treat Box […]
10 Awesome Silhouette Halloween Project Ideas | Dawn Nicole Designs
Saturday 19th of September 2015
[…] Zombie Finger Treat Box by Simplistically Living […]