

These Chocolate Peanut Butter Hearts are the perfect treat to make for Valentine’s Day. With a chewy, homemade peanut butter filling and a dark chocolate shell, these make a healthier version of Reese’s Peanut Butter Hearts.

Chocolate Peanut Butter Hearts
Valentine’s Day is one of my favorite holidays because it’s the time of the year we can bring sweets back into our lives after trying to eat healthier in January.
When I started making sweet treats for Valentine’s Day, I started with Boozy Valentine Hot Cocoa Bombs, Conversation Heart Cocoa Bombs, Valentine Brownies, Valentine M&M’s Cookies, Heart Shaped Stained Glass Cookies and then made these Marbled Heart Cookies.
And I am not finished just yet!
These chocolate peanut butter hearts turned out way better than expected and dare I say, even better than Reese’s!

Why I Love This Recipe
- These are easy to make
- They make a healthier version of a Reese’s Peanut Butter Heart
- They use dark chocolate for the perfect rich taste.
- They are fancy enough to put in a cute box for gift giving.

Things To Note:
- If you want it to be more of a copycat Reese’s Peanut Butter hearts, add 1-2 additional tablespoons of powdered sugar, this will give them both a sweeter flavor and also a slightly dryer and more crumbly texture that is more familiar to the Reeses. Then swap the dark chocolate for a quality milk chocolate. Again, that will help with sweetness, but also give a milkier flavor that is more familiar to Reese’s.
- You can swap the peanut butter for almond butter, sunflower butter, etc. for those with allergies. Nut free alternatives will work well for this recipe.
- Dairy free/vegan chocolates should work well here, we tried it with Enjoy Life chocolate that also worked well.
- Store any leftovers in an airtight container
- Avoid moisture.

What You Need To Make Chocolate Peanut Butter Hearts
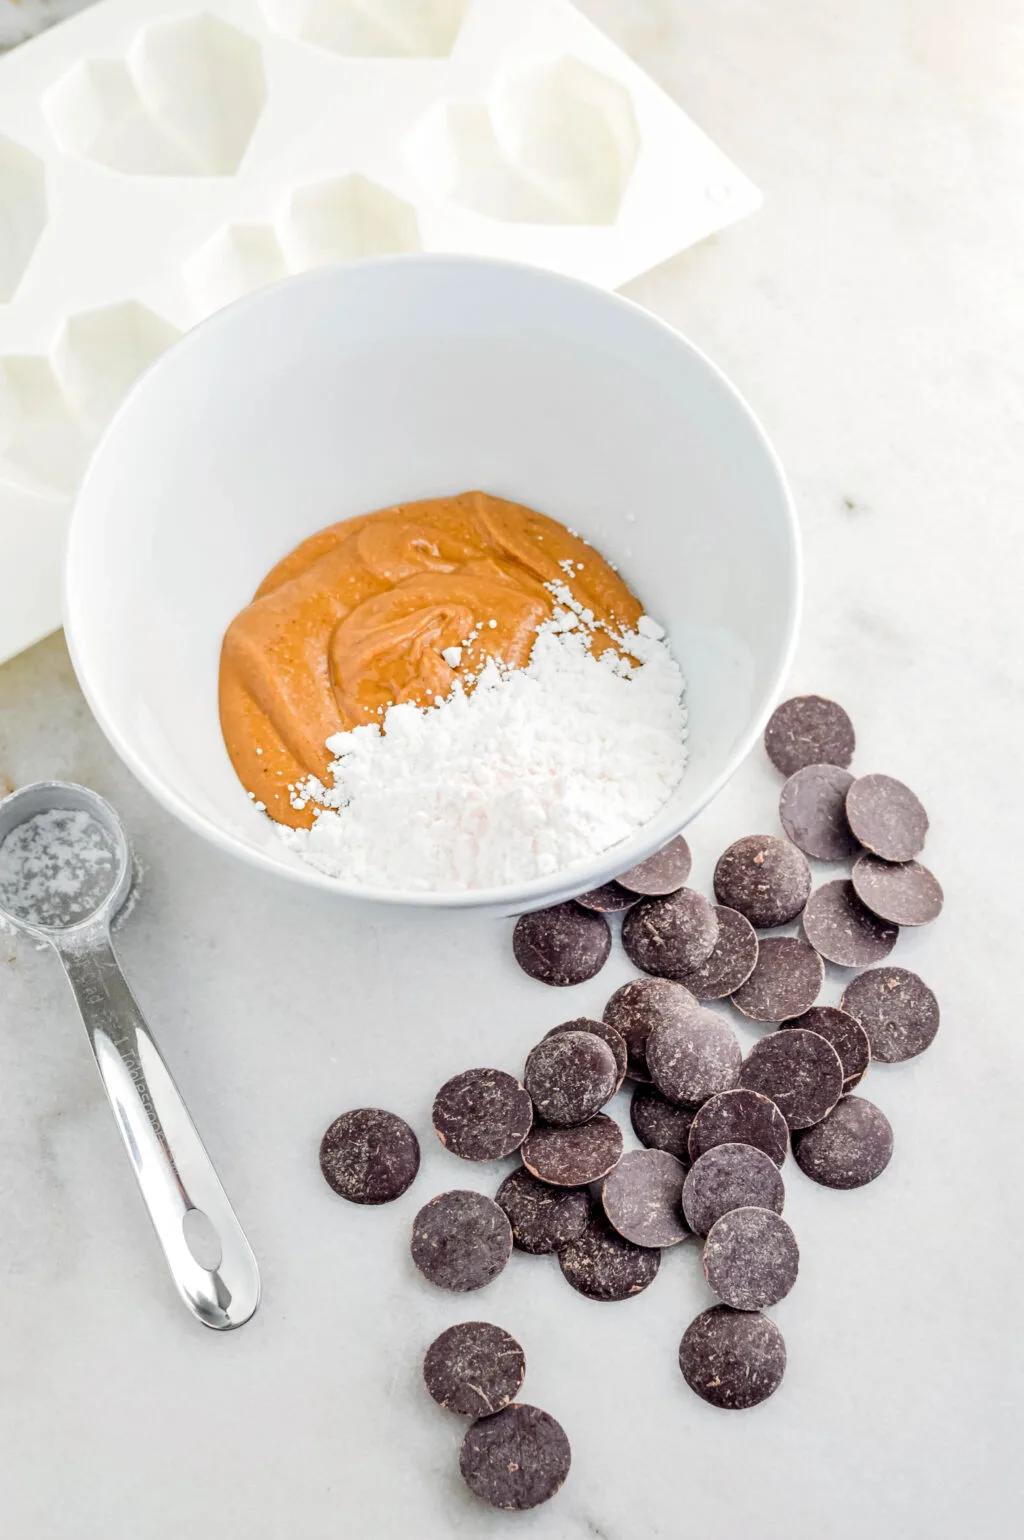
- Dark chocolate wafers – Ghirardelli is my favorite
- Natural peanut butter, smooth, and stirred really well to ensure there isn’t any peanut oil visibly present
- Powdered sugar
- Salt
- Pure vanilla extract
- Tiny White nonpareils
- Edible gold leaf sheets
- Diamond Heart Mold
- Parchment Paper

How to Make Chocolate Peanut Butter Hearts
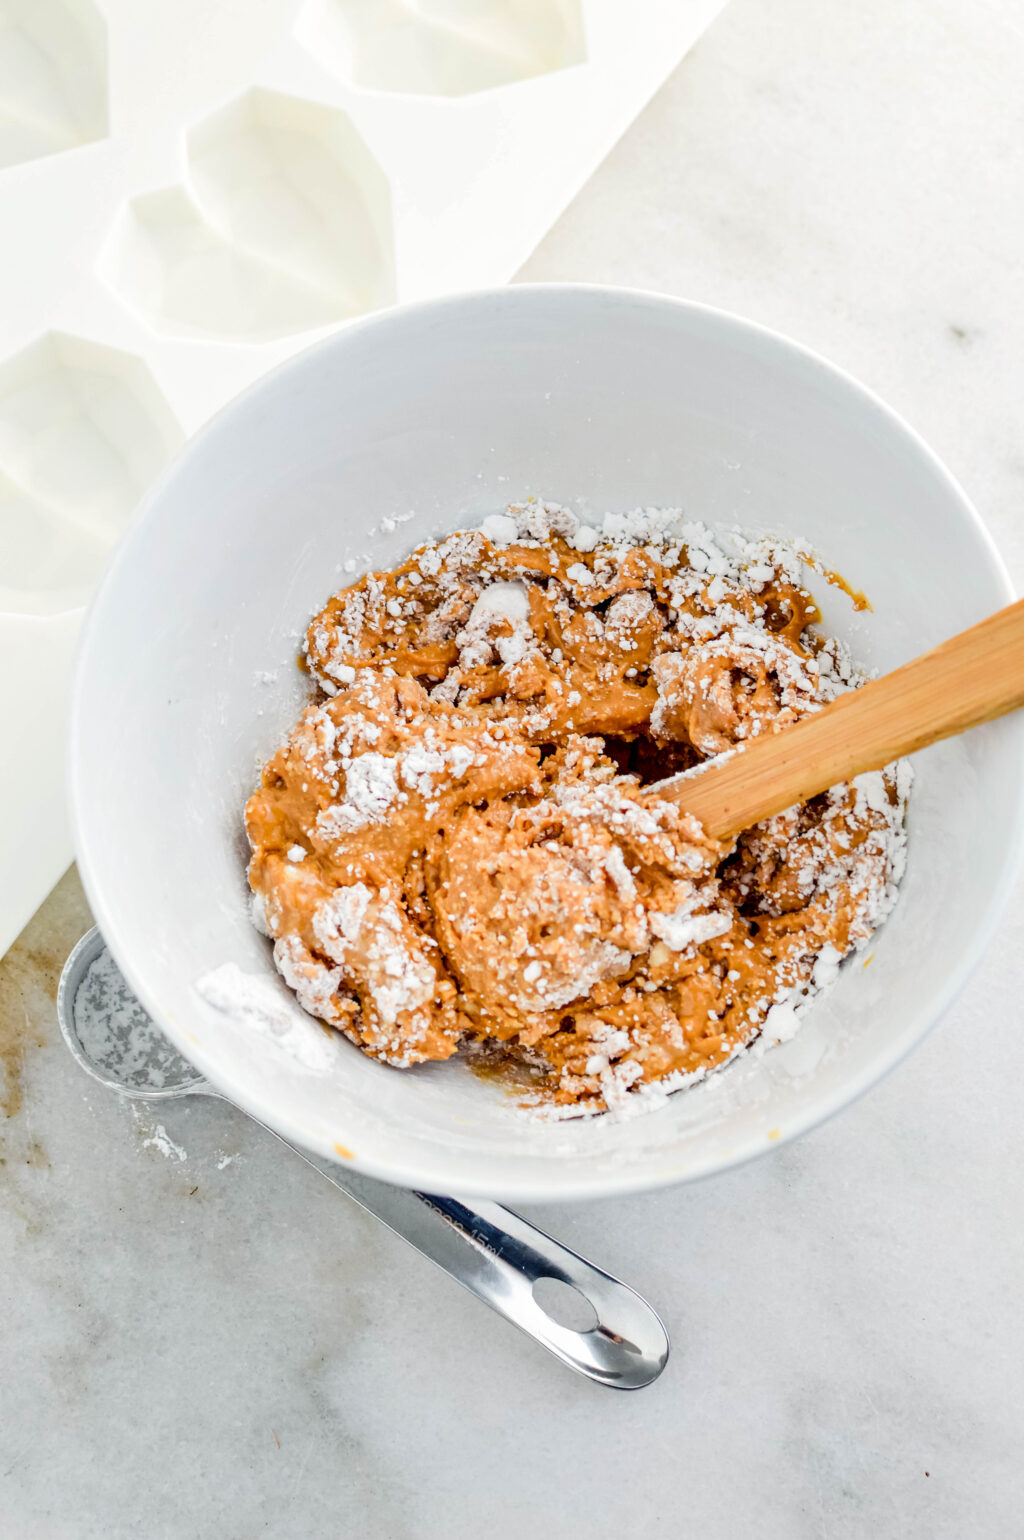
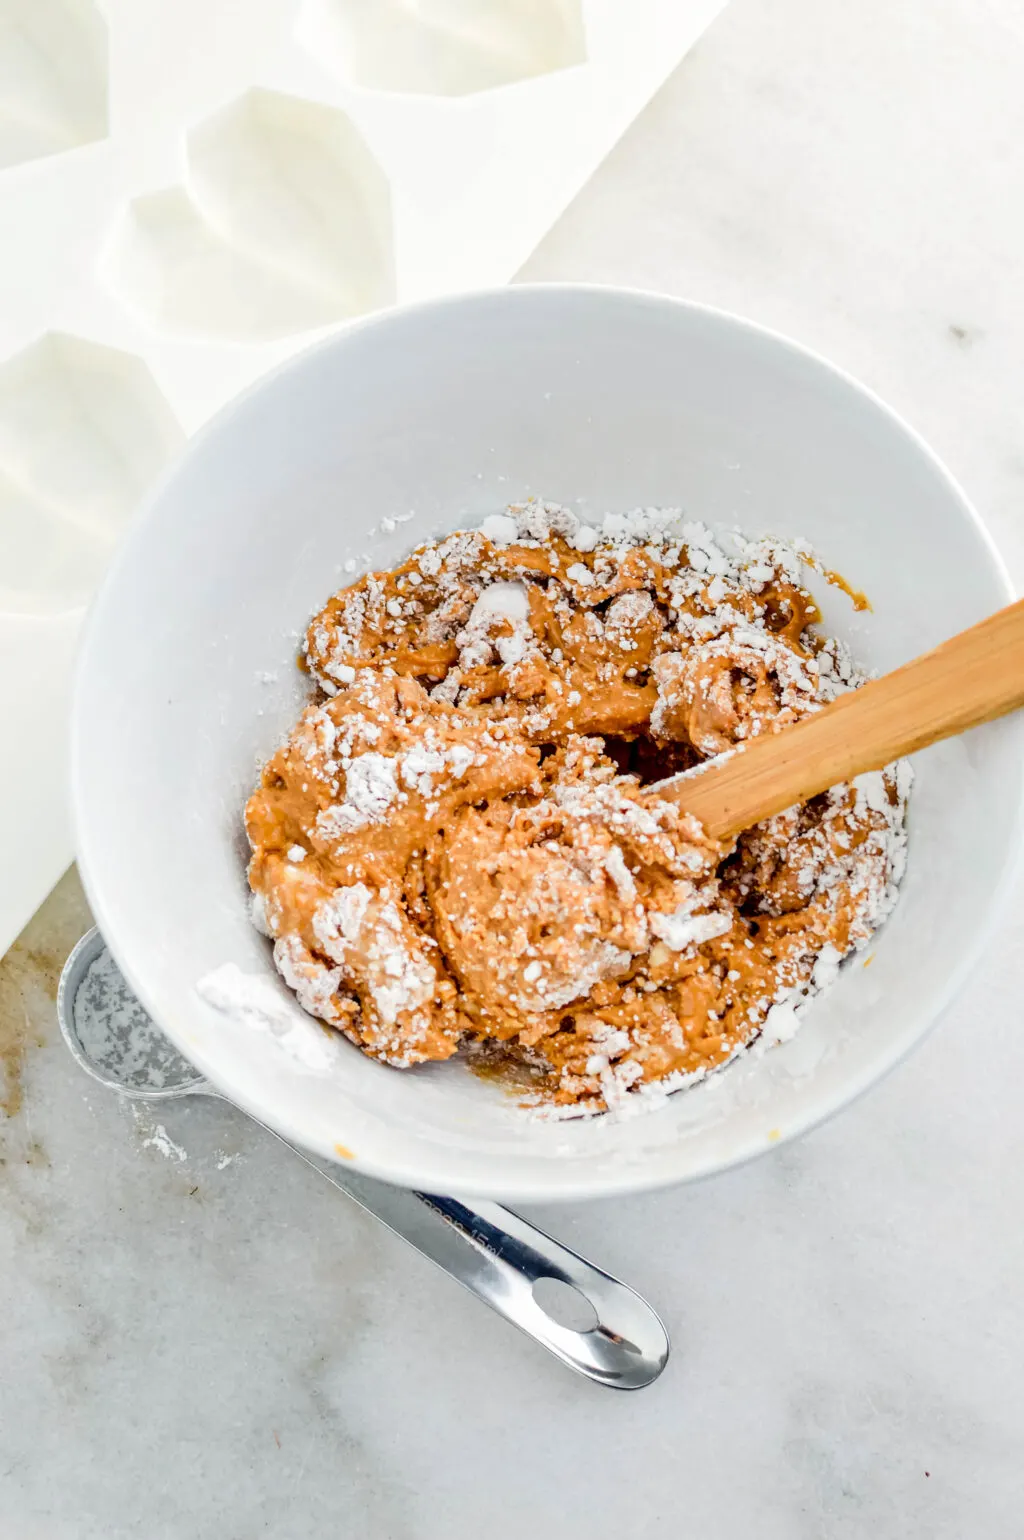
Mix the peanut butter, powdered sugar, salt and vanilla until smooth.
Fold a piece of parchment paper in half then transfer the peanut butter to one half, fold the other side of the paper over so the peanut butter is in the middle of the two sheets, and smooth the peanut butter mixture to an even ½ inch thickness.
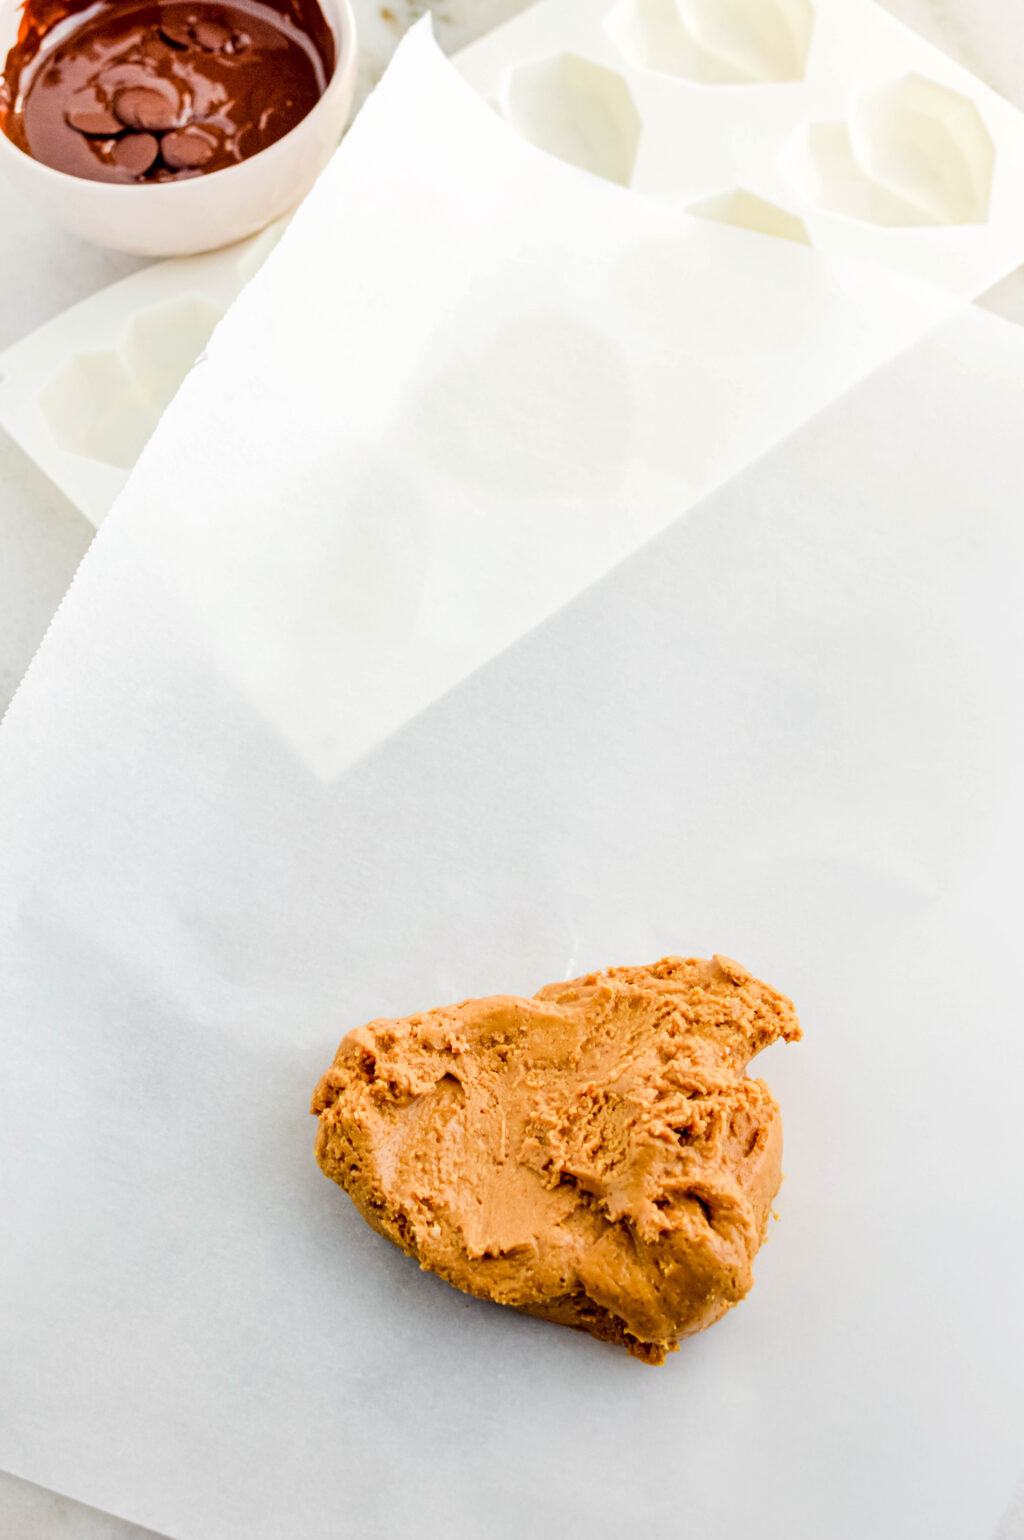

Set this in the freezer for about 20 minutes. *It is easier to work with frozen peanut butter mixture, but you can certainly do this with softer peanut butter, it will just be a little bit harder to work with.
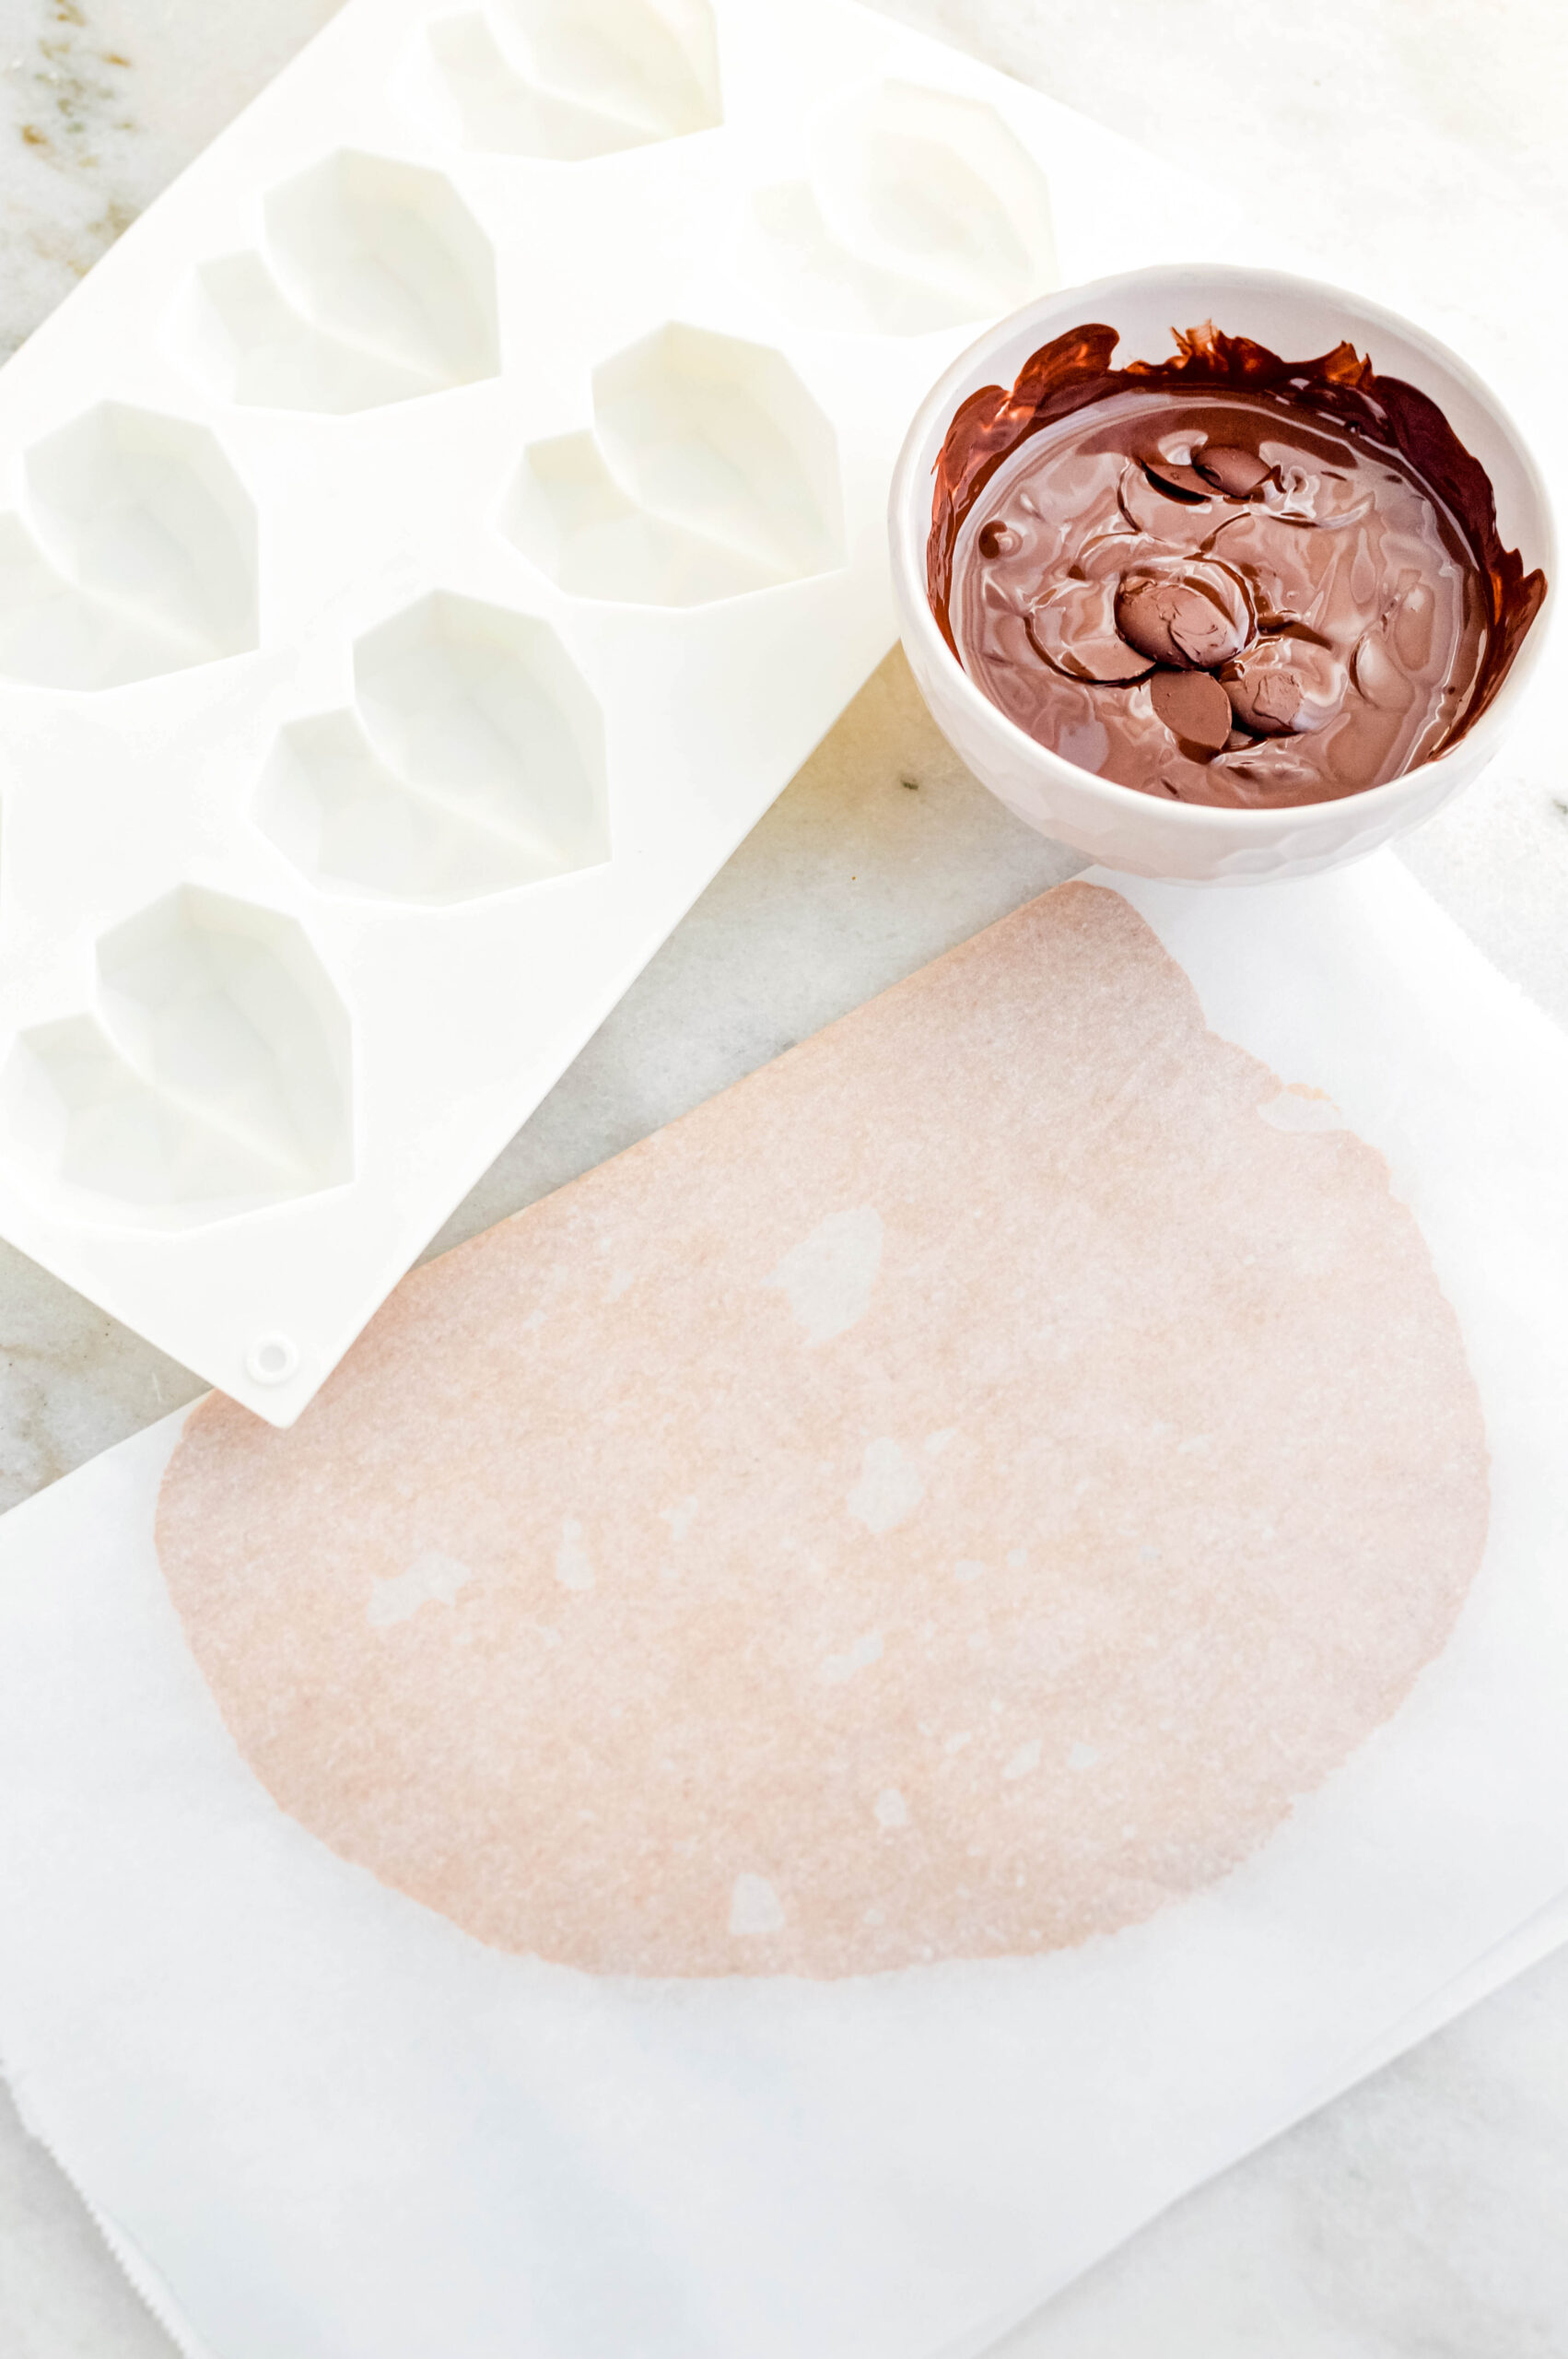
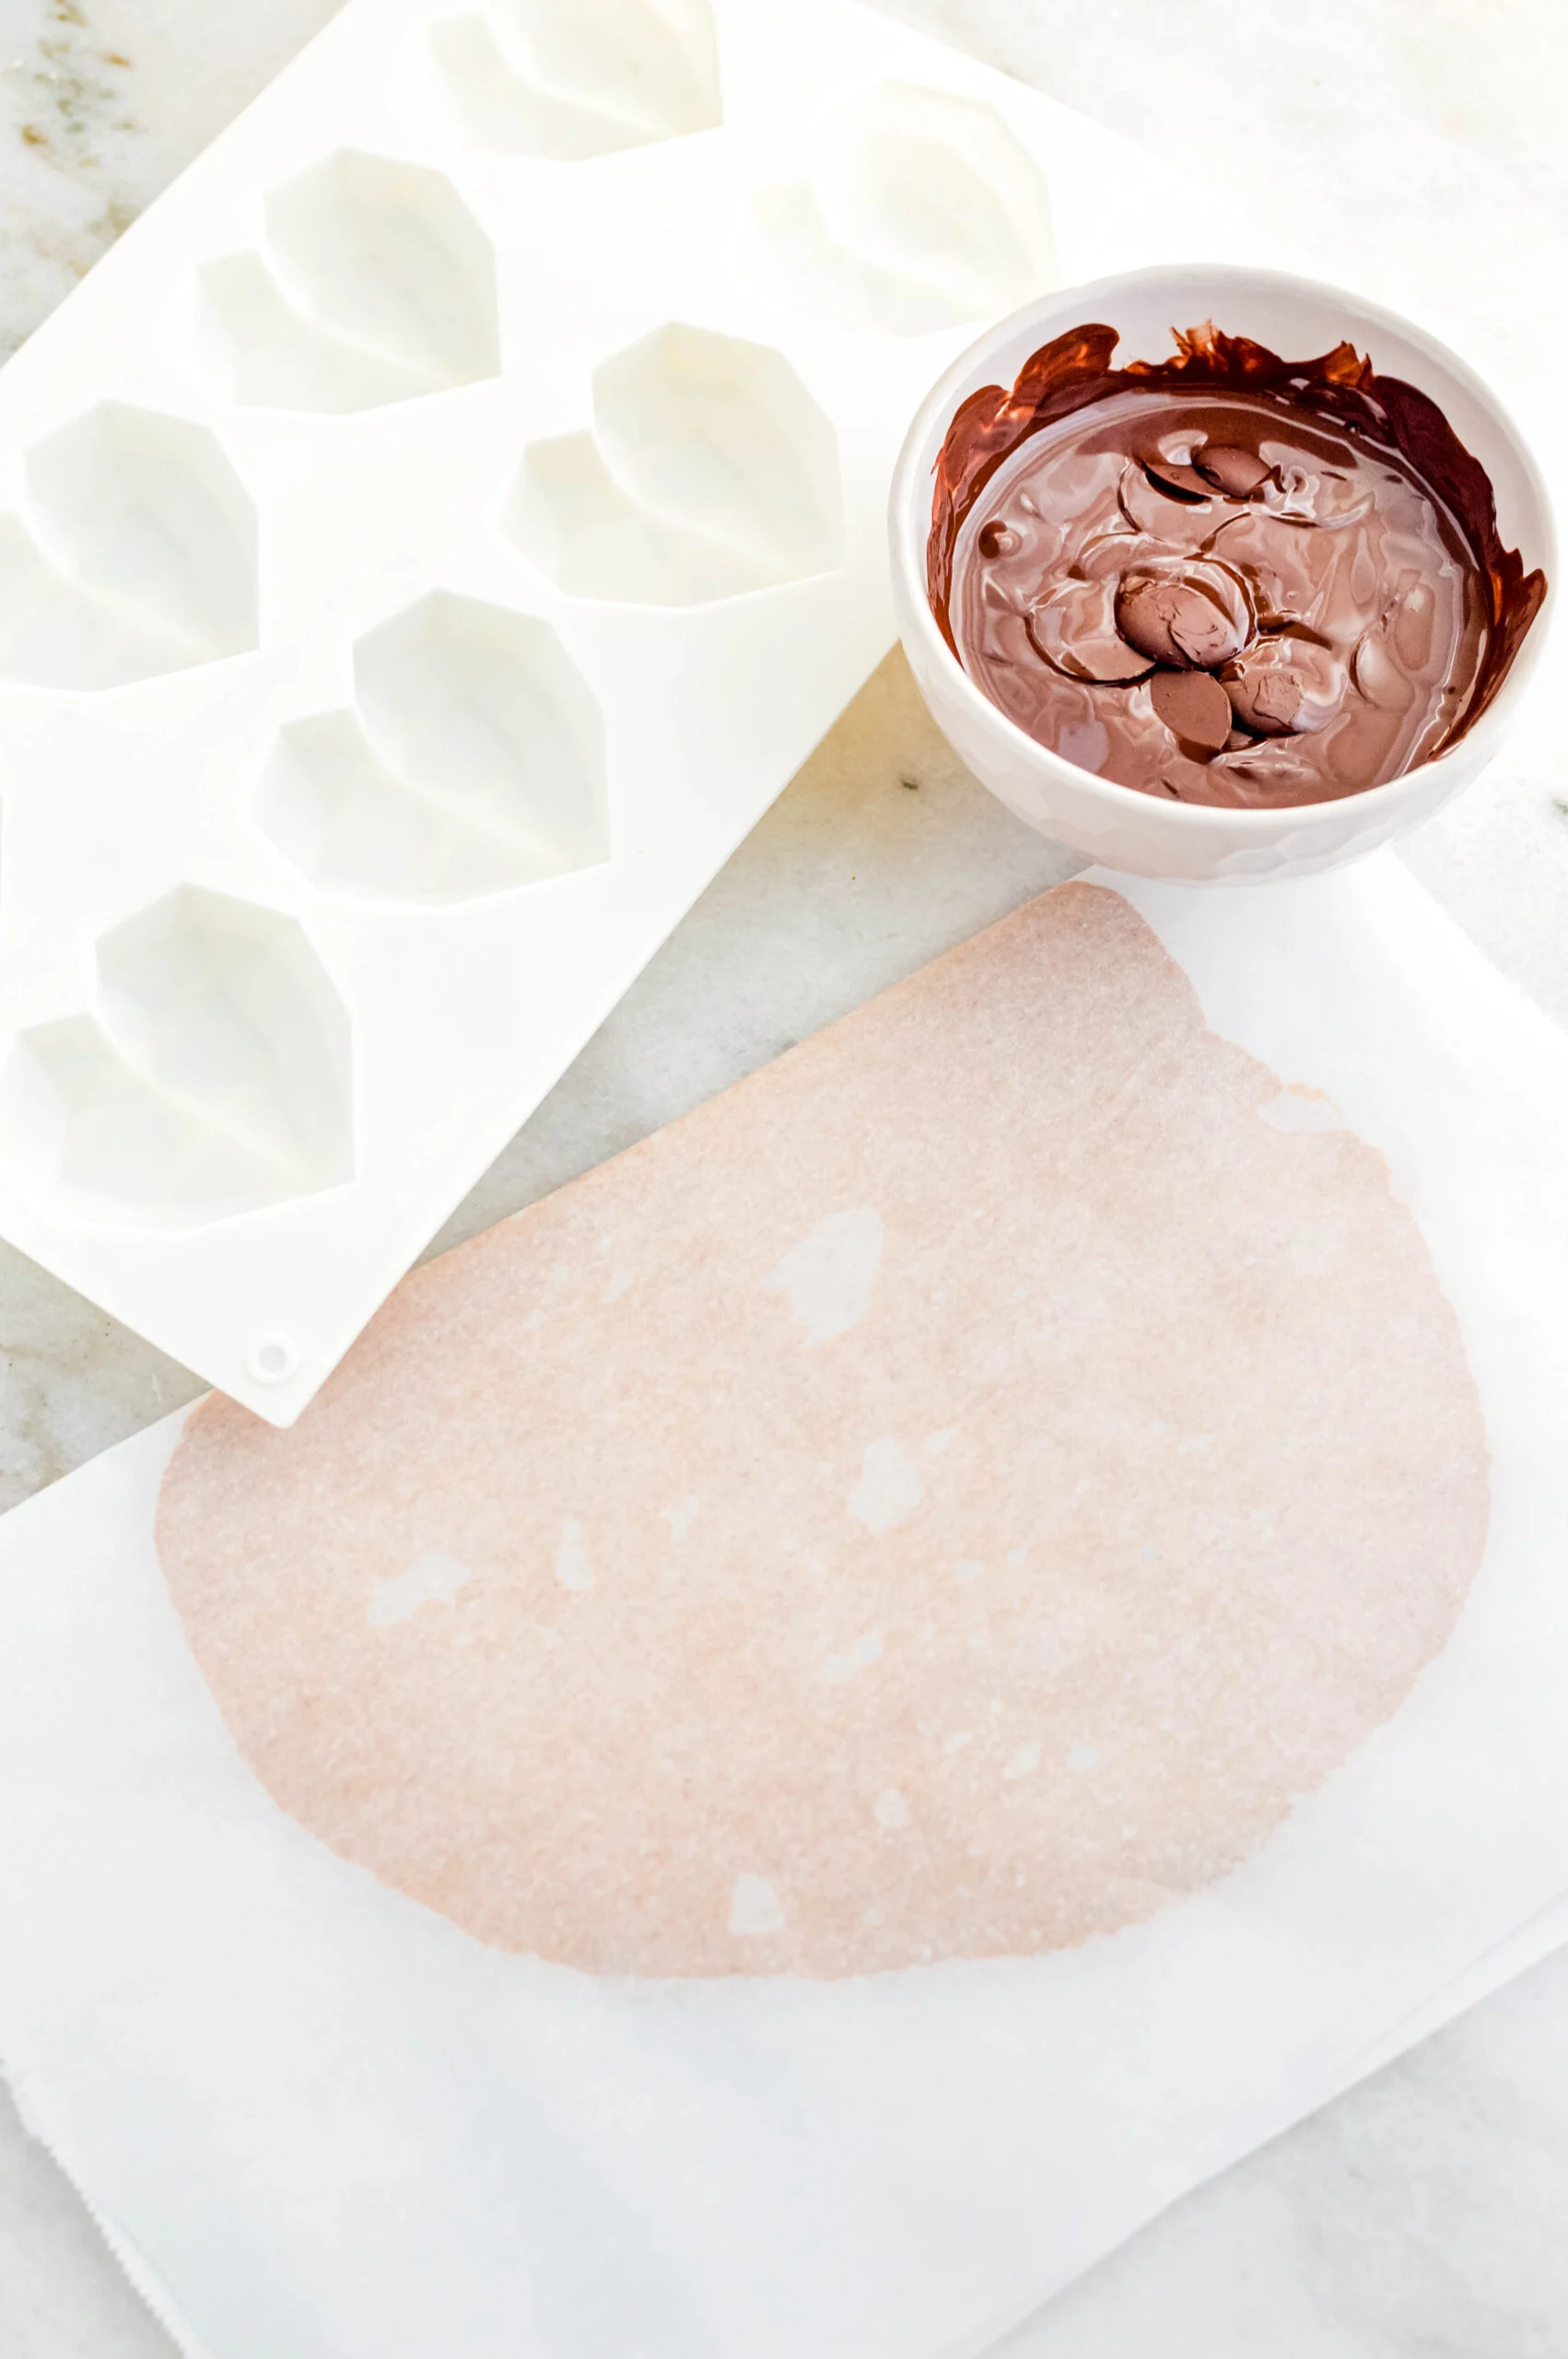
While that is chilling you can start making the chocolate.
Melt the chocolate in the microwave using 30 second increments, stirring in between. Melt until smooth.
Carefully smooth the chocolate it into each corner of the heart molds with a small rubber spatula. You want to have a solid and even coating on the hearts, for this carefully turn the mold around and look at it from each direction to make sure no spots are missed.
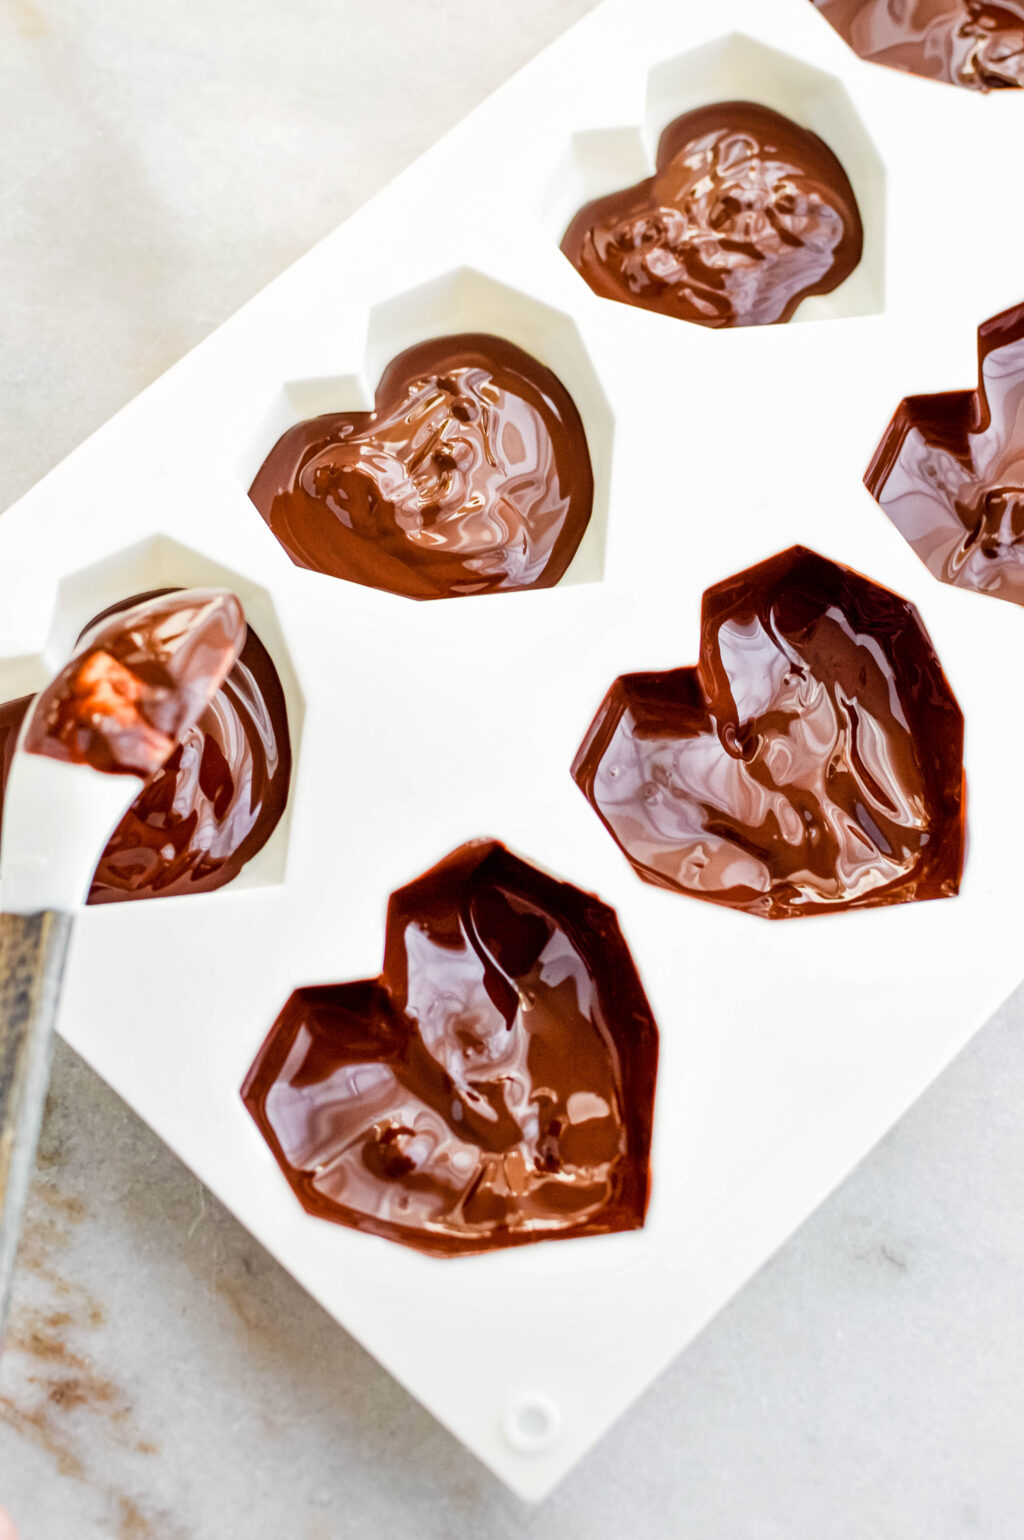
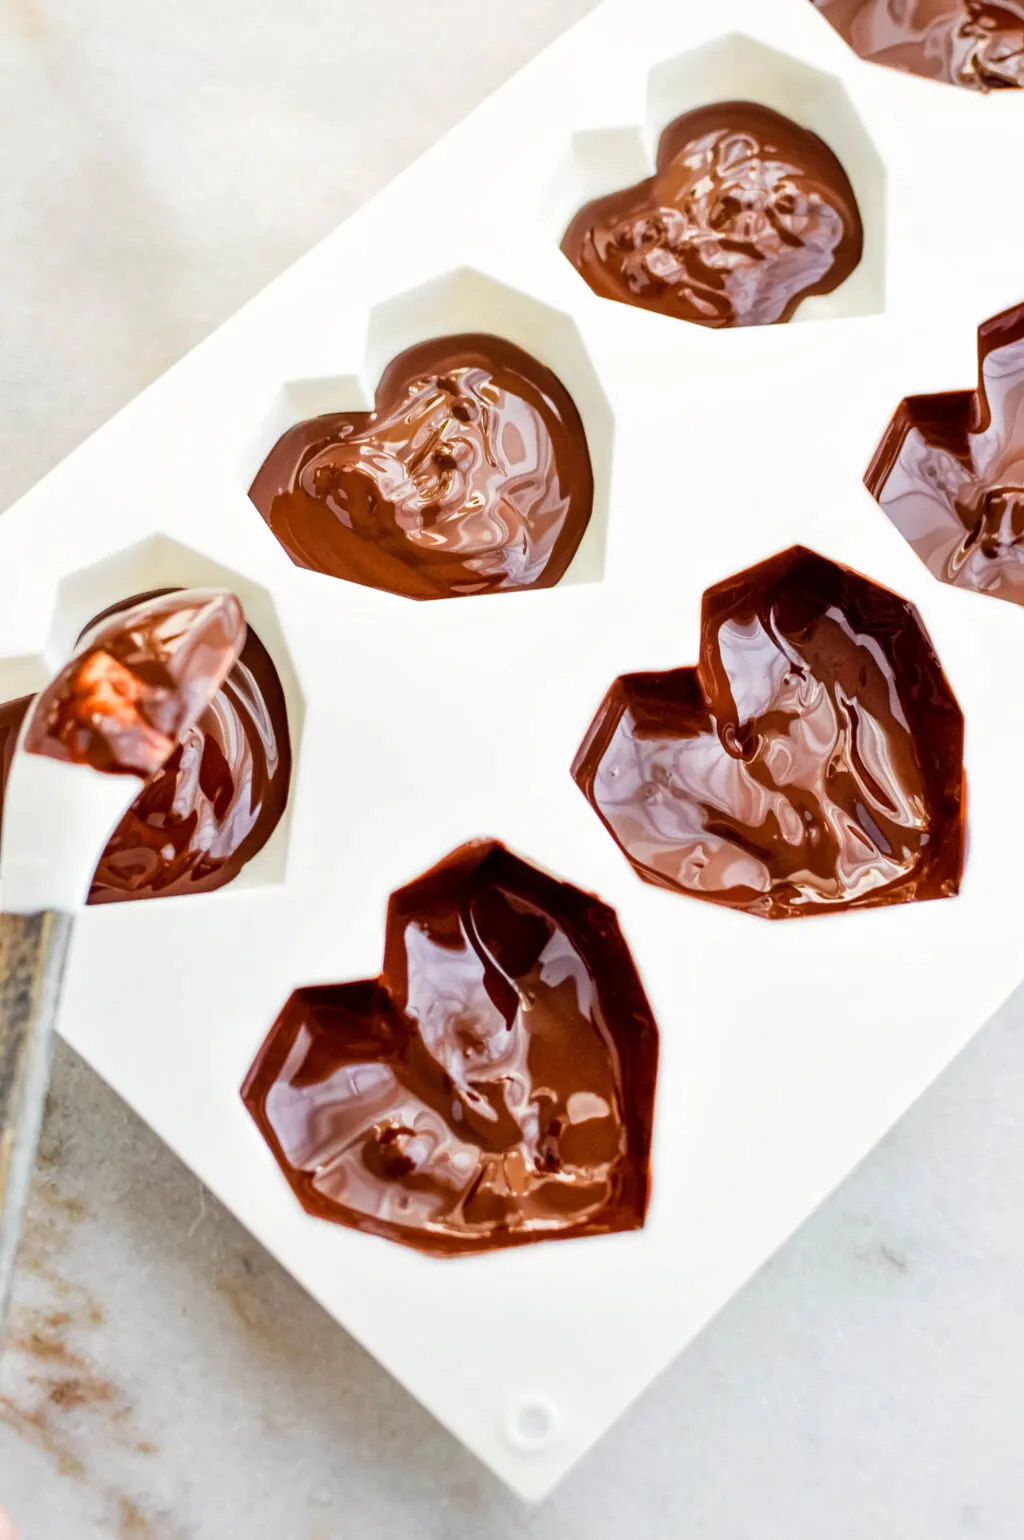
I like to have the silicone mold on a tray or cutting board while doing this as it helps with stabilizing the tray while the chocolate is setting up. You will have plenty of chocolate left over in your melting dish after this step, you will use this in the next steps. Leave the tray on the counter while the peanut butter filling chills.
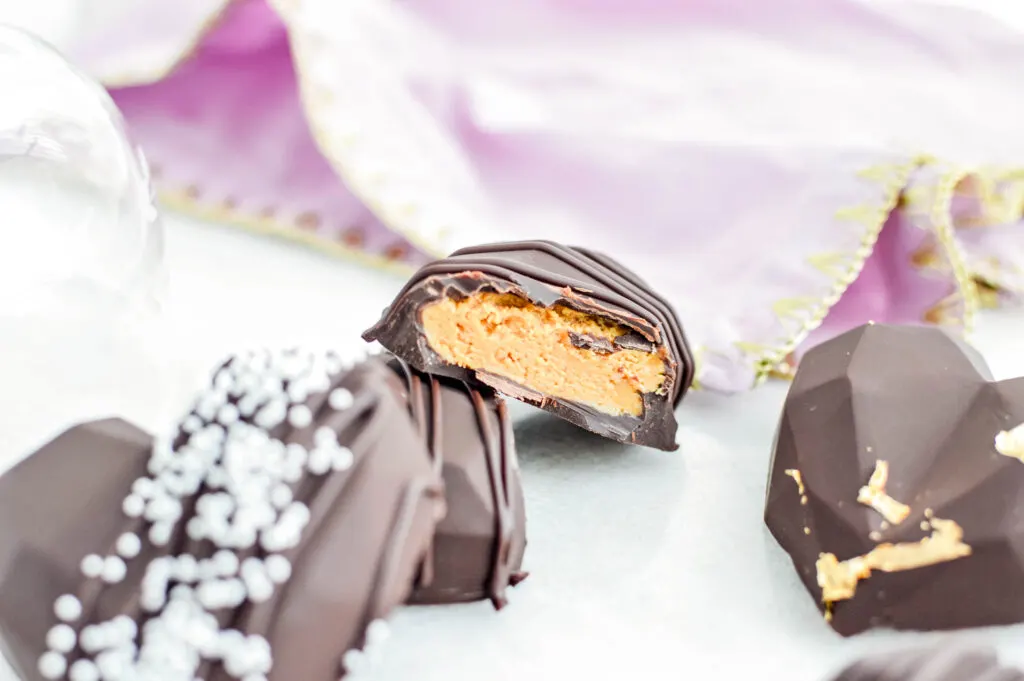
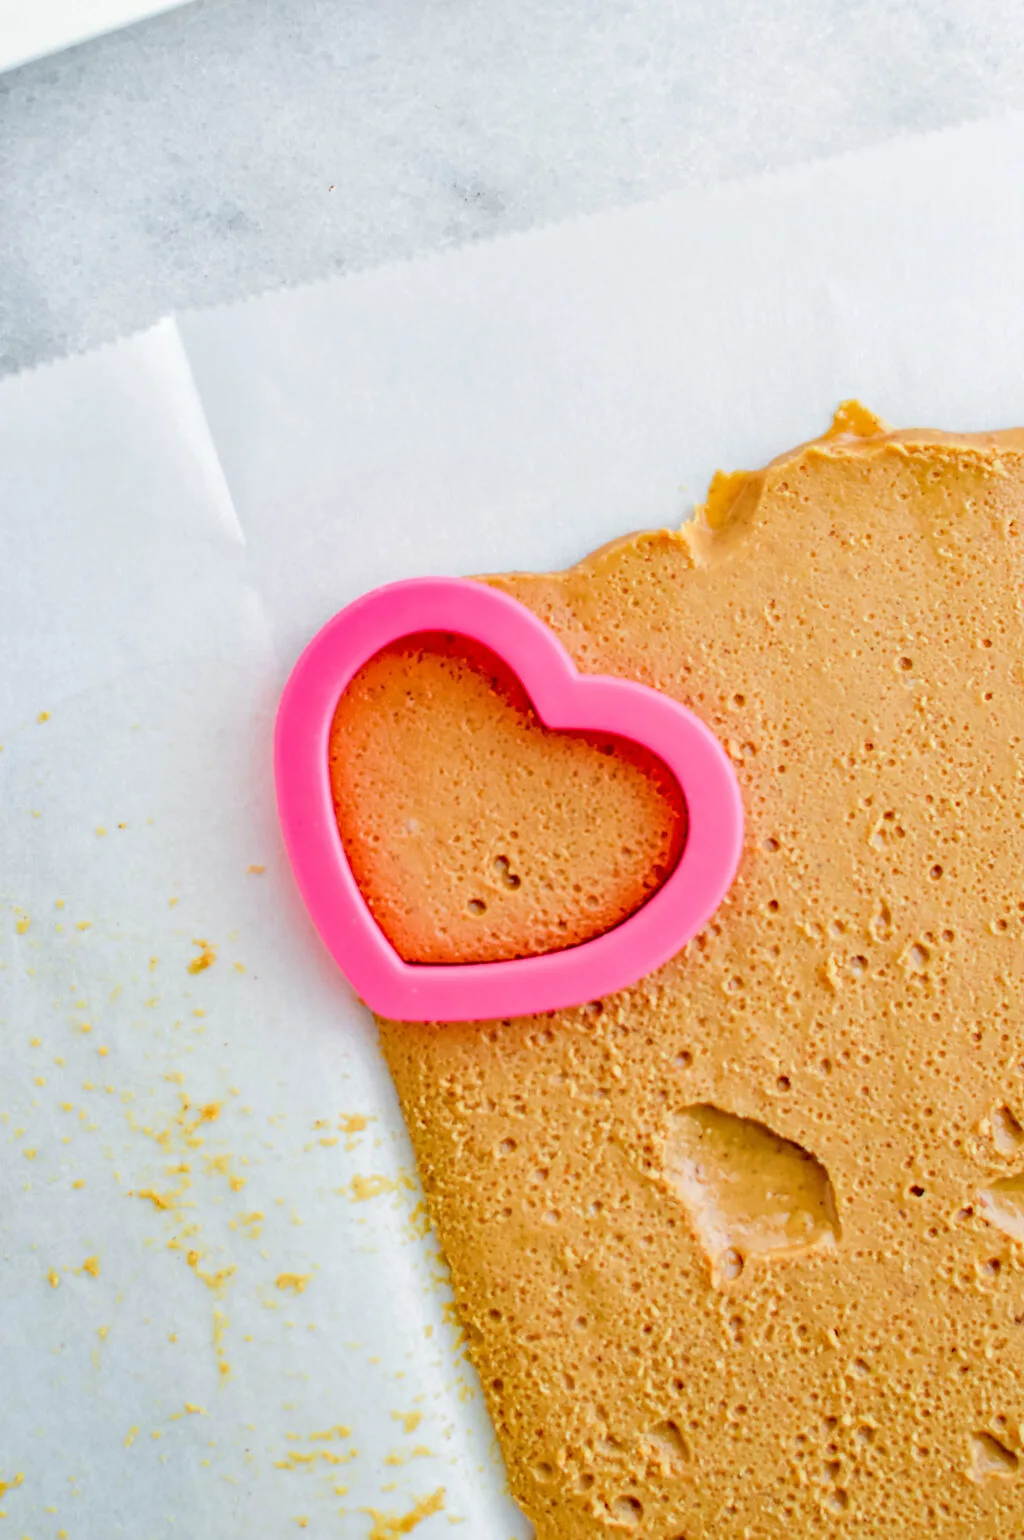
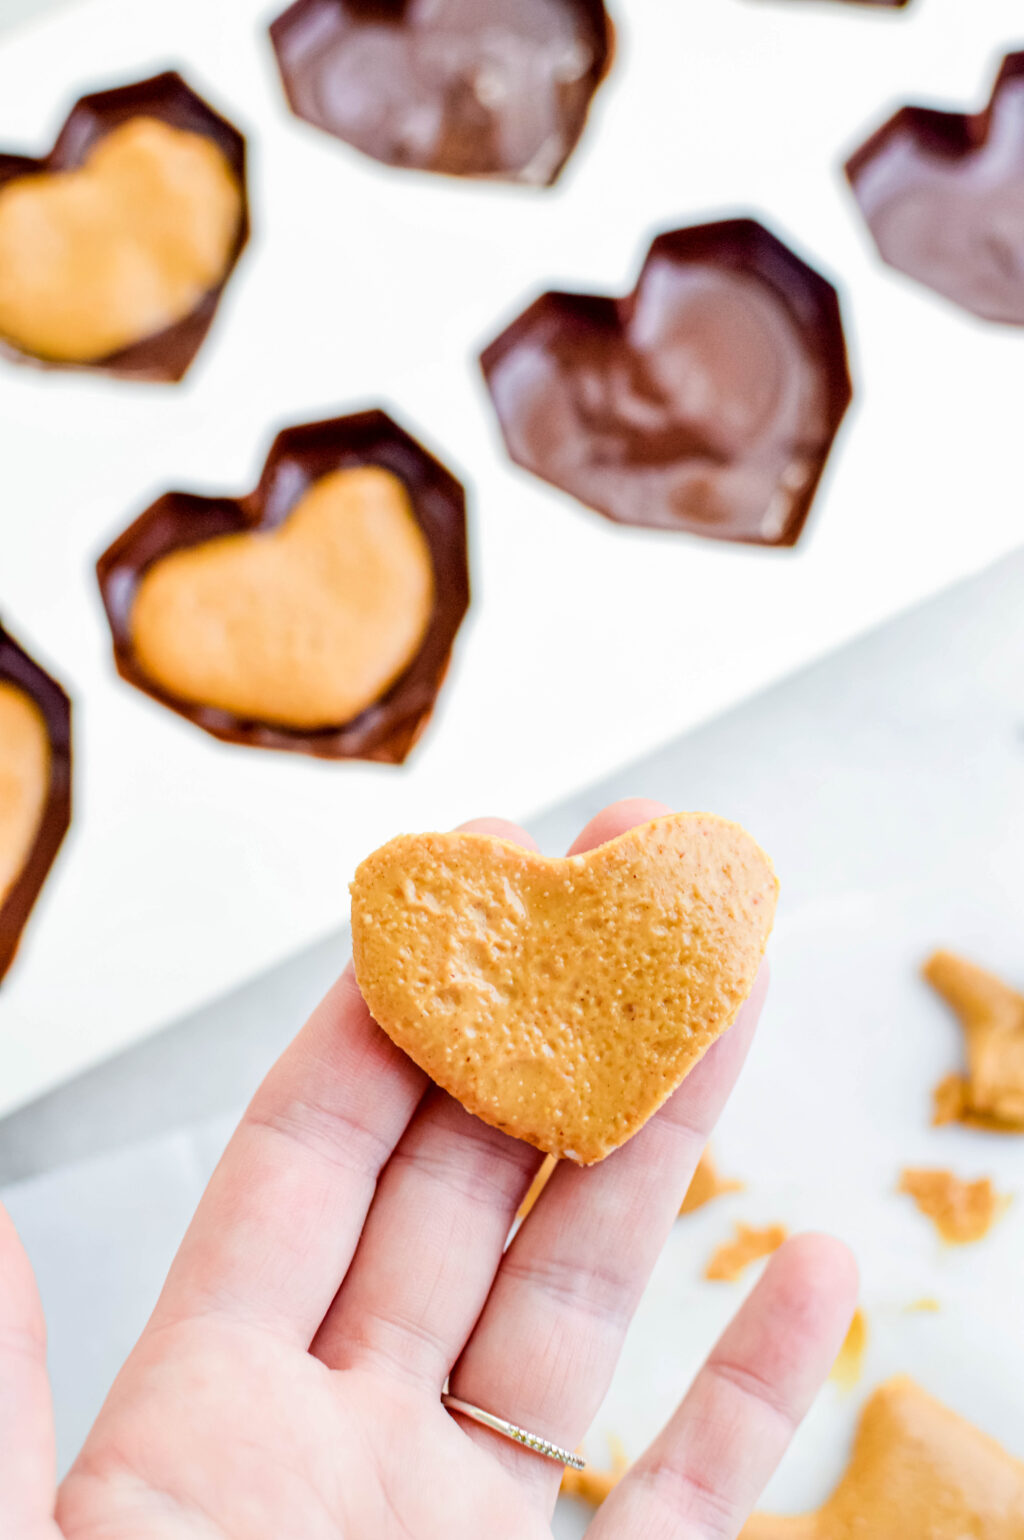
Remove the filling mixture from the freezer and free hand cut or use a cookie cutter to cut out hearts that will easily fit into the center of the chocolate hearts.

The chocolate should still be very liquidy and the peanut butter hearts should easily push right into the chocolate. Try to press them in just enough that they are in all the way-but not so far that they would likely push through to the chocolate that would be the top part of the hearts once removed from the molds.

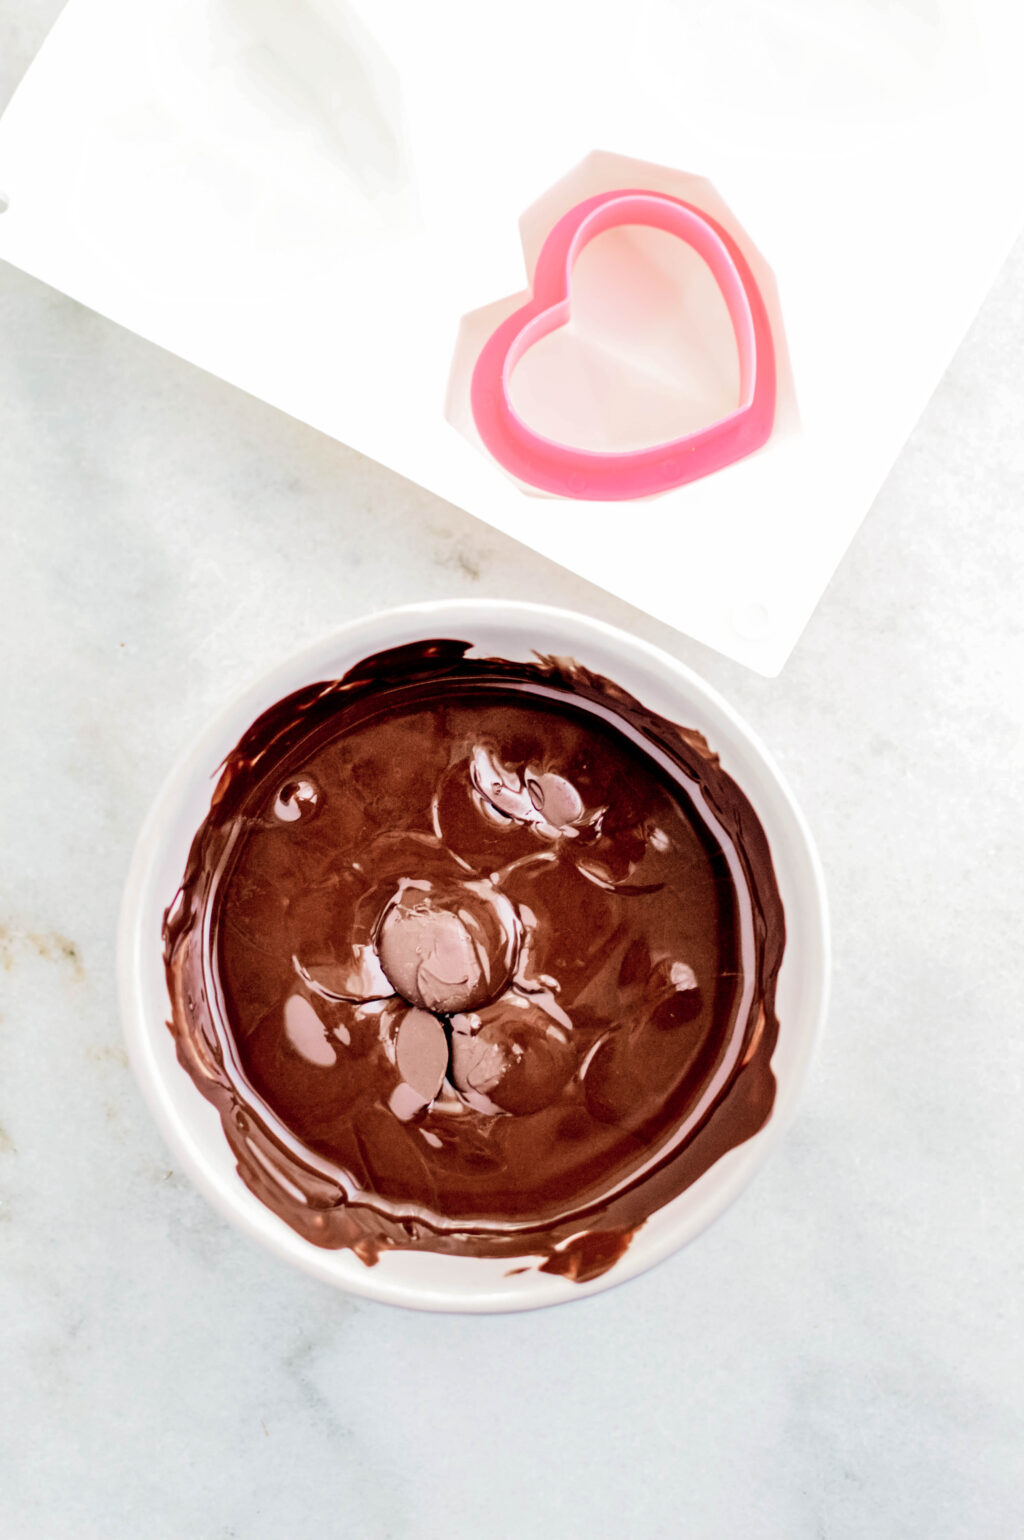
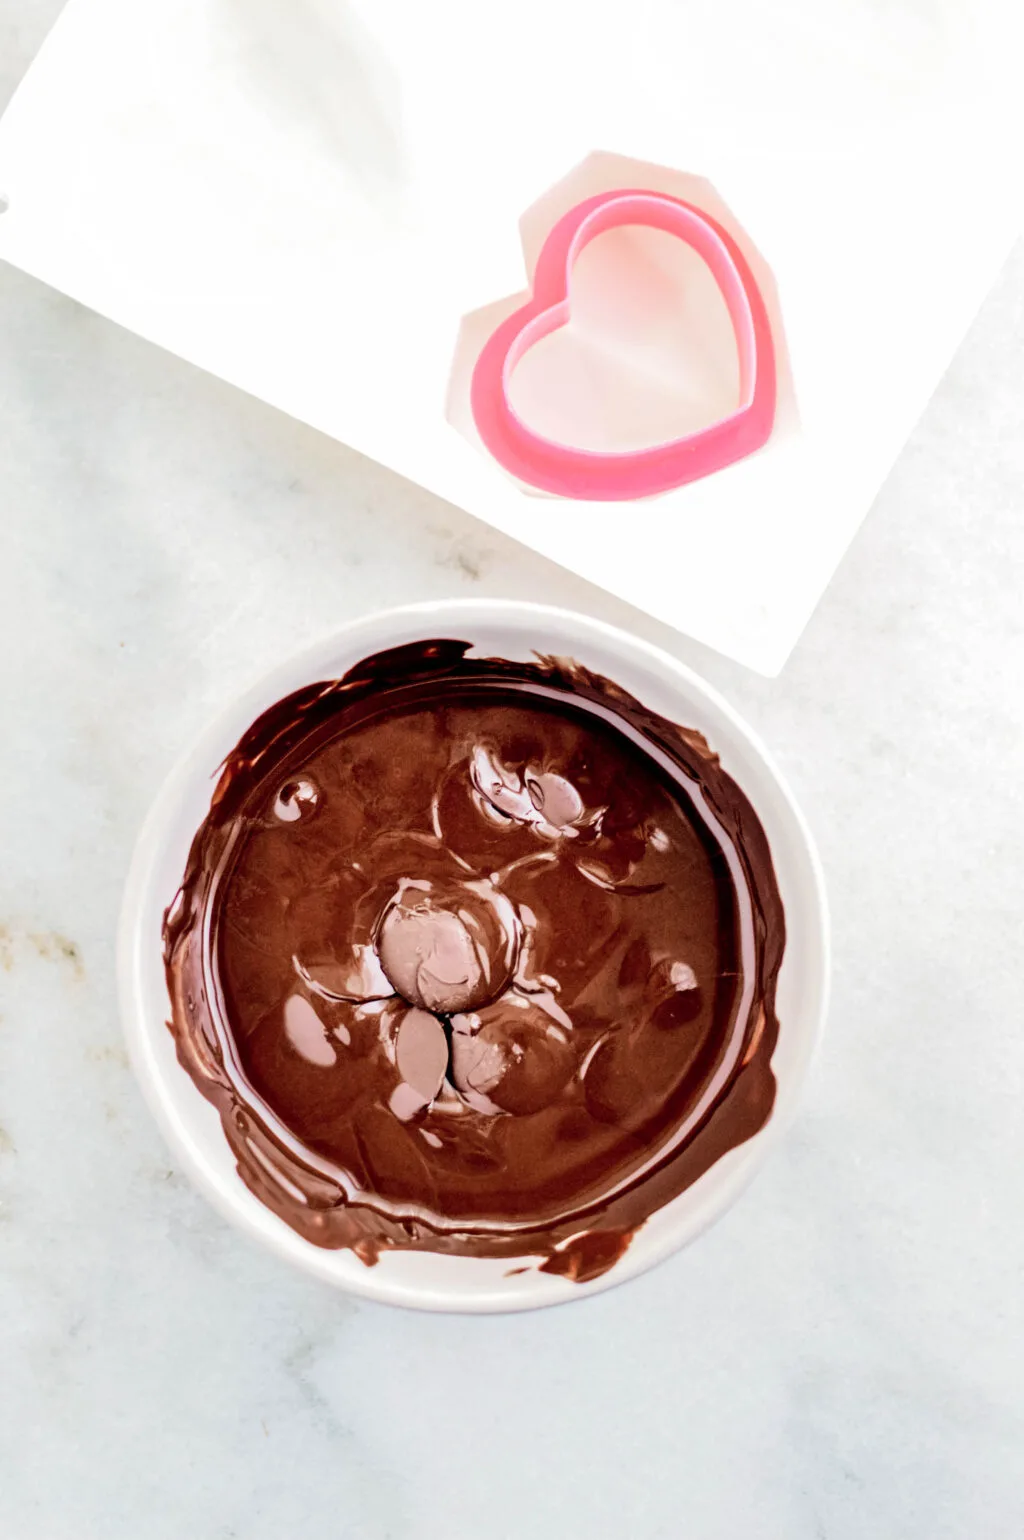
Pour the rest of the chocolate over the hearts and carefully smooth out so the chocolate evenly fills all of the space around and over the peanut butter filling. Try not to add so much that the bottoms will be mounted up with the chocolate, aim for a flat bottom.
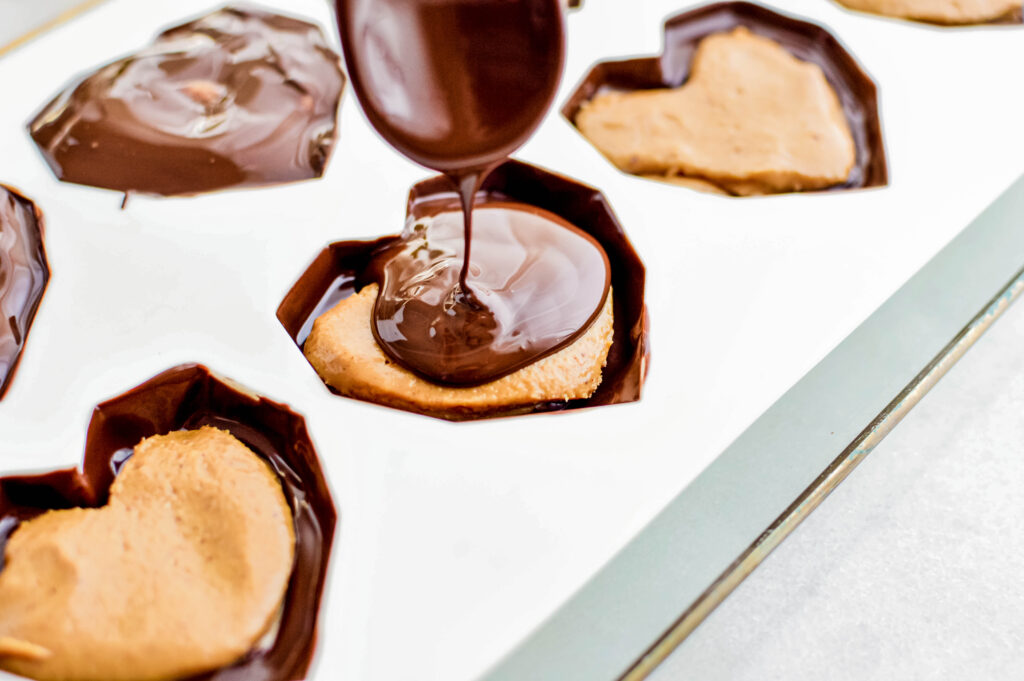

Set into the fridge or freezer, I prefer the freezer with this exact chocolate, to chill for about 20 minutes.
Remove the completely solid hearts from the mold, I like to use food safe gloves for this to avoid fingerprints.
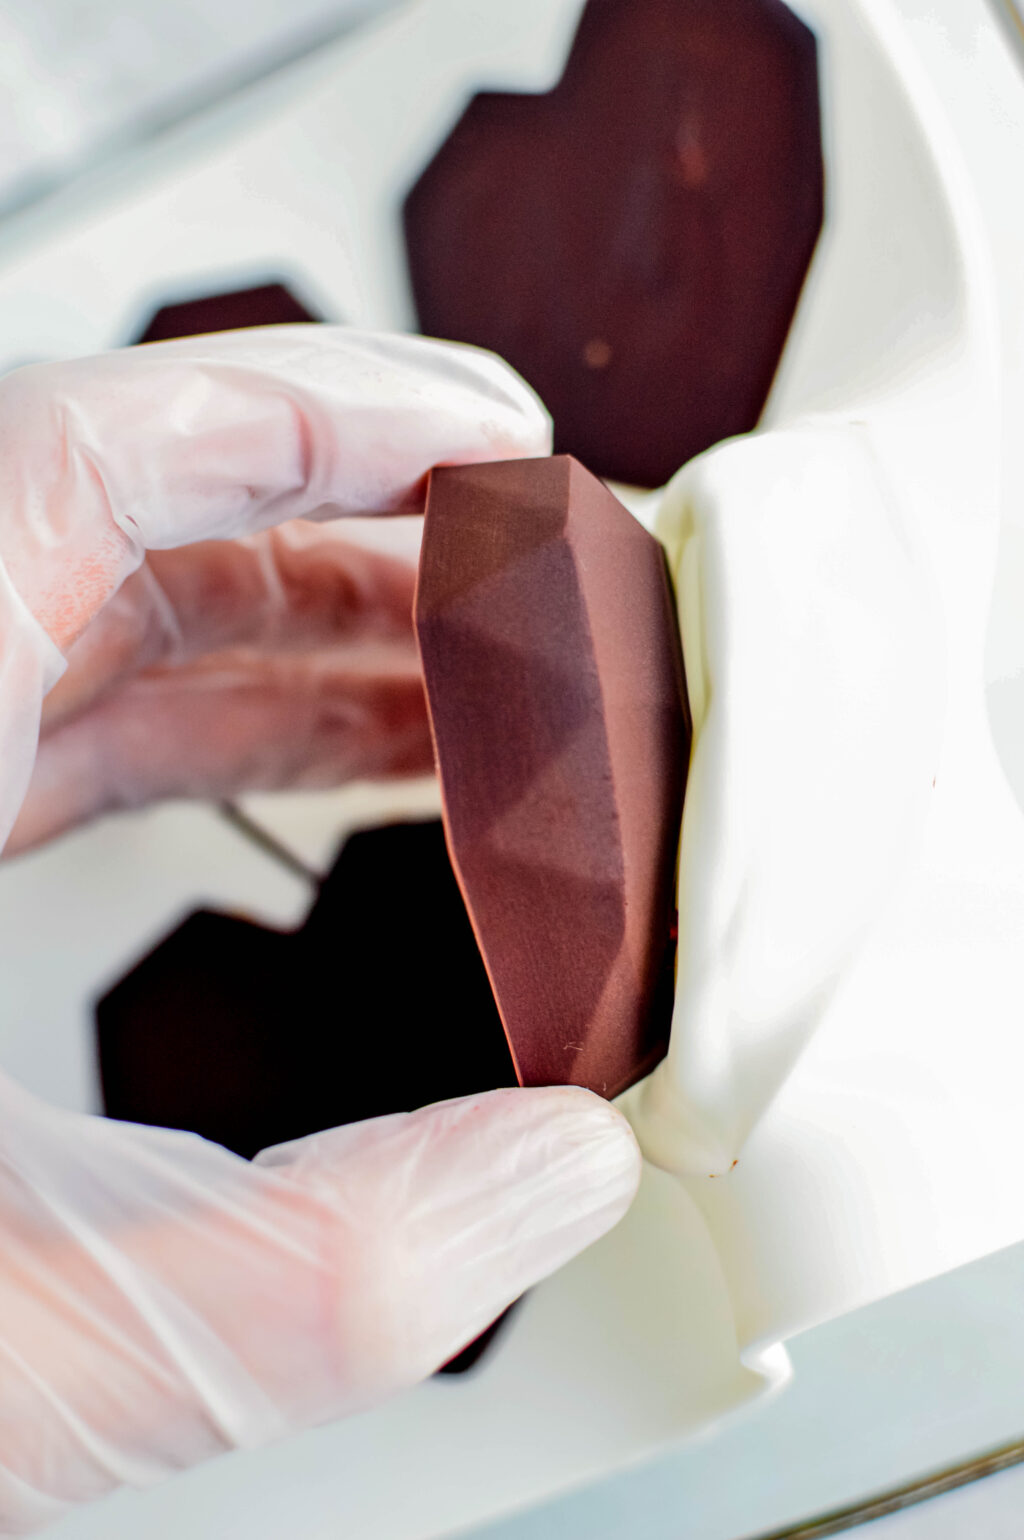
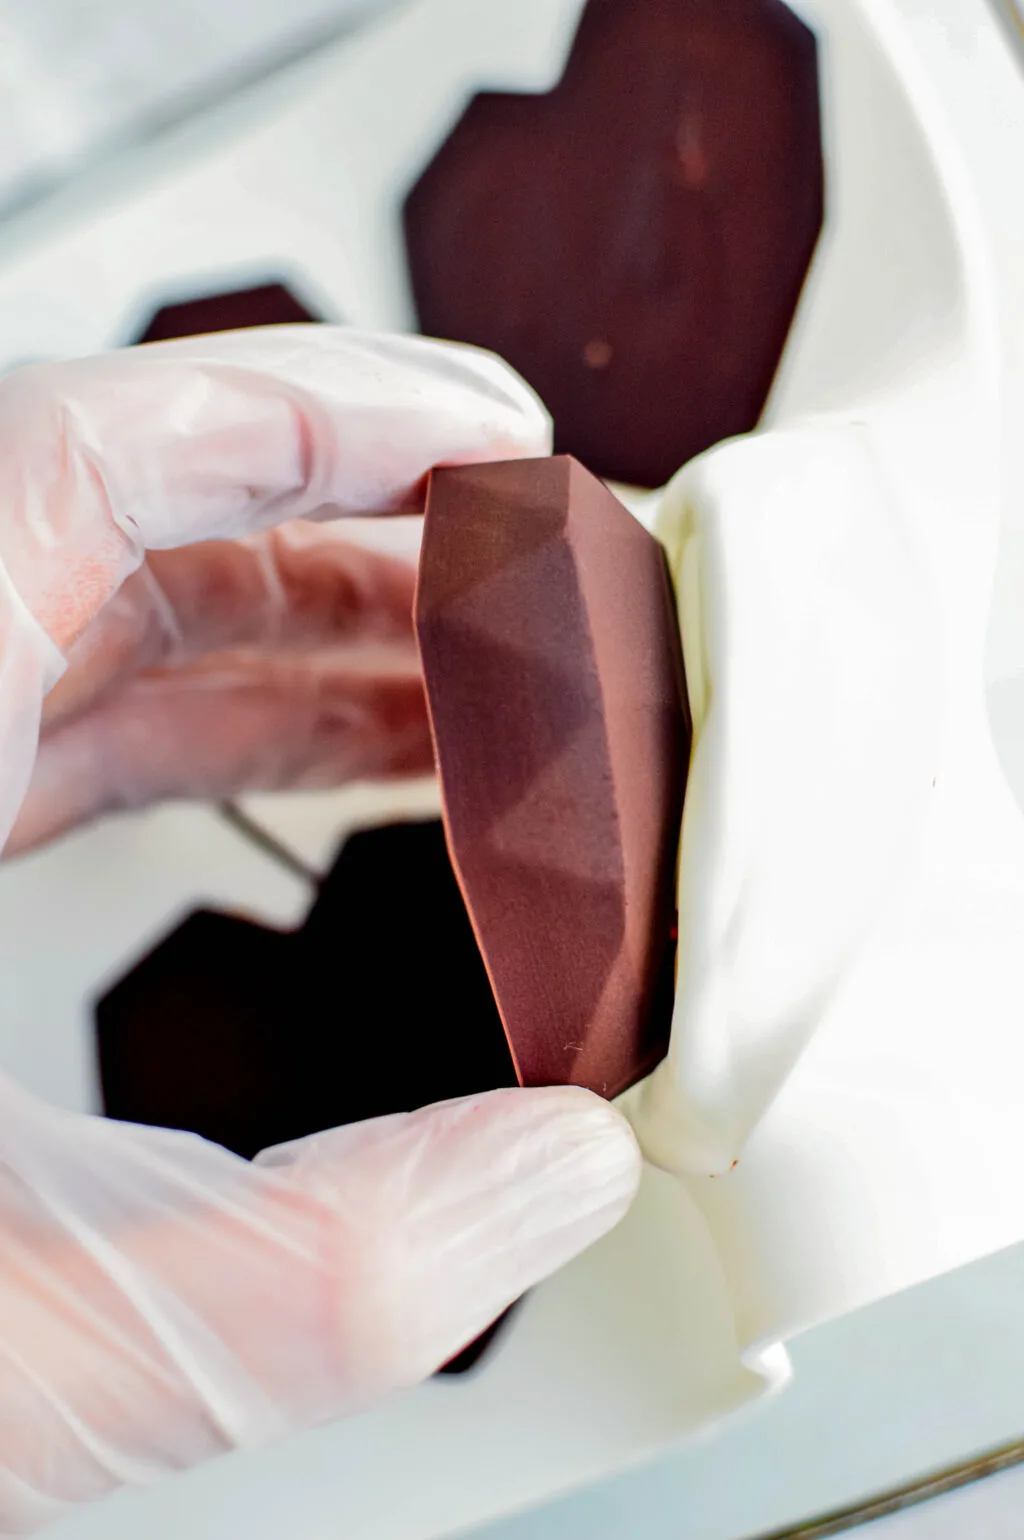
Set the hearts right onto the same cold/frozen tray that the silicone mold was on in the freezer.
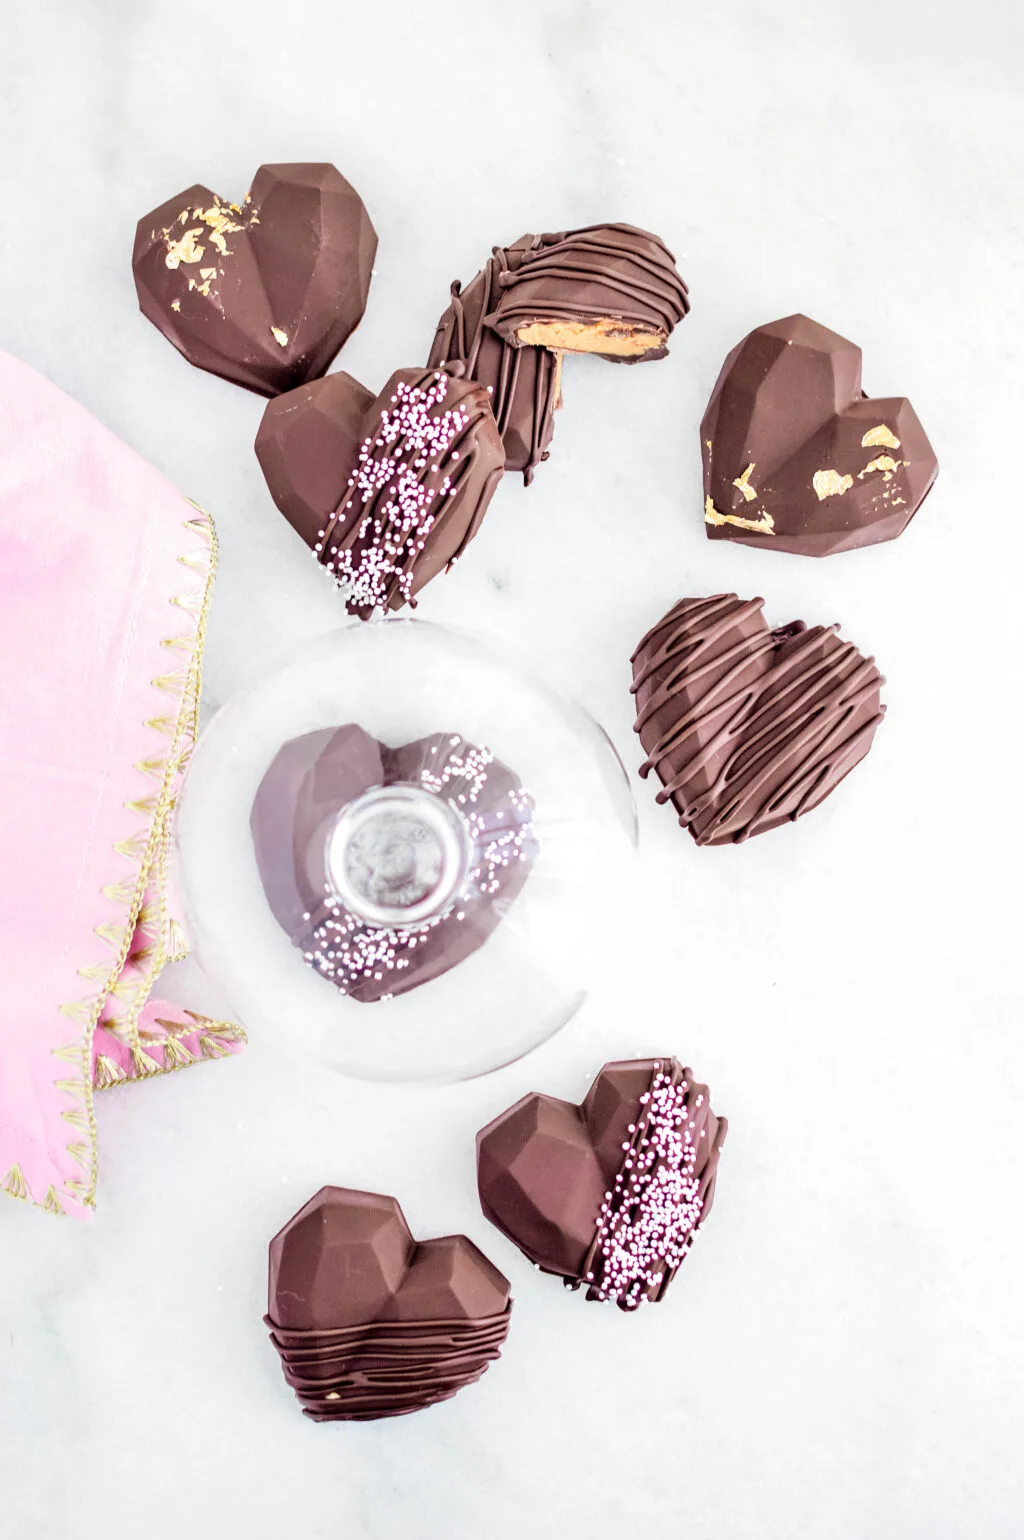
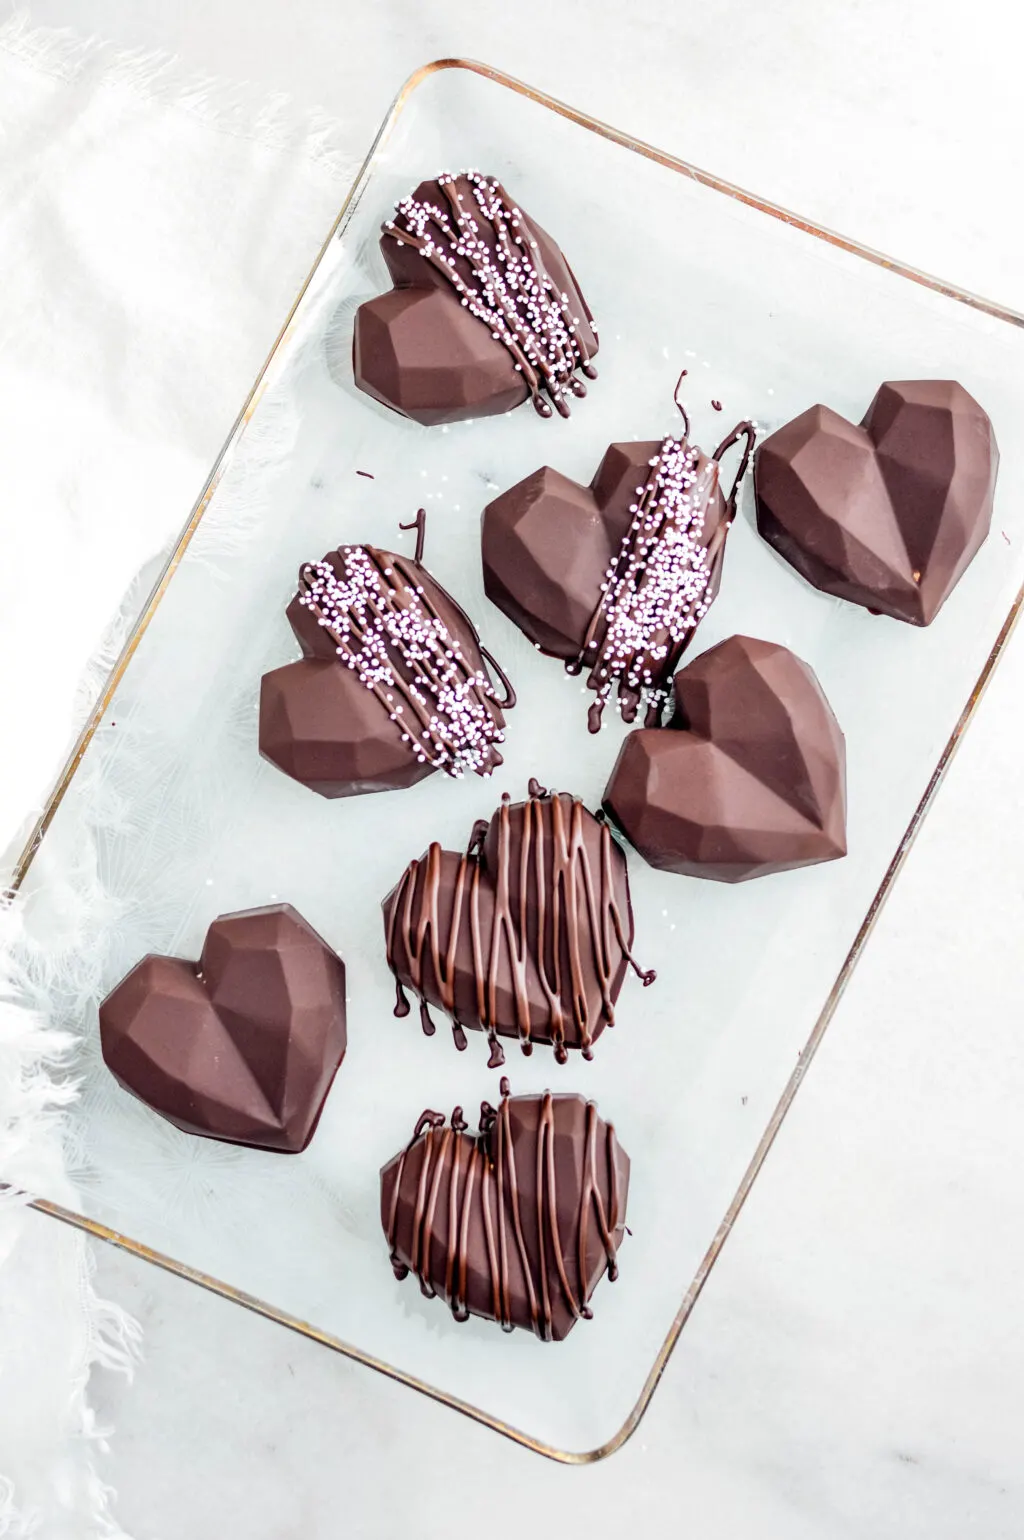
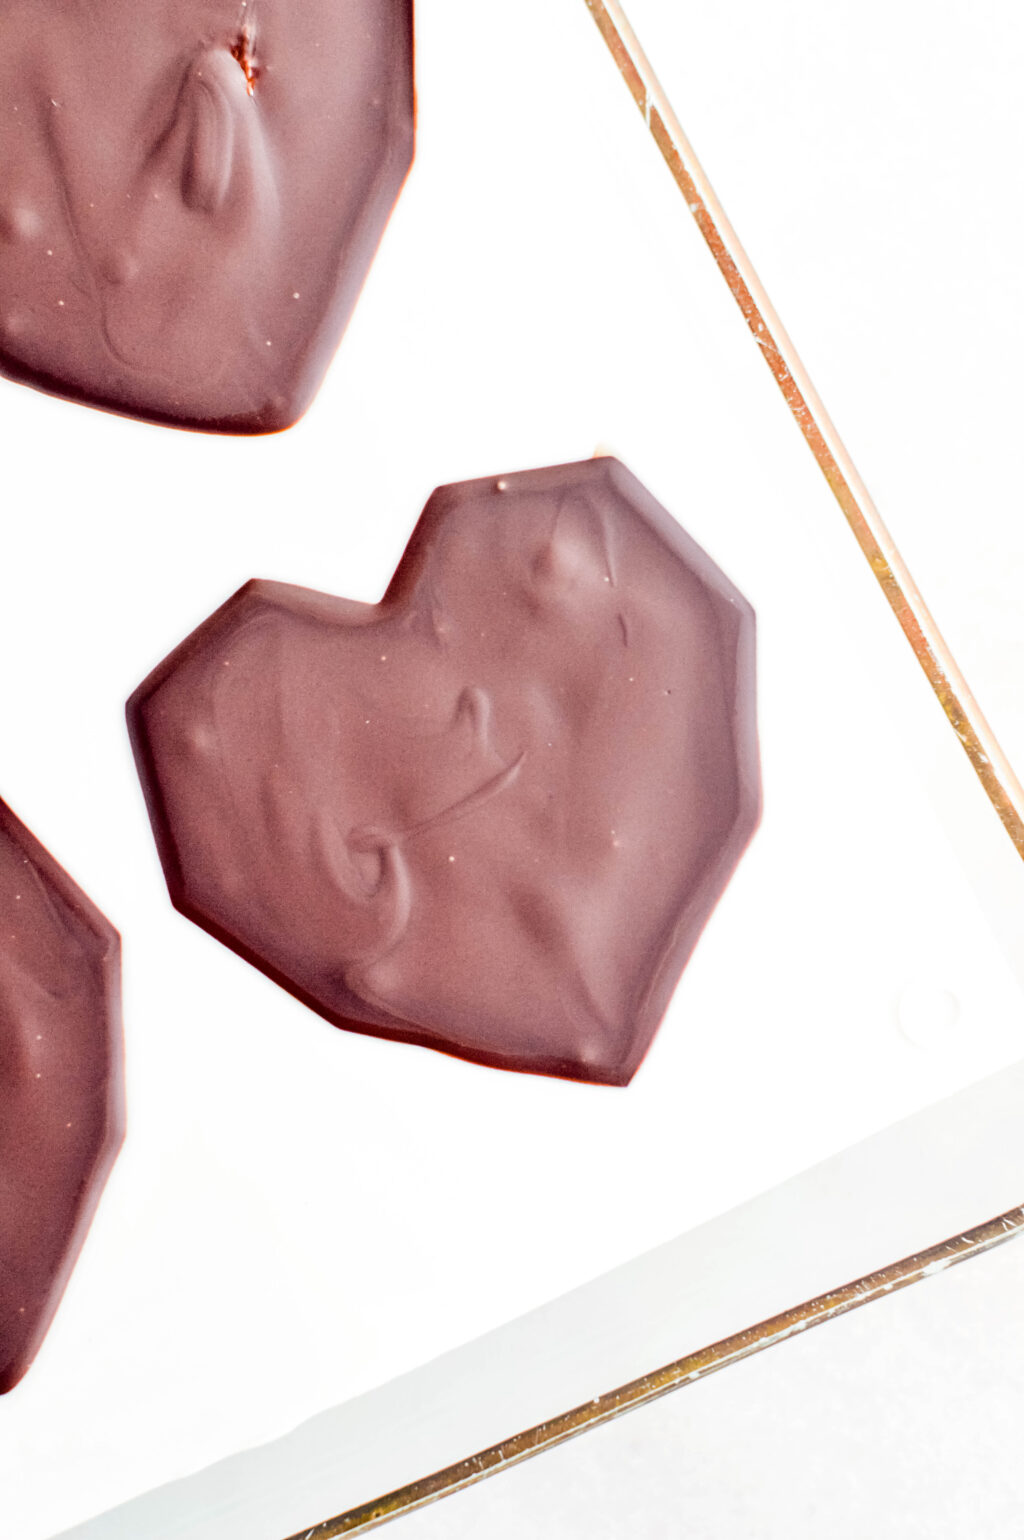
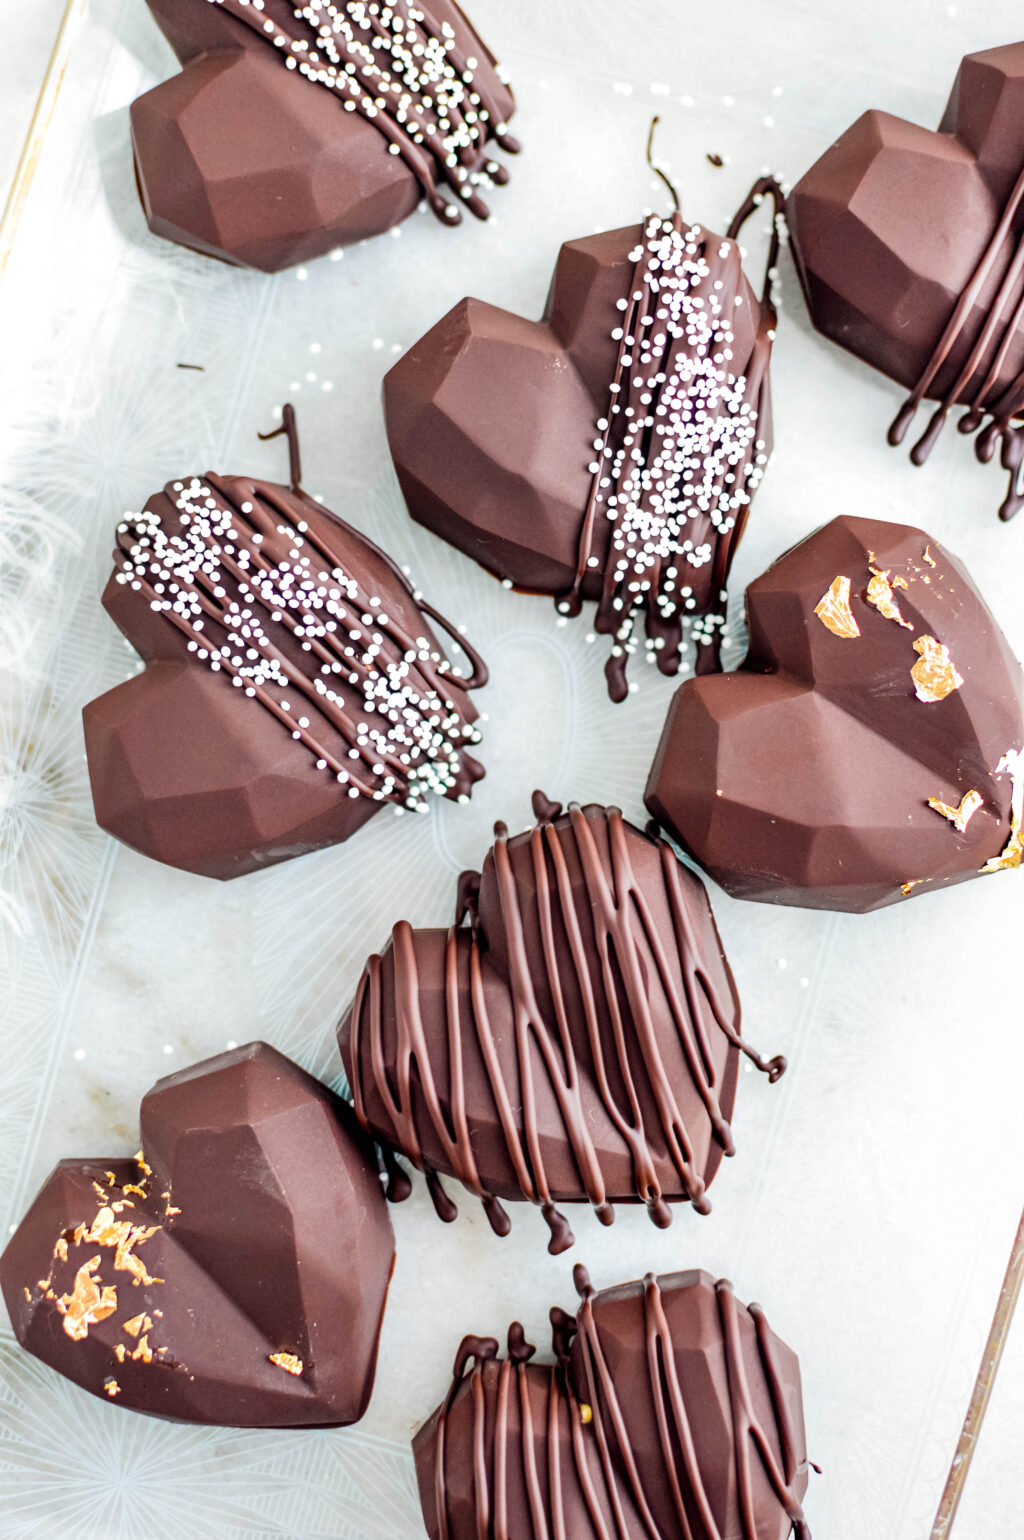
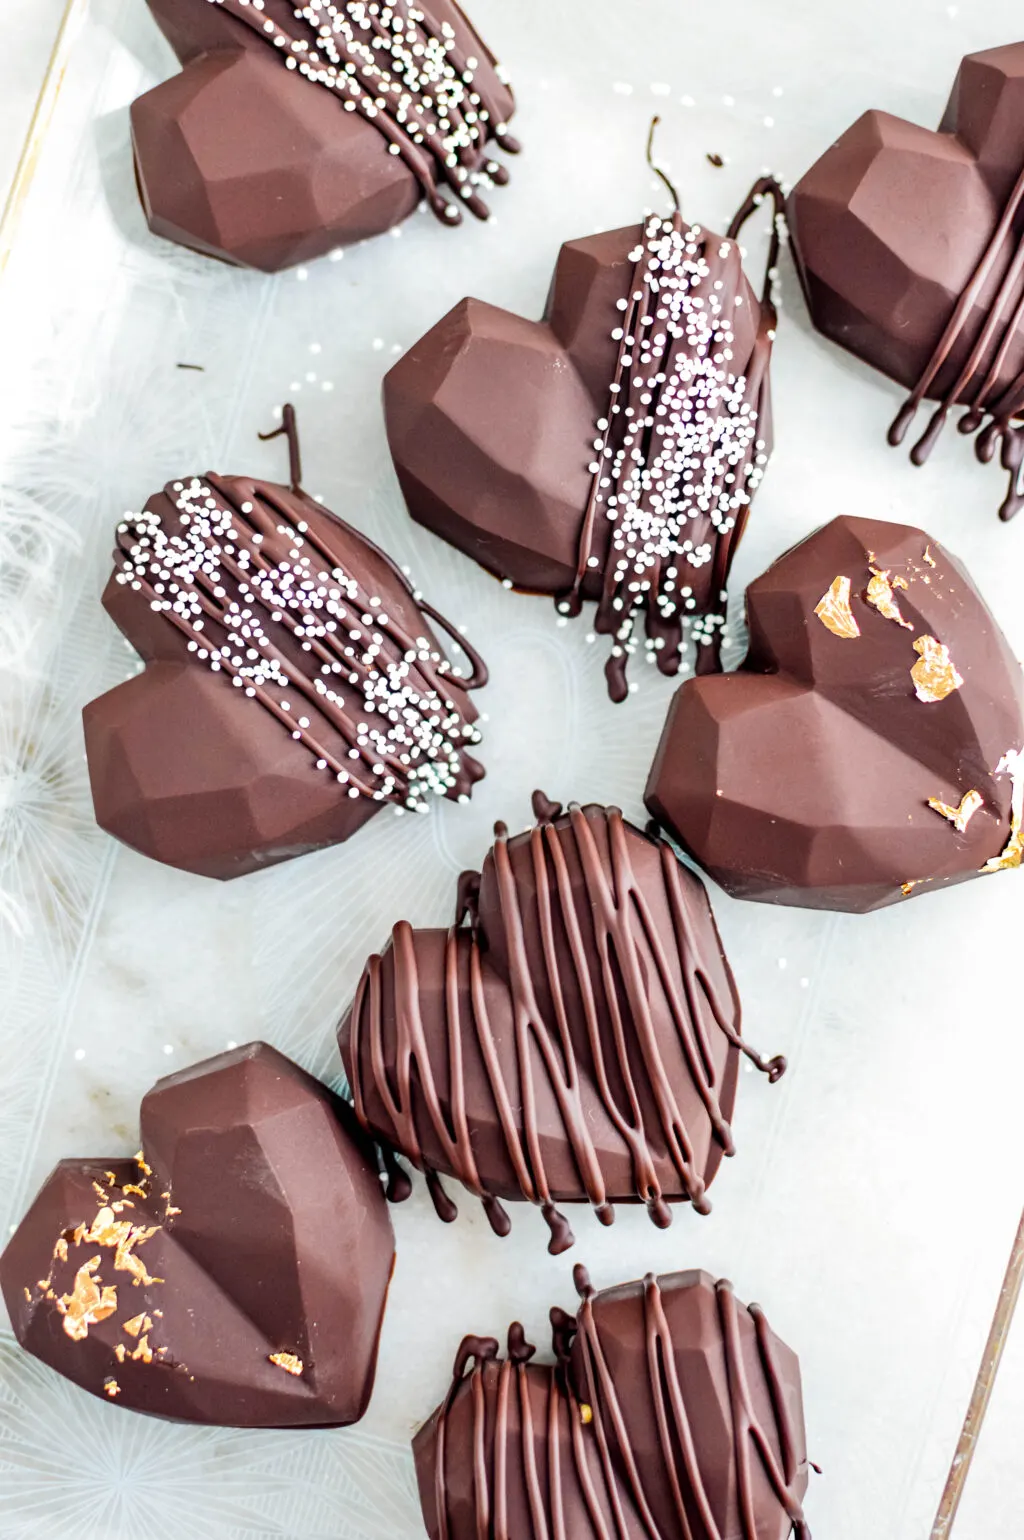
Use the remaining melted chocolate to drizzle over the top of some or all of the hearts.

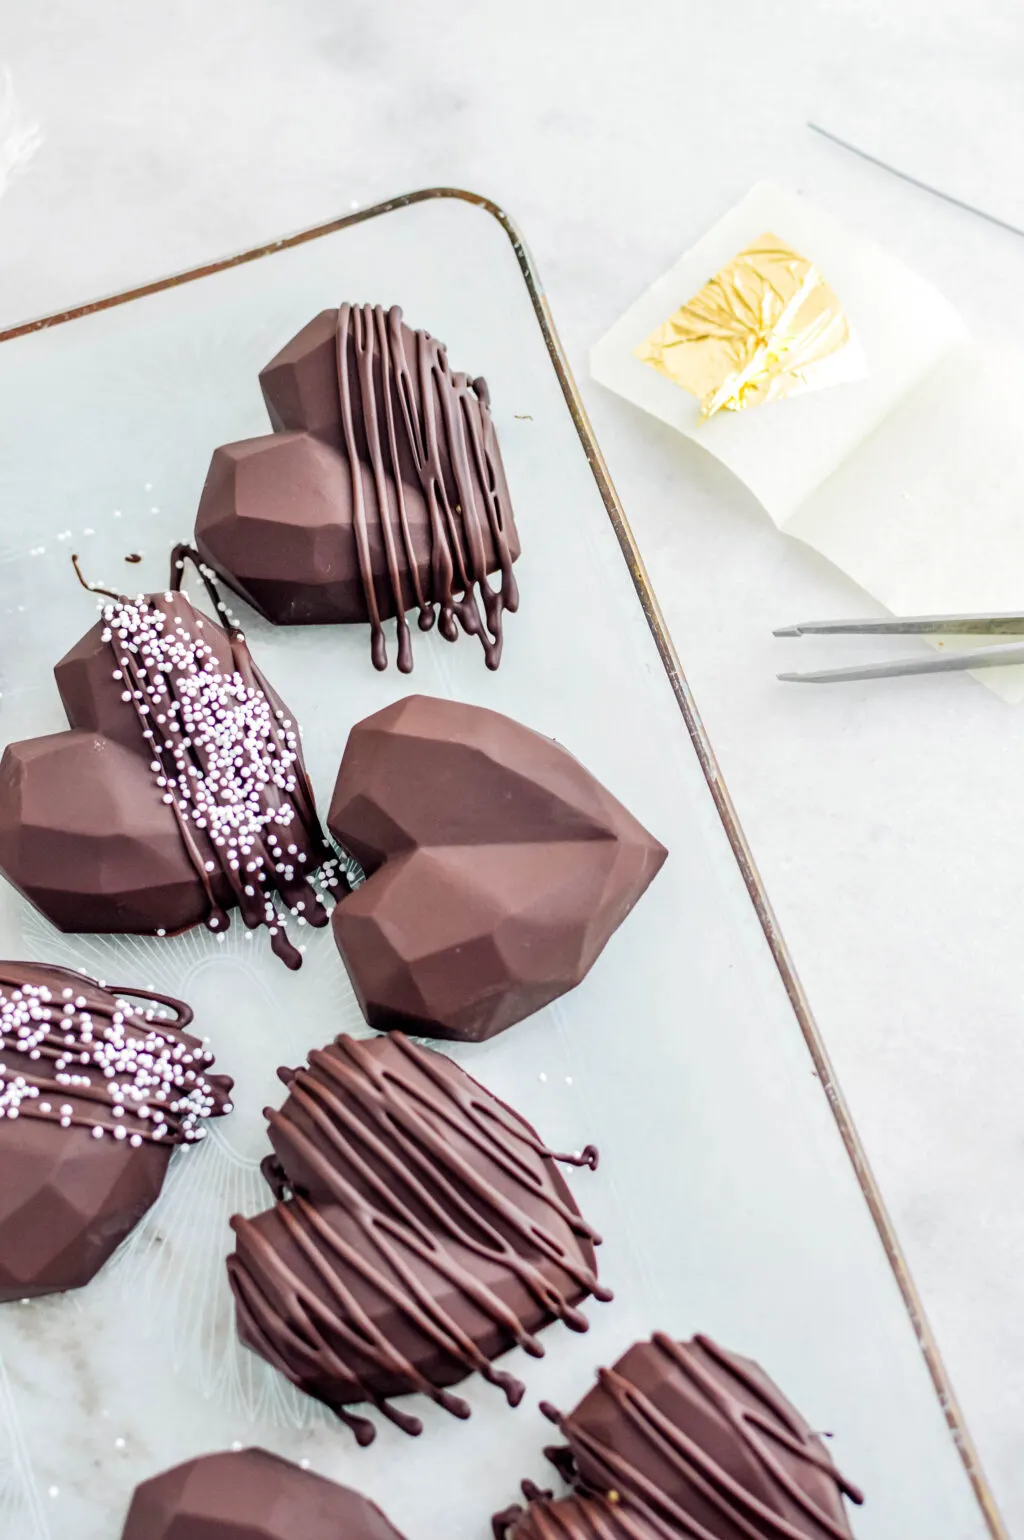
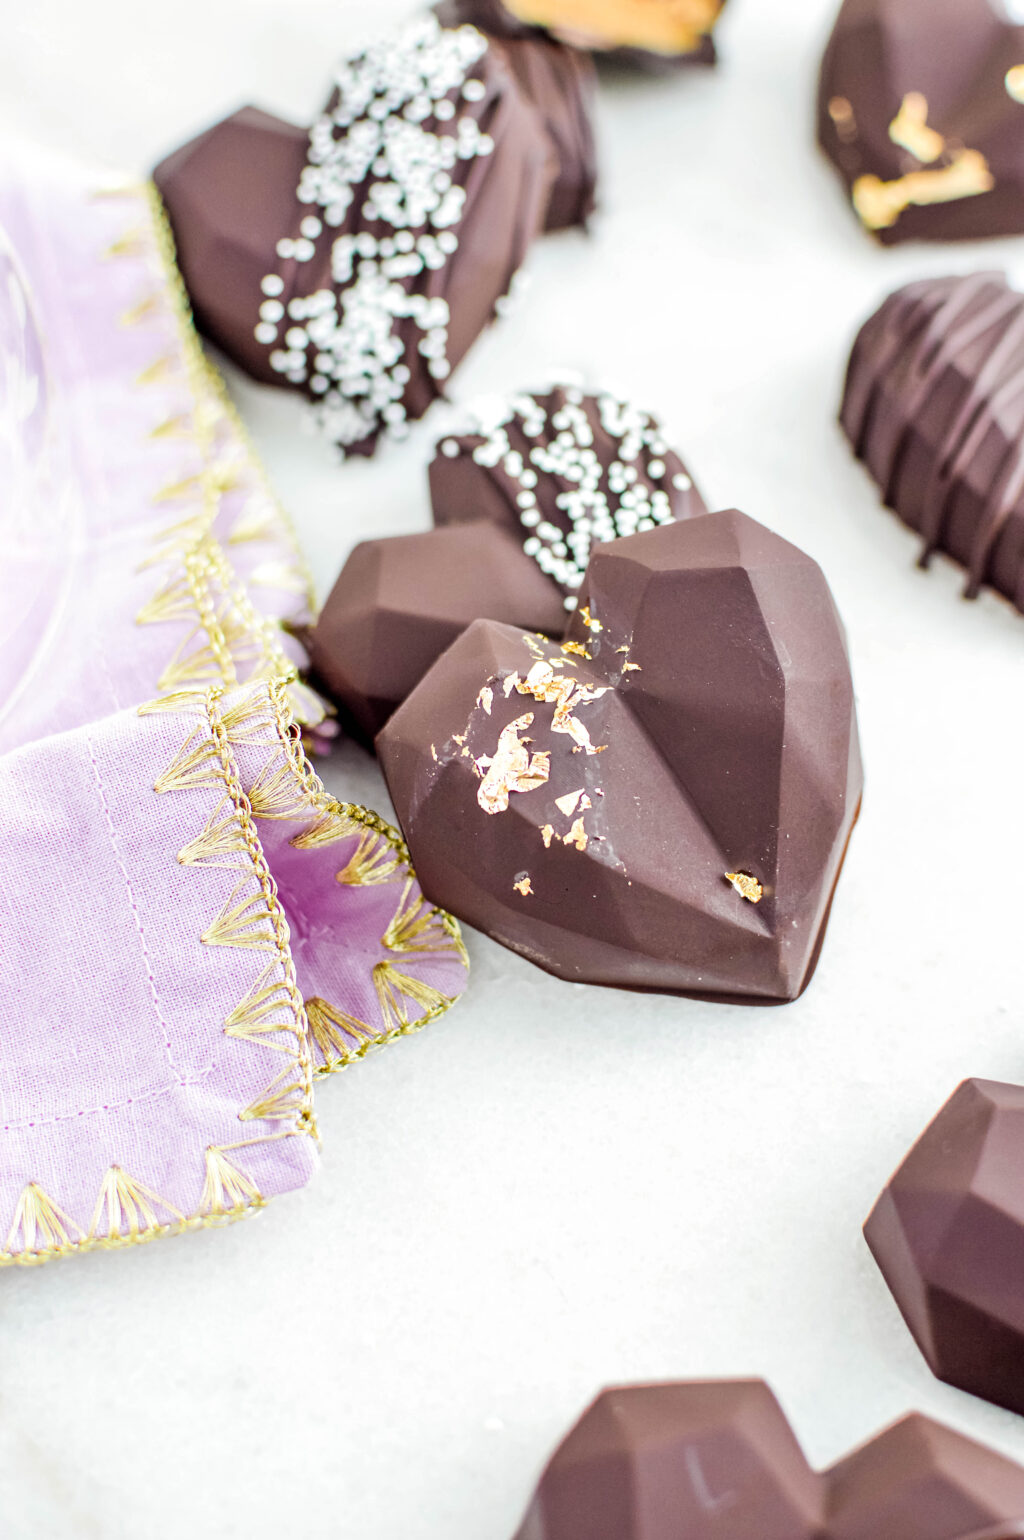
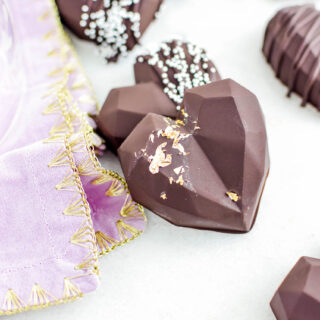
I sprinkled some nonpareils on a few of them.
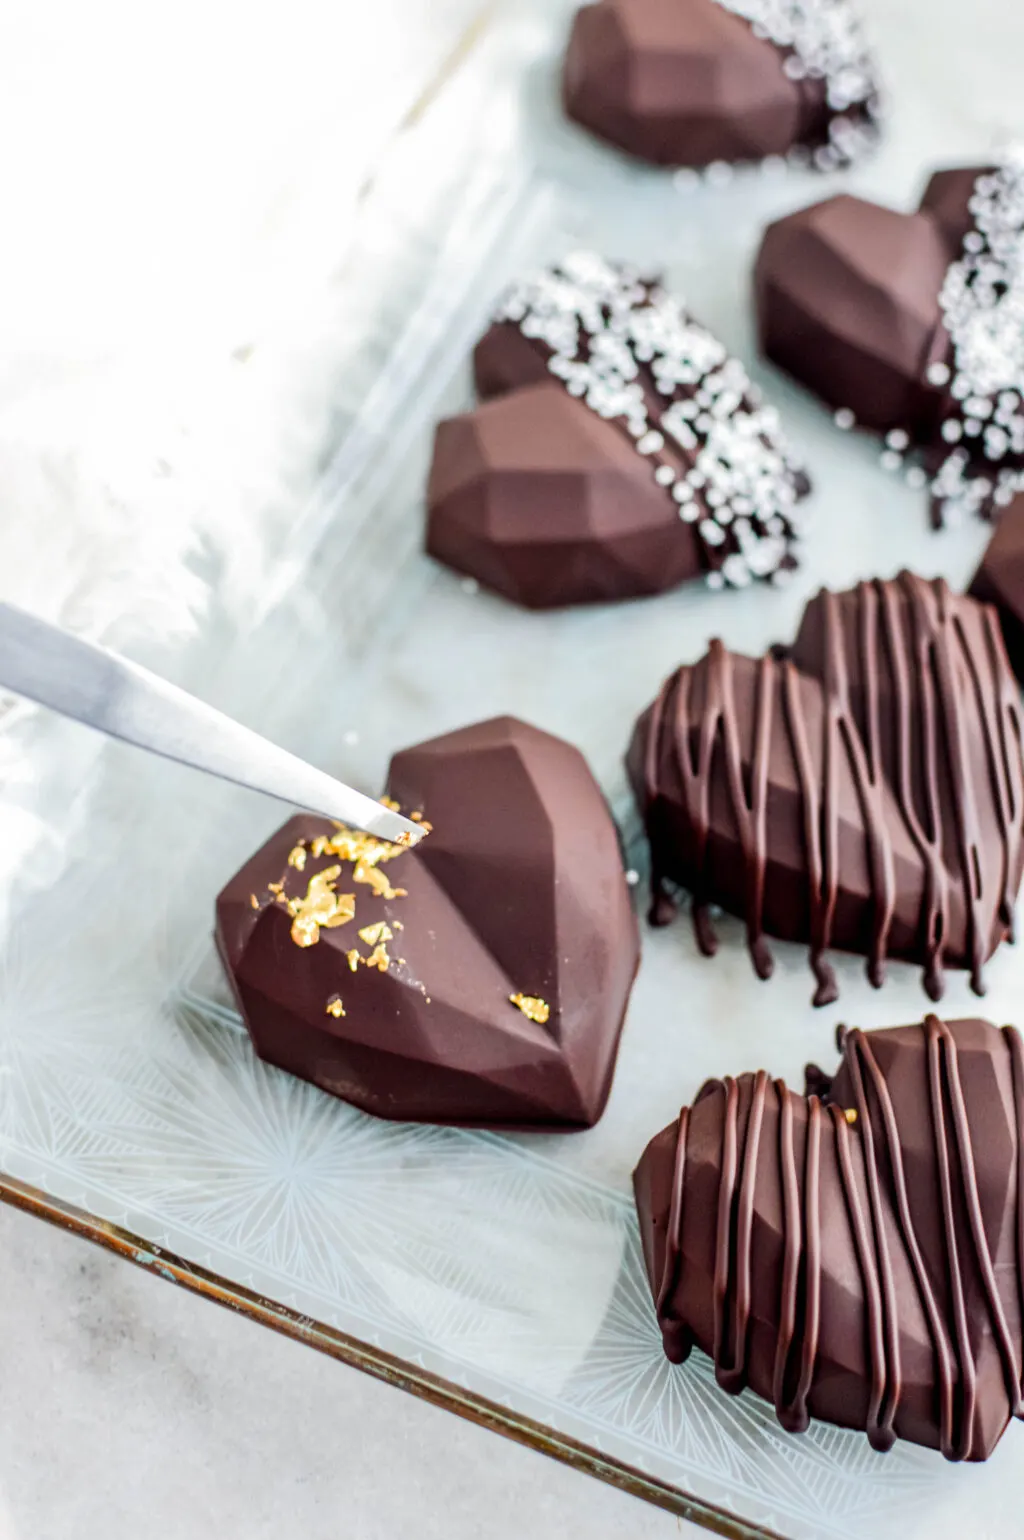
I used clean food tweezers to apply a little edible gold leaf on two of the hearts. The trick to using gold leaf is to get the surface of the item you will be decorating just a tiny bit wet. This can be tricky with chocolate so try to add just tiny droplets of water on the exact spot you want the gold. The gold leaf holds up perfectly fine in changing temperatures such as room temp, the fridge, freezer and then back to room temp again.

Store in an airtight container for up to a week.

Chocolate Peanut Butter Hearts
Equipment
Ingredients
- 1.5 cups dark chocolate wafers divided so you have some to drizzle on the top after as well
- 6 oz of natural peanut butter smooth, and stirred really well to ensure there isn’t any peanut oil visibly present. *Nut free alternatives will work well for this recipe.
- 3.5 tablespoons powdered sugar
- Pinch of quality salt
- 1 teaspoon pure vanilla extract
Instructions
- Mix the peanut butter, powdered sugar, salt and vanilla until smooth.
- Fold a piece of parchment paper in half then transfer the peanut butter to one half, fold the other side of the paper over so the peanut butter is in the middle of the two sheets, and smooth the peanut butter mixture to an even ½ inch thickness.
- Set this in the freezer for about 20 minutes. *It is easier to work with frozen peanut butter mixture, but you can certainly do this with softer peanut butter, it will just be a little bit harder to work with.While that is chilling you can start making the chocolate molds.
- Melt the chocolate in the microwave using 30 second increments, stirring in between. Melt until smooth.
- Carefully smooth the chocolate it into each corner of the heart molds with a small rubber spatula. You want to have a solid and even coating on the hearts, for this carefully turn the mold around and look at it from each direction to make sure no spots are missed.
- I like to have the silicone mold on a tray or cutting board while doing this as it helps with stabilizing the tray while the chocolate is setting up. You will have plenty of chocolate left over in your melting dish after this step, you will use this in the next steps. Leave the tray on the counter while the peanut butter filling chills.
- Remove the filling mixture from the freezer and free hand cut or use a cookie cutter to cut out hearts that will easily fit into the center of the chocolate hearts.
- The chocolate should still be very liquidy and the peanut butter hearts should easily push right into the chocolate. Try to press them in just enough that they are in all the way-but not so far that they would likely push through to the chocolate that would be the top part of the hearts once removed from the molds.
- Pour the rest of the chocolate over the hearts and carefully smooth out so the chocolate evenly fills all of the space around and over the peanut butter filling. Try not to add so much that the bottoms will be mounted up with the chocolate, aim for a flat bottom.
- Set into the fridge or freezer, I prefer the freezer with this exact chocolate, to chill for about 20 minutes.Remove the completely solid hearts from the mold, I like to use food safe gloves for this to avoid fingerprints.Set the hearts right onto the same cold/frozen tray that the silicone mold was on in the freezer.
- Use the remaining melted chocolate to drizzle over the top of some or all of the hearts.
- I sprinkled some nonpareils on a few of them.I used clean food tweezers to apply a little edible gold leaf on two of the hearts. The trick to using gold leaf is to get the surface of the item you will be decorating just a tiny bit wet. This can be tricky with chocolate so try to add just tiny droplets of water on the exact spot you want the gold. The gold leaf holds up perfectly fine in changing temperatures such as room temp, the fridge, freezer and then back to room temp again.
- Store in an airtight container for up to a week.
NUTRITION
Nutrition information is a rough estimate only; actual values will vary based on the exact ingredients used and amount of recipe prepared.