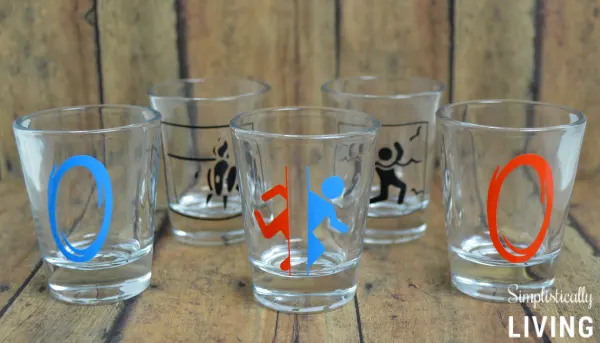
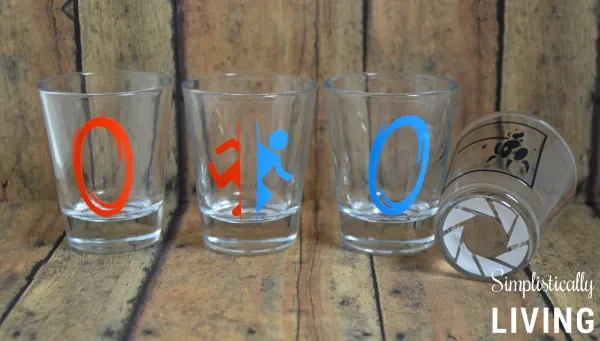
My husband and I love to play Portal 2 which is why I threw him a Portal 2 party for his 26th birthday. Since you can’t really buy Portal 2 party supplies, I made my own. One of the items I made was these Portal 2 Shot Glasses which were huge hit among our guests!

You don’t have to drink alcohol in order to have shot glasses. I know quite a few people who don’t drink but still collect shot glasses so these will really make fun gifts for anyone. You can make these to give as party favors, wedding favors, Christmas gifts and so much more. They are going to be popular among gamers!
When making these shot glasses you are going to want to find Portal 2 images that are in png. format. The reason I say this is because when tracing them using your silhouette machine (or cricut) it makes it easier than having to remove a white background.
What you will need:
- Silhouette Machine
or Cricut Cutting Machine
- Permanent Adhesive Vinyl
- Transfer Paper
- Portal or Portal 2 images (Google these)
- Clear Glass Shot Glasses– I got a dozen of them for $10.99 from Oriental Trading.
Instructions:
- Before applying vinyl make sure your shot glasses are clean of any stickers and residue. I used glass cleaner to clean mine.
- Download Portal 2 images from Google and upload them into your silhouette or cricut software.
- Resize your images to be no larger than 1.5 x 1.5 to ensure they fit on the shot glasses perfectly. I used 1.47 x 1.47 for my image sizes.
- Trace your image as you normally would and cut the image onto your desired color of permanent adhesive vinyl. Obviously blue and orange are a must for some of the images.
- Once your images are cut use your transfer paper to transfer the image to your shot glass. Be careful because once this vinyl is placed onto your shot glass it is not going anywhere so don’t place the image until you are sure that is how you want it.
- Enjoy your new DIY Portal 2 Shot Glasses!

If you want to really get crazy with these you can even add the Aperture logo to the bottom of the shot glasses like I did (below). It’s a really neat touch!


How to Throw a Portal 2 Party Simplistically Living
Sunday 18th of January 2015
[…] For the party I ordered a variety of orange and blue products such as tablecloths, streamers, balloons, plates and favor bags. I also ordered some glass shot glasses and some plastic test tubes. I used the glass shot glasses to make these Portal 2 Shot Glasses and gave them out as party favors. These were randomly placed into the test subject bags with handwritten test subject numbers on the front. Our guests loved these! You can see the full tutorial on how to make these Portal Shot Glasses Here. […]
Lauren
Wednesday 14th of January 2015
Your shot glasses came out great! Nice tutorial.
Brittanie
Wednesday 14th of January 2015
Hi Lauren,
Thank you for stopping by and for the kind comment. I certainly appreciate it! :)