
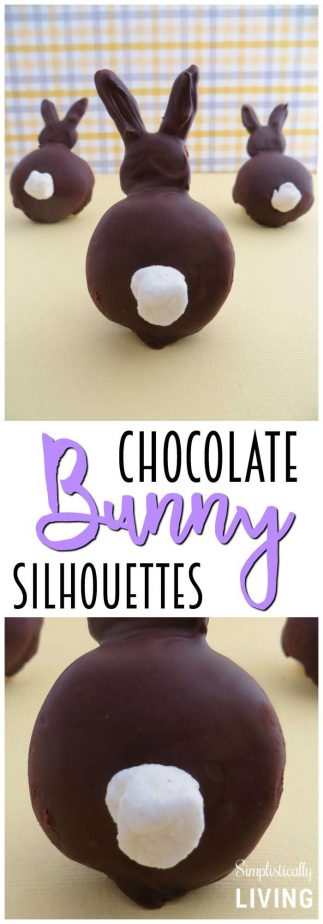
Bunnies are an adorable! Which is no surprise they are a favorite part of Easter and Spring. If you are looking for hoppin’ good recipe, these Homemade Chocolate Bunny Silhouettes are sure to hit the spot!

These are so fun and easy to make and their taste is an added bonus! 😉
Cookies and chocolate go hand in hand. Funny I say that because , that is exactly what you need to make these fun little guys. You can make these with your kids and have them pass them out to their friends or place them in a cute box and deliver them to neighbors or family members. I am sure they will be a bit hit just like they were at my house!
Homemade Chocolate Bunny Silhouettes
Ingredients Needed:
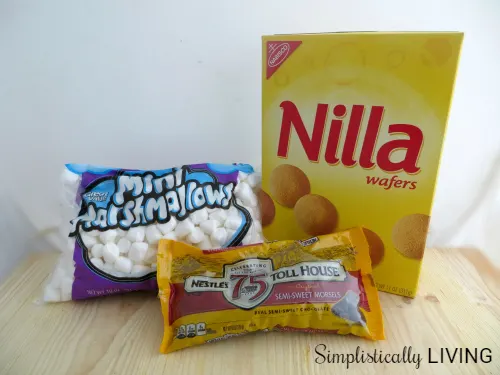
- 12 oz. bag semi-sweet chocolate chips (you can also use organic dark chocolate to make these a bit healthier)
- 30 mini marshmallows
- 30 Nilla Wafers
- Piping bag with a small round pastry tip
- Parchment paper
- Chocolate dipping or kitchen fork

Directions:
- Place a piece of parchment paper on a baking sheet.
- Roll each mini marshmallow in the palms of your hands to make them more round and wrinkled (the idea is to make them look like a bunny tail.)
- In a microwave safe bowl, melt the chocolate chips in 30 second intervals stirring in between. Be careful not too burn the chocolate. (you can also use the double boiler method)
- Spoon a portion of the chocolate into a piping bag with the small round tip.
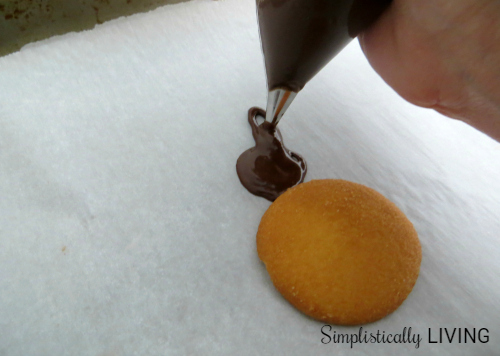

- Place a Nilla wafer on parchment paper to use as a guide for how large to make the bunny heads. Pipe out a round circle about 1/3 the size of the vanilla wafer. Add two ears and fill in with chocolate.
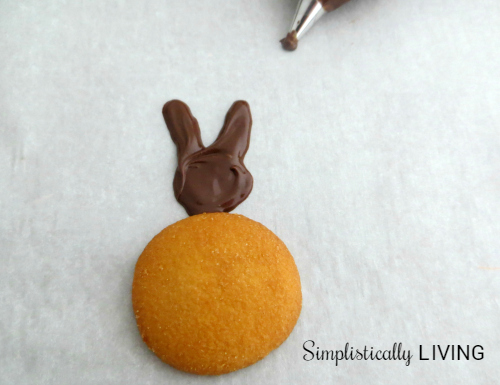

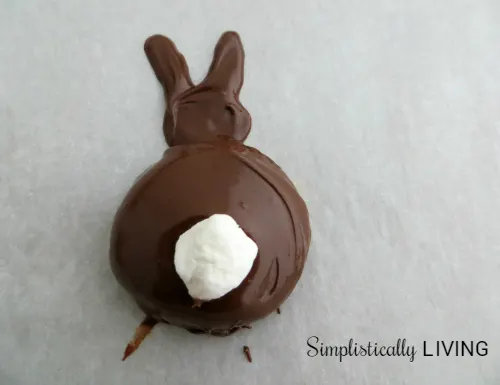
- While chocolate is still wet, immediately dip the Nilla wafer into the bowl of chocolate – submerging it completely. Use a fork to lift the cookie out of the chocolate. Tap the edge of the bowl to allow excess chocolate to drip off and set the chocolate covered cookie just below the piped bunny head to connect the two.
- Press a mini marshmallow onto the bottom of the chocolate covered cookie. This will serve as the bunny butt so to speak.

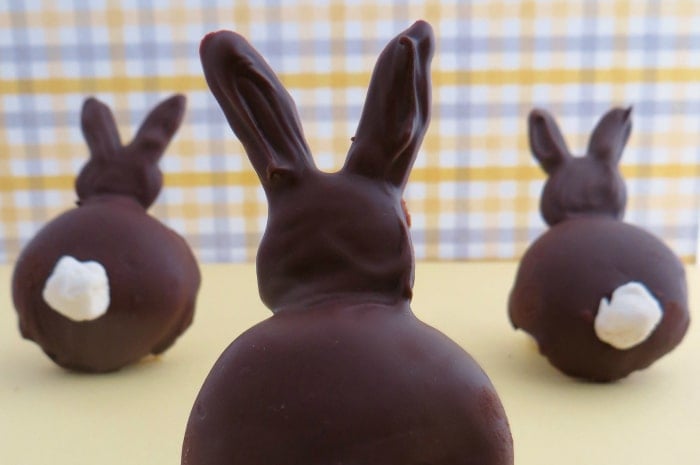
- Place the Chocolate Bunny Silhouettes in the refrigerator for about an hour to allow the chocolate to set and harden.
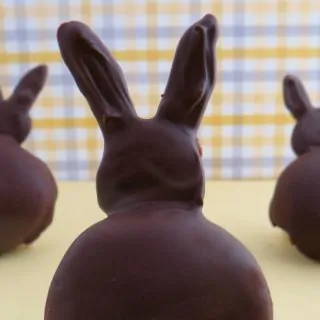
- Once the chocolate has hardened you are ready to enjoy your sweet bunny treat!
- Serve and Enjoy!
Tip: If you want to make these stand (like shown in the image above) you can use a small piece of modeling chocolate.


Homemade Chocolate Bunny Silhouettes
Ingredients
- 12 oz. bag semi-sweet chocolate chips you can also use organic dark chocolate to make these a bit healthier
- 30 mini marshmallows
- 30 Nilla Wafers
Instructions
- Place a piece of parchment paper on a baking sheet.
- Roll each mini marshmallow in the palms of your hands to make them more round and wrinkled (the idea is to make them look like a bunny tail.)
- In a microwave safe bowl, melt the chocolate chips in 30 second intervals stirring in between. Be careful not too burn the chocolate. (you can also use the double boiler method)
- Spoon a portion of the chocolate into a piping bag with the small round tip.
- Place a Nilla wafer on parchment paper to use as a guide for how large to make the bunny heads. Pipe out a round circle about 1/3 the size of the vanilla wafer. Add two ears and fill in with chocolate.
- While chocolate is still wet, immediately dip the Nilla wafer into the bowl of chocolate – submerging it completely. Use a fork to lift the cookie out of the chocolate. Tap the edge of the bowl to allow excess chocolate to drip off and set the chocolate covered cookie just below the piped bunny head to connect the two.
- Press a mini marshmallow onto the bottom of the chocolate covered cookie. This will serve as the bunny butt so to speak.
- Place the Chocolate Bunny Silhouettes in the refrigerator for about an hour to allow the chocolate to set and harden.
- Once the chocolate has hardened you are ready to enjoy your sweet bunny treat!
- Serve and Enjoy!
NUTRITION
Nutrition information is a rough estimate only; actual values will vary based on the exact ingredients used and amount of recipe prepared.
Homemade Easter Cakes | Far more delicious than store-bought cakes
Wednesday 14th of March 2018
[…] Homemade Chocolate Bunny Silhouettes […]
21 Hippity Hoppity Easter Recipes Simplistically Living
Friday 23rd of February 2018
[…] Homemade Chocolate Bunny Silhouettes […]
The Wednesday Roundup Week 65 :: A Link Party - LeMoine Family Kitchen
Monday 6th of November 2017
[…] Chocolate Bunny Silhouettes by Simplistically Living […]
Show Me Saturdays Link Party #22 | SWEET HAUTE
Tuesday 21st of April 2015
[…] Chocolate Bunny Silhouettes- Simplistically Living […]
Baby Days - Something I Made - Little Girl Designs
Friday 20th of March 2015
[…] ran across this super-simple (and adorable!) recipe for chocolate bunnies recently that would make a wonderful Easter treat. I think kids would love watching these being […]