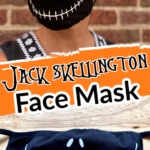

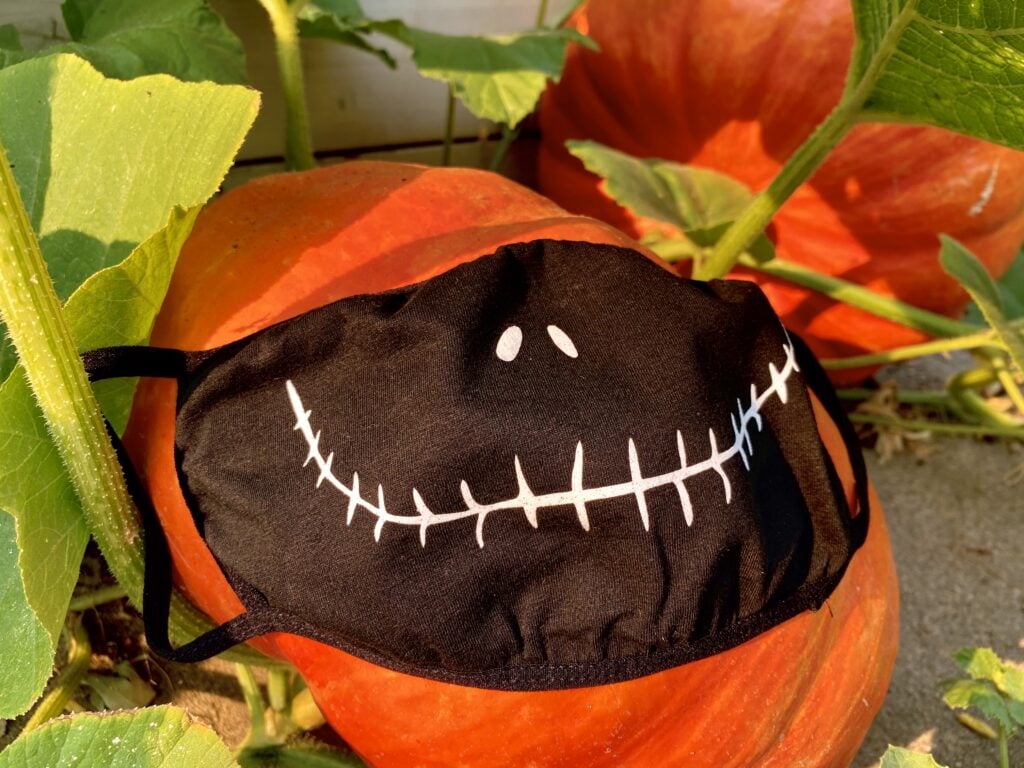
This Jack Skellington Face Mask is the perfect wearable craft for any Nightmare Before Christmas Fan. With a few craft supplies and a Cricut machine, you’ll have a face mask that is perfect for Halloween!

Halloween is the perfect time of year to be wearing masks everyday so why not wear one that is adorable?!
This step-by-step tutorial will show you how to take a plain mask and spice it up with Jack’s grin from Disney’s A Nightmare Before Christmas.

Crafting fun masks for the fall season is at the top of my project list! They’ll be especially useful for kids who are back in school wearing masks and cute decorating a pumpkin on the porch before it’s time to carve it.
This is a quick, cheap DIY project with awesome results – let’s get crafty!


How To Make A Jack Skellington Face Mask
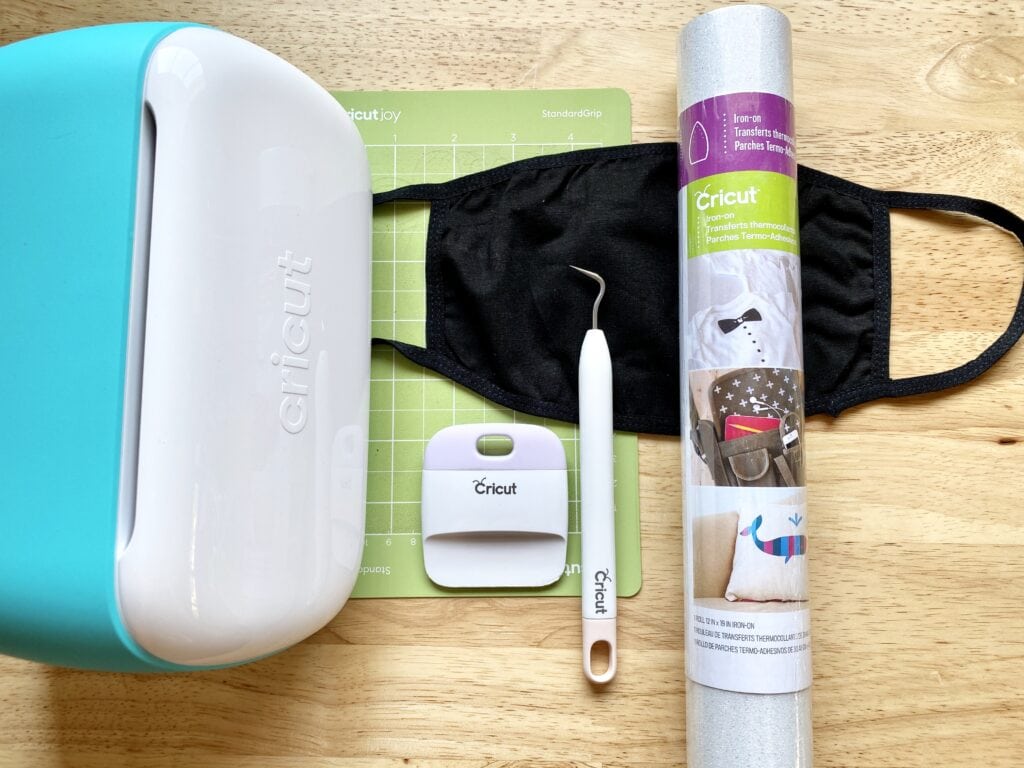
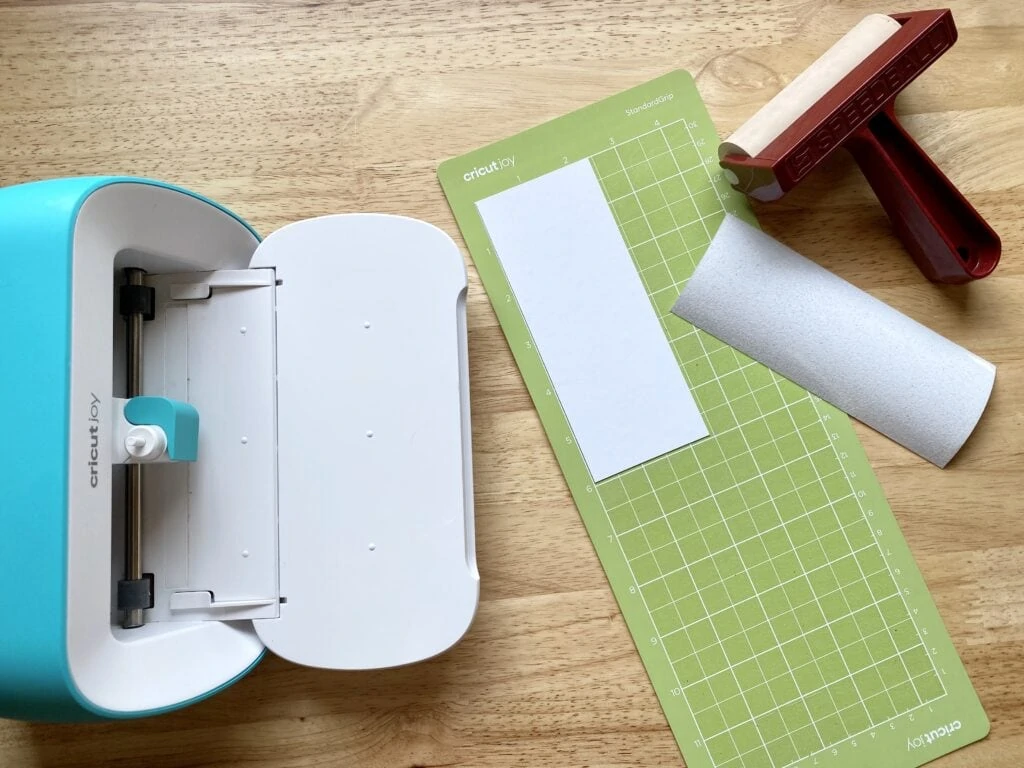
What You’ll Need:
- Nightmare Before Christmas SVG cut flies, I downloaded mine from Etsy
- Blank mask – here are some similar to what I used
- White Glitter Iron on HTV
- Easy Press Mini
- Cricut Joy or Cricut Cutting Machine
- Cricut Easy Press Mini
- Cutting mat
- Weeding Tools

For this project I chose Cricut Iron-on HTV in white glitter. I wanted the dramatic look of white teeth on the black mask and I thought the touch of glitter would soften it a bit so it’s more playful and less scary.
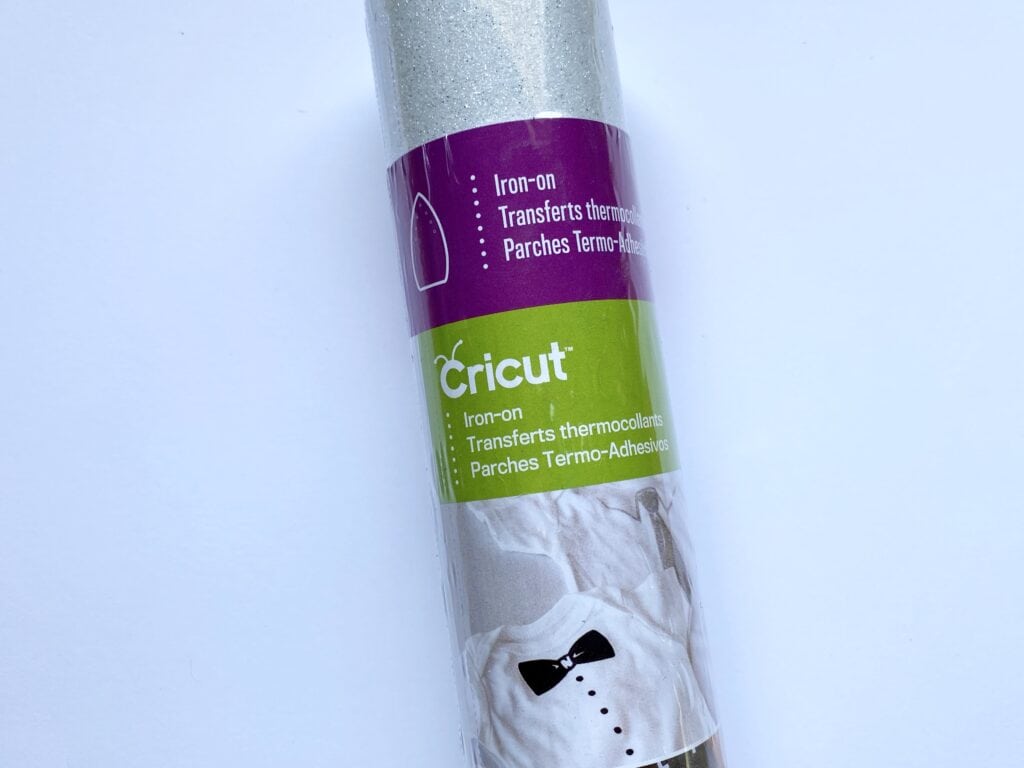
If glitter isn’t your thing, keep in mind you can use any HTV for this project. If you are using the Cricut Joy you could also do this with any iron on Smart Material. That way you won’t need to fuss with the mat or even cutting the material to size. I’d probably avoid doing this with Infusible Ink as you need a polyester base for that to work and there’s lots of evidence saying cotton is a more effective barrier for Covid.
The masks I used have a 100% cotton liner and the black fabric outer surface is 95% cotton and 5% elastane. I chose a mask that had one solid piece of fabric on the front and no pleats so the design would lay flat and transfer easily.
Whenever you’re doing a heat transfer project make sure you wash and your blank first to avoid any shrinking or adhesion issues. Make sure you avoid fabric softener as it can get in the way of the transfer sticking.
Design your Mask
Find an image you would like to use. I chose this Nightmare Before Christmas bundle from Etsy because it’s packed with a lot of images that would be great for Halloween. I also liked that there was a simple image of Jack’s face that I wouldn’t need to do much cleaning up on to make my mask.
If you have time and enjoy the hunt you could also check out websites offering free SVG files and find a similar image.
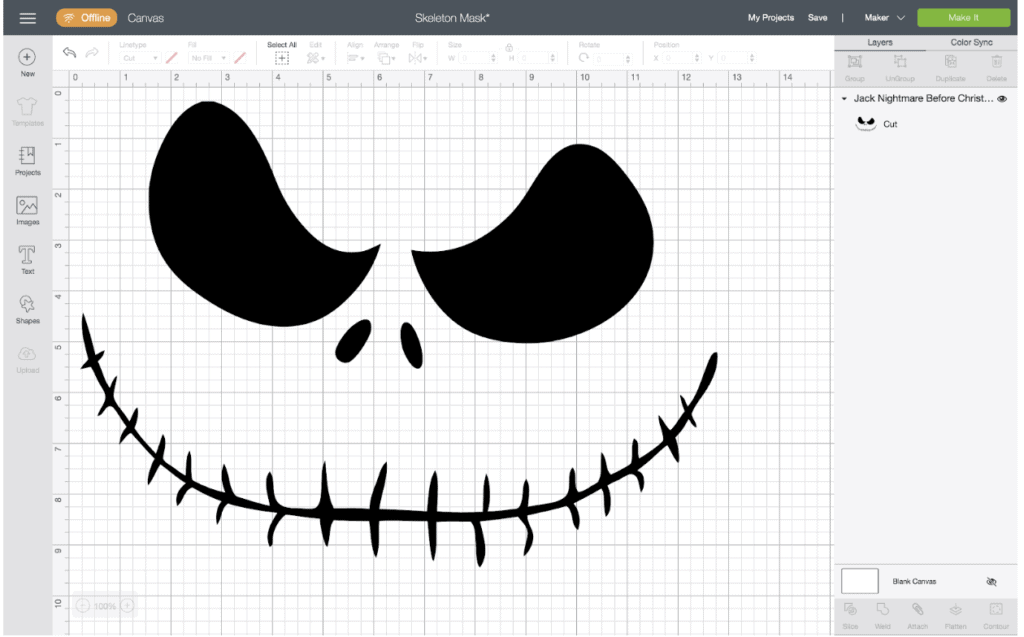
Now, upload the image you are using to Cricut Design Space. In this case, the image I am using is Jack’s full face from the Nightmare Before Christmas. I don’t want to include the eyes on the mask, just the teeth and nostrils, so I am going to use the slice tool to delete the eyes.
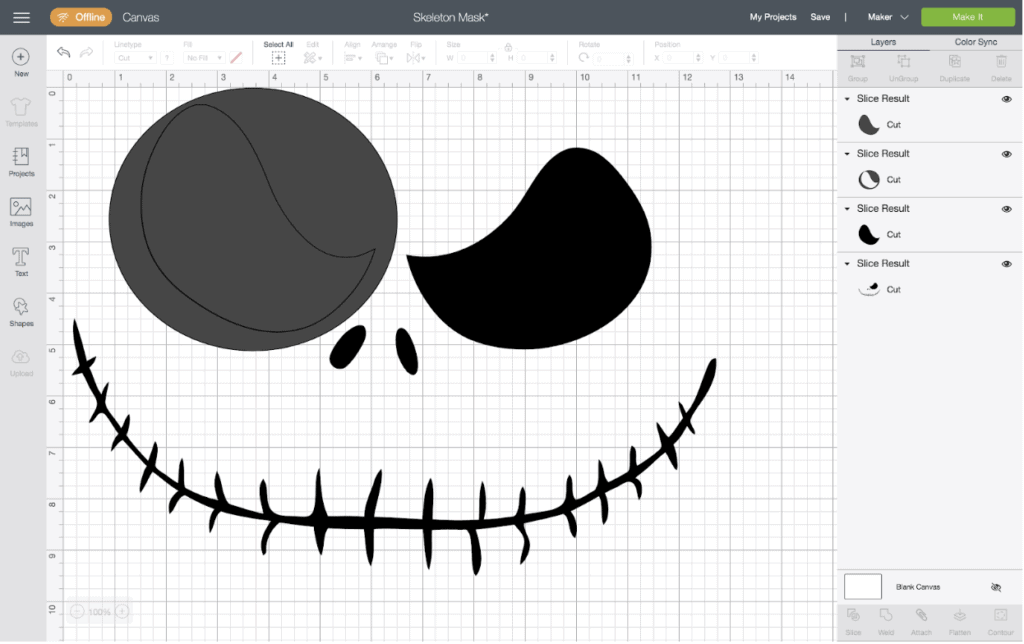
I added a circle shape to cover one of the eyes. Then I selected the circle and Jack’s face at the same time and clicked ‘slice’ from the lower right hand corner, next to the ‘weld’ button.
Next I clicked and deleted each of the sliced layers and repeated the process for the other eye.
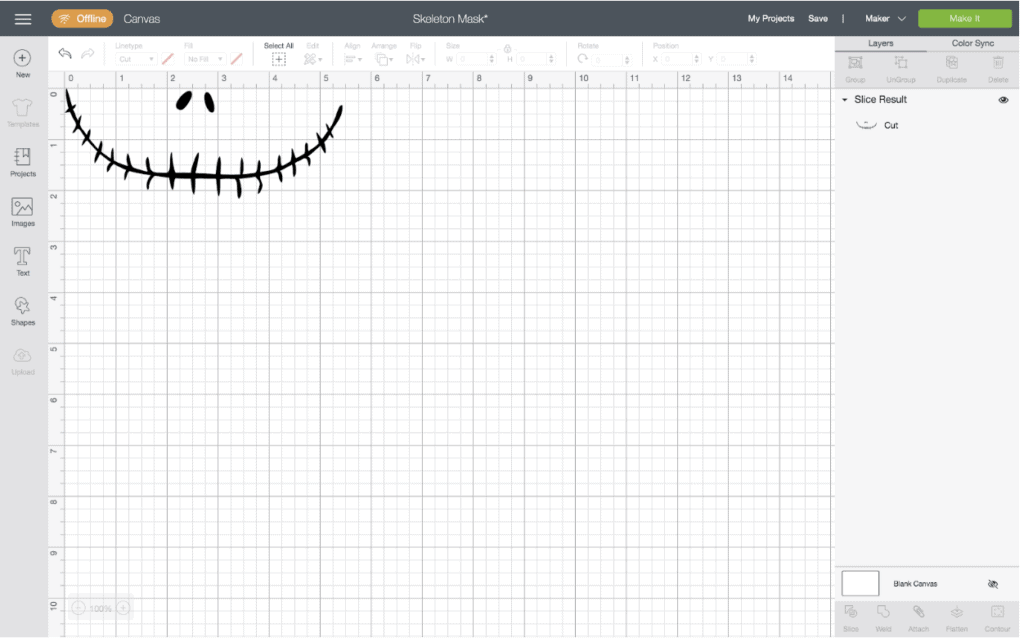
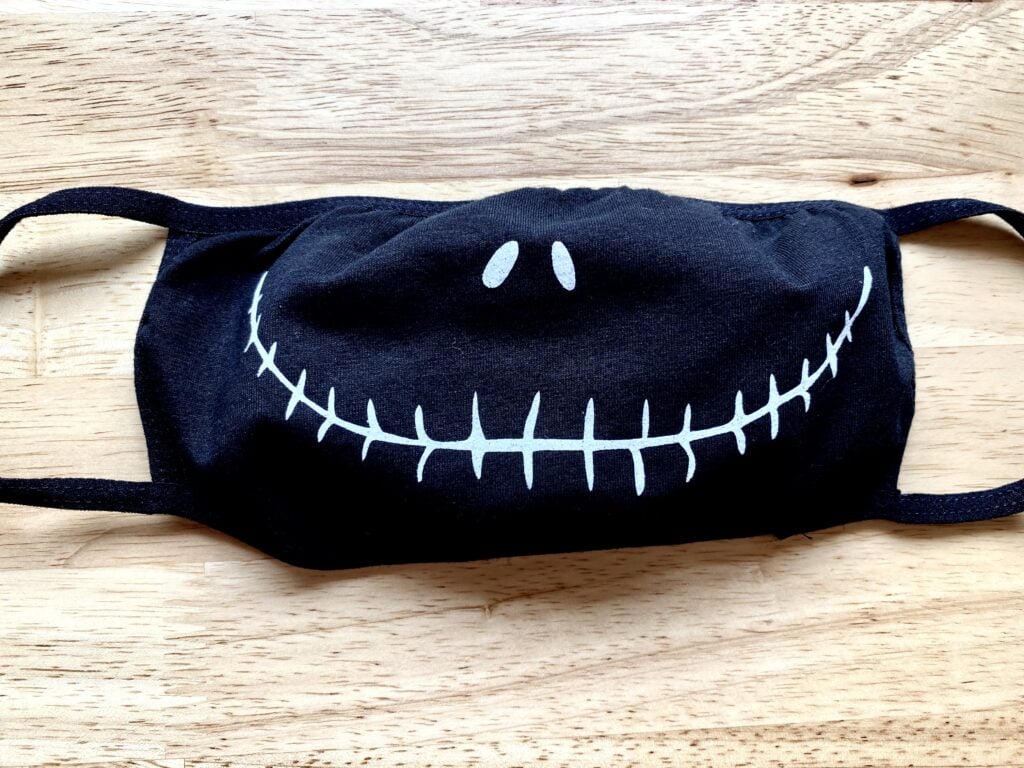
Above you can see my edited design, ready to cut. I measured how wide my mask was and determined that a smile a little over 5 inches would look great. I resized my image accordingly and now I’m ready to click the green ‘Make it’ button!
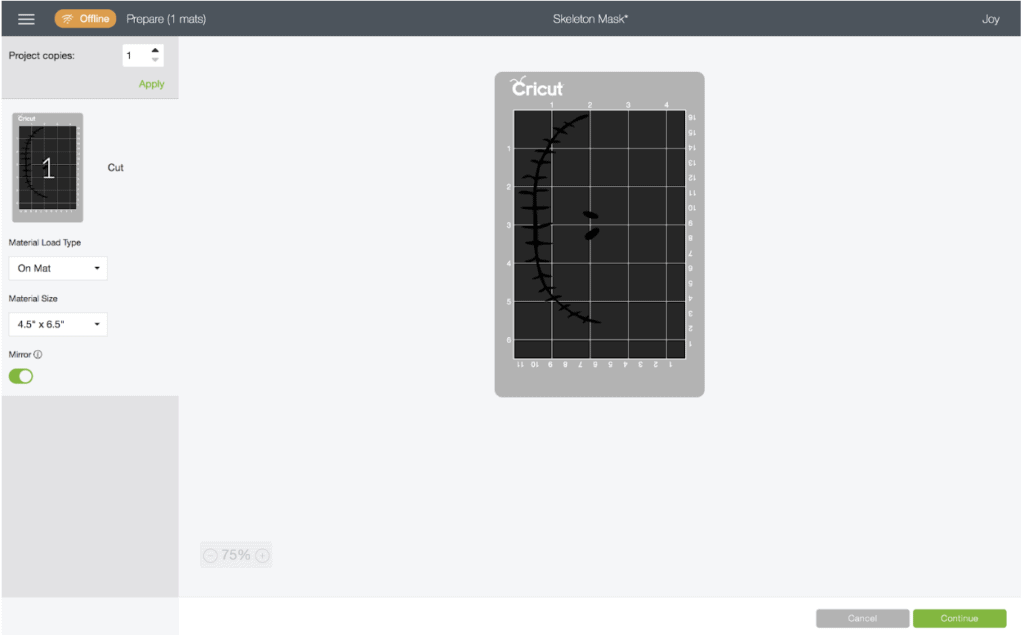

As you should with any iron-on project, I made sure to mirror my image. It wouldn’t be a big deal if I forgot because there isn’t any writing that would turn out backwards but it’s a good habit to be in.
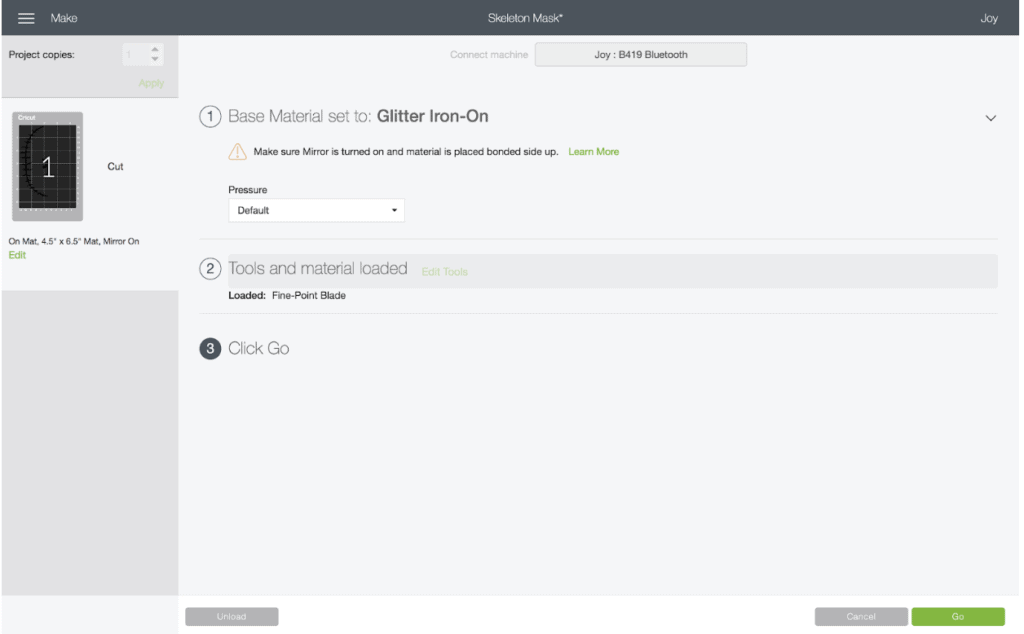
I selected “Glitter Iron-On” as my base material and Cricut Design Space reminded me to make sure I’d mirrored my image which I had.
Now it’s time to cut and mount my material, load my mat, and cut.
Cut Out Your Design
For this project I think the Joy is the best Cricut machine. It’s portable and easy to use for a variety of projects. When I use my Cricut Maker I’ve got to clear a lot of space off of my desk but the Joy fits easily with whatever else I’m currently working on.
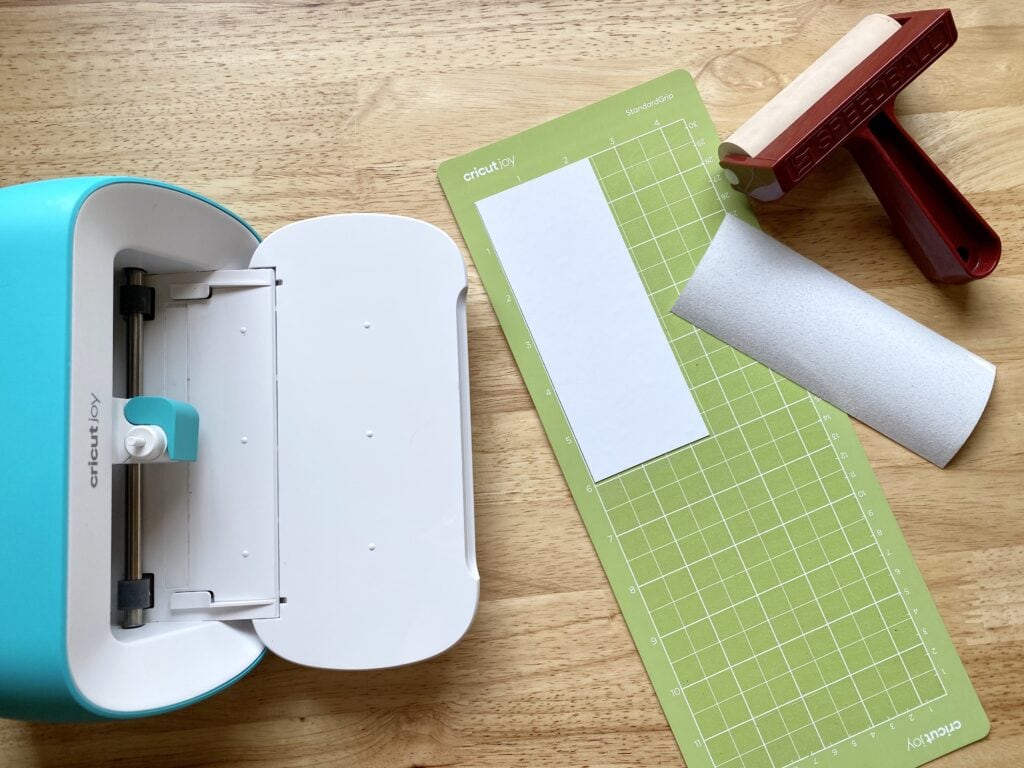
I always use a trimming tool when cutting my materials. It is fast (and satisfying!) and helps me maximize my materials as I waste very little with every design. Because my image is a little over 2 inches by 5.5 inches I cut my HTV 2.5” x 6”.
I mounted my HTV on the mat liner side down. Using glitter or holographic HTV makes it easy as the pretty, shiny side always faces the mat.
I used my Speedball brayer to make sure the HTV was evenly adhered, you could also use your scraper tool or even a credit card to get the same result.
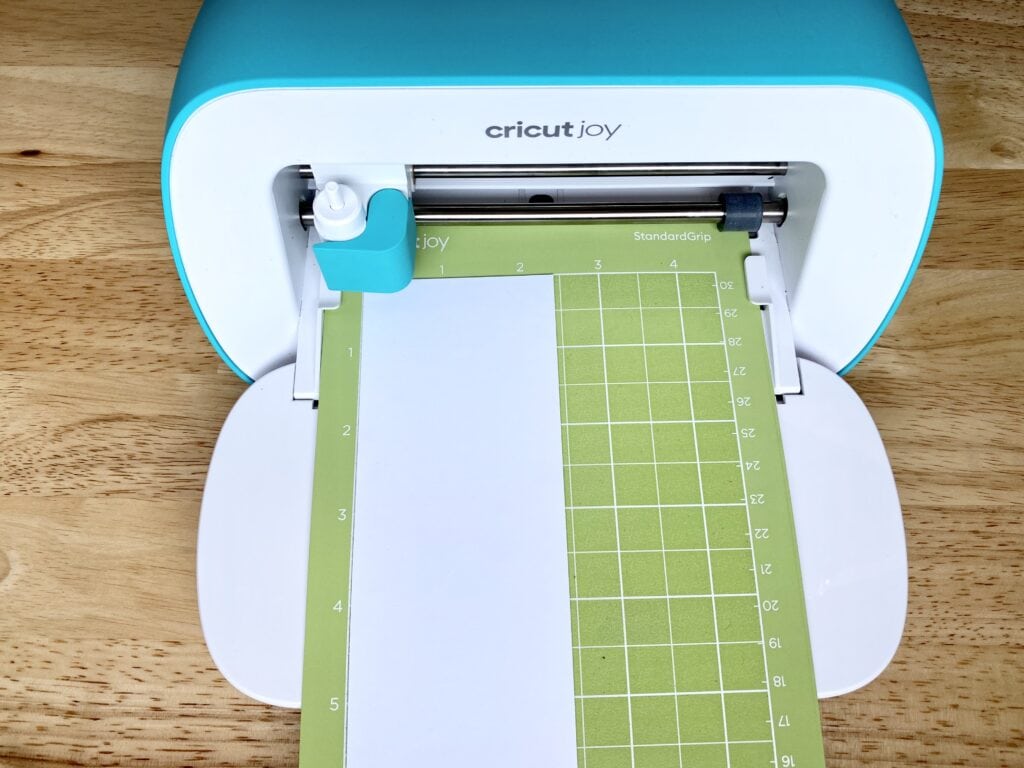
My mat is ready to go – now I just need to click “Go!”
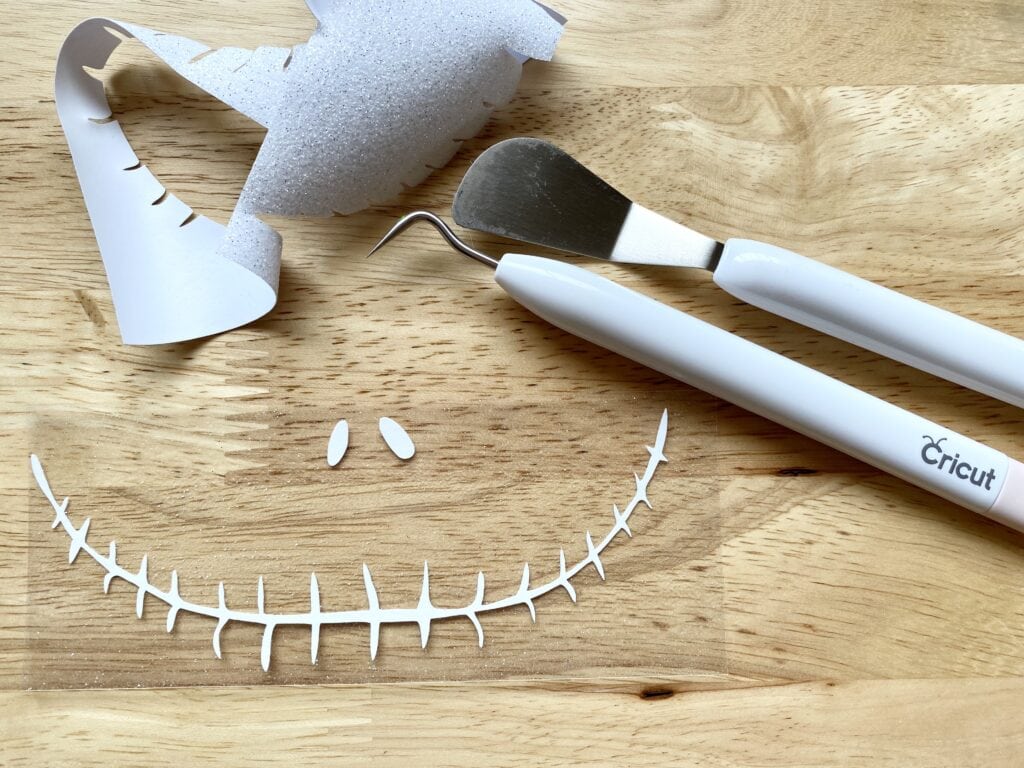
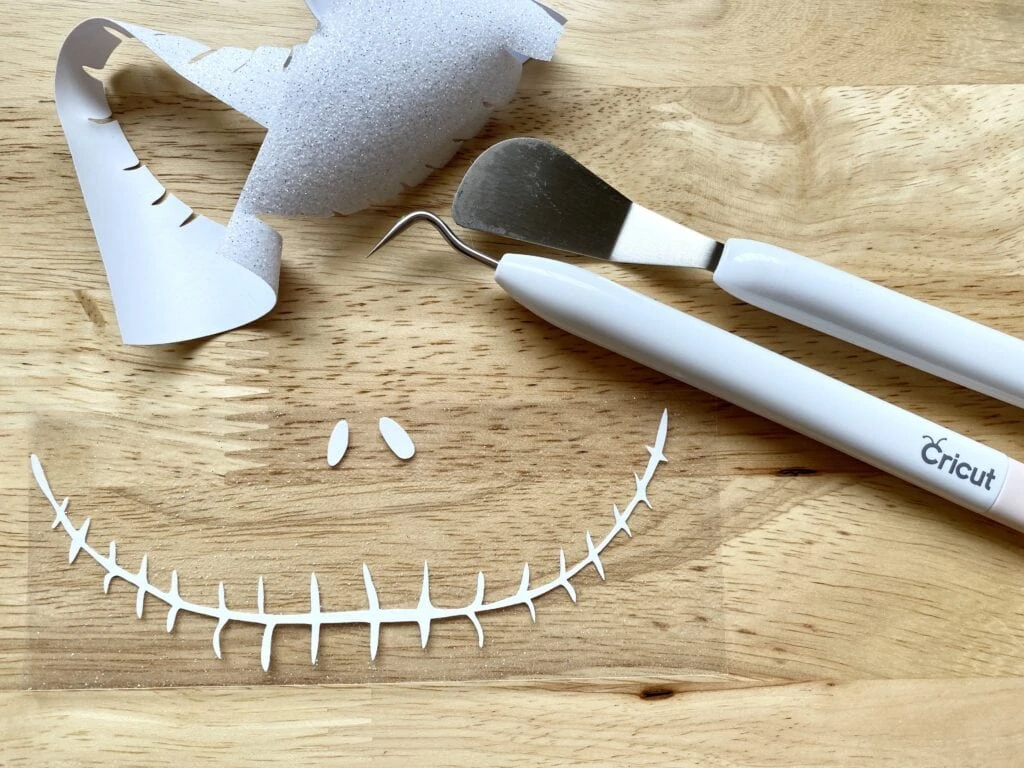
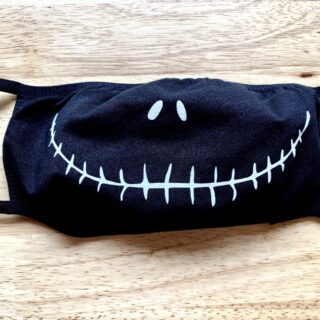
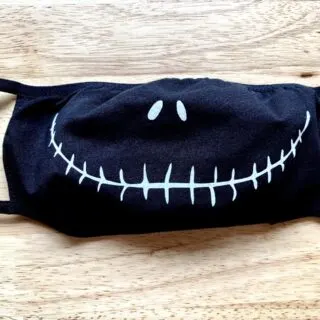
After removing the cut from the mat I used my spatula and weeding tool to peel away the unwanted sections of my design. I really like the asymmetry of the nostrils and the way the teeth details turned out!
With glitter HTV there will often be little flecks left behind on the backing in places other than your design. If you look closely at the image above you can see some of these little specks. Don’t worry about these, they don’t have any ‘glue’ on them and therefore won’t be transferred to your finished product.
Heat Transfer Your Design

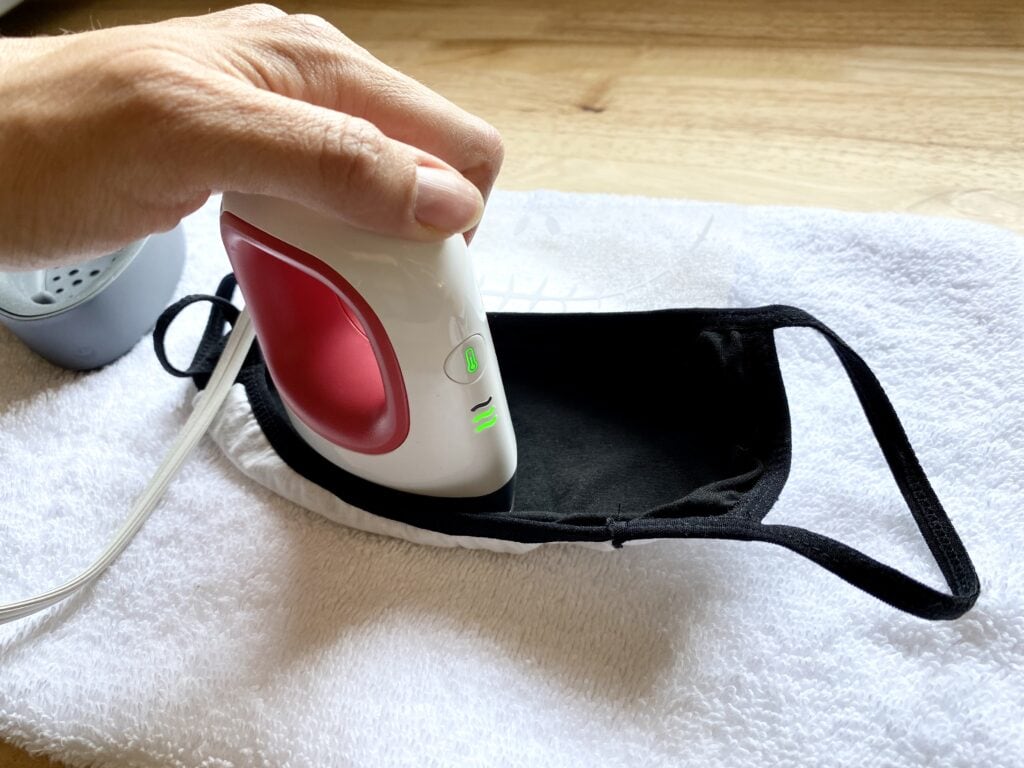
Next, I heated up my Easy Press Mini. I always use Cricut’s Heat Guide to determine which temperature setting is best based on the HTV I’m using and the material I’m ironing it onto. The Mini is perfect for a project like this because of the size of the mask surface and the bumpy edges. With the mini I can get good contact with the entire design.

For applying glitter HTV to the cotton/poly mask Cricut suggested the following:
- medium heat
- pre-heat for 5 seconds
- light pressure and constant movement, 25 seconds
- iron reverse side for 15 seconds
- warm peel
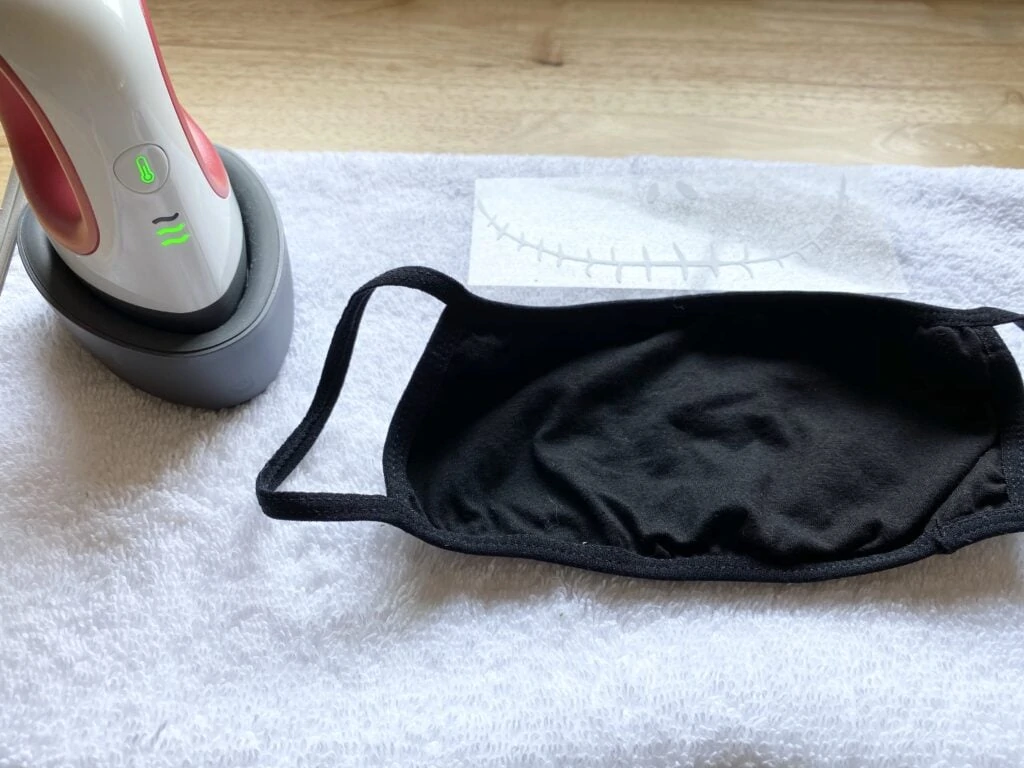
You could use a heat press pillow for under your project if you have one, if not a towel will also work just fine.
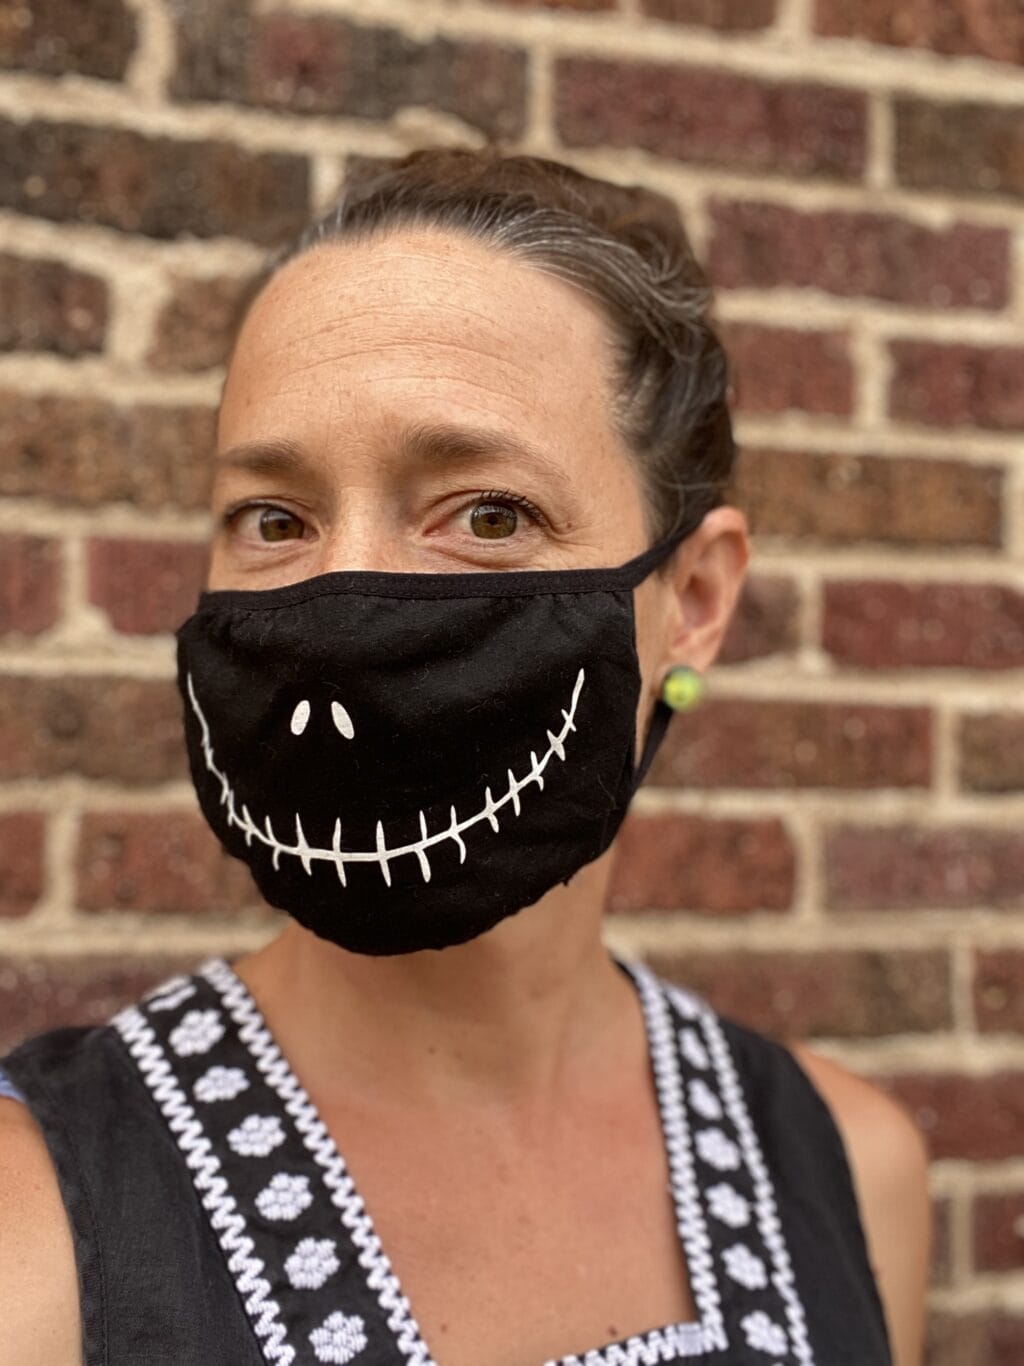
To make sure I placed my design properly I put my mask on and placed my fingers where the mask covers my nostrils, then I lined up the nostrils on the design with that spot. Now I’m ready to transfer the design!
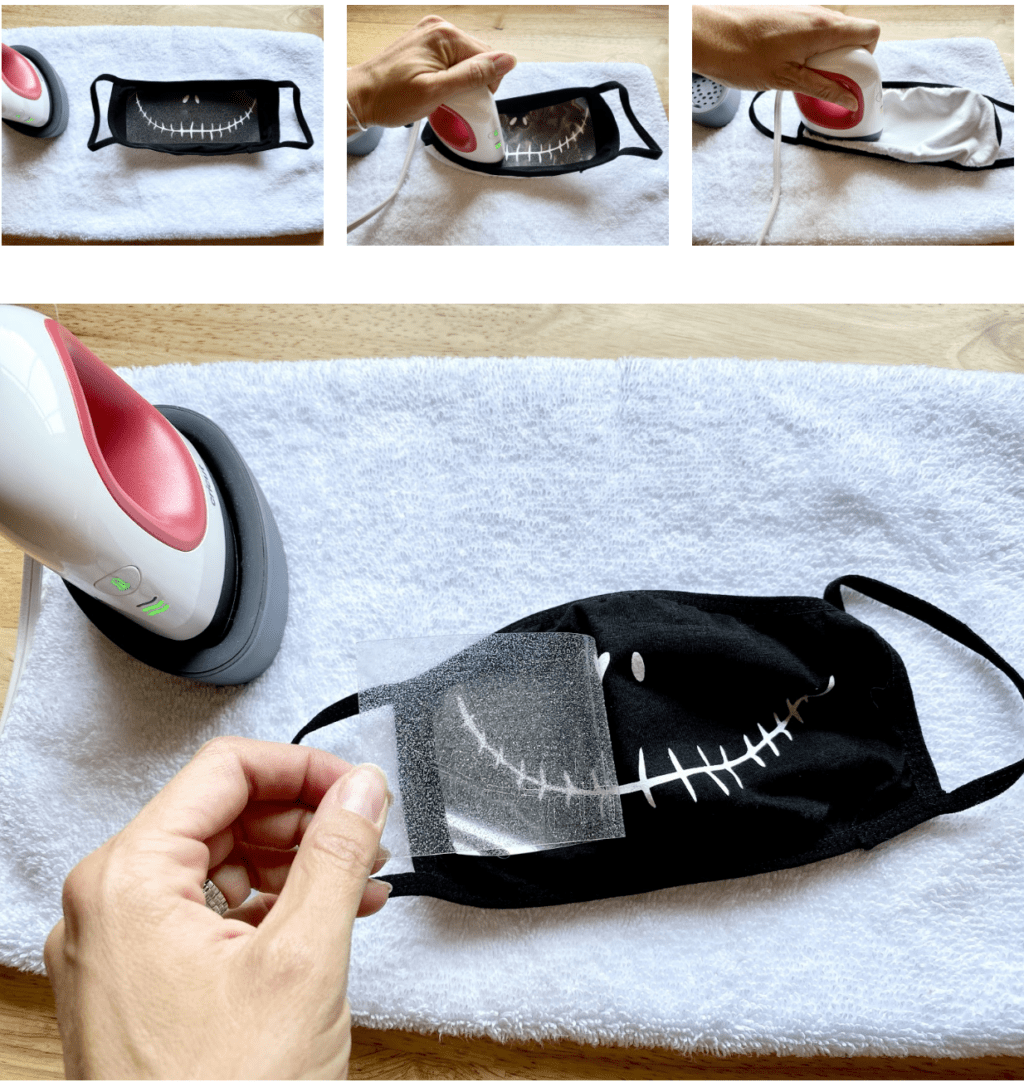

I could tell right away that the transfer worked well because the backing was already detaching before I started to peel.
Your Jack Skellington Face Mask Is Now Complete!
Ta-da! Such a cute, easy upgrade to a normal blank mask. This will spice up your next trip to the grocery store or your Target run. Enjoy it while you can, before we know it it’ll be time for holiday crafts!

Want more Jack Skellington Fun? Check out:
- A Jack Skellington Cheese Ball Recipe
- Jack Skellington Soap Rings
- Nightmare Before Christmas Baby Shower Ideas
- Jack Skellington Treat Cups
- Jack Skellington Reese’s Peanut Butter Cups
DIY Jack Skellington Face Mask
Materials
- Nightmare Before Christmas SVG cut files I downloaded mine from Etsy
- Blank mask – here are some similar to what I used
- White Glitter Iron on HTV
- Easy Press Mini
- Cricut Joy or Cricut Cutting Machine
- Cricut Easy Press Mini
- Cutting mat
- Weeding Tools
Instructions
- Download the Jack Skellington SVG file you wish to use.
- Upload the design into your Cricut software, adjust the size and mirror the image.
- Load your HTV into your Cricut cutting machine and select the correct settings to cut.
- Cut out the design.
- Weed your design using your tools and apply the design to your face mask.
- Heat up your Cricut Mini Press and apply the design to your mask using the recommended settings (per the post information above).
- Gently peel away the backing and your design should be adhered to the face mask.
- Put on your new face mask and wear it with joy!