
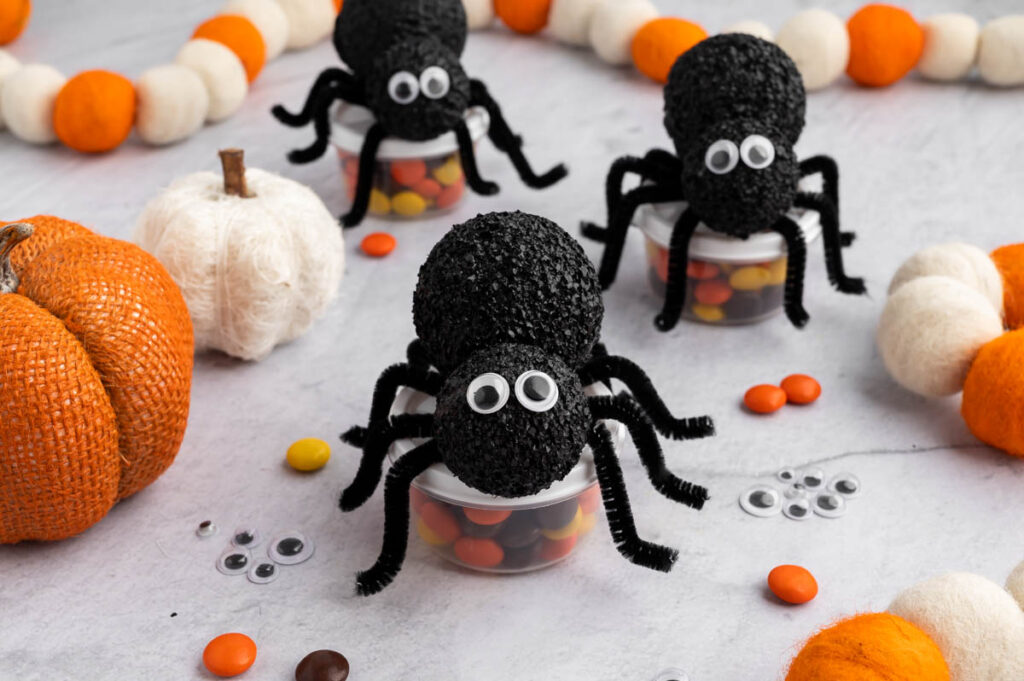
These adorable spider treat containers can be made in under 30 minutes, can be filled with small candies or trinkets, and will make any Halloween celebration feel extra special!

Spider Treat Containers
I love nearly everything about Halloween but one of my top favorite things to do is, make adorable Halloween treats and easy halloween crafts for kids!
These spider treat cups actually combine a treat and a craft and make something so cute, you’ll be excited to gift them to your friends, family, classmates and even neighbors!
These are perfect for class parties and older kids (10 years old+) can help make them too!
Want more Halloween treat ideas? Try our Oogie Boogie Popcorn, Halloween Rice Krispie Treats, Vampire Donuts and even our Dirty Q-Tip Snack.
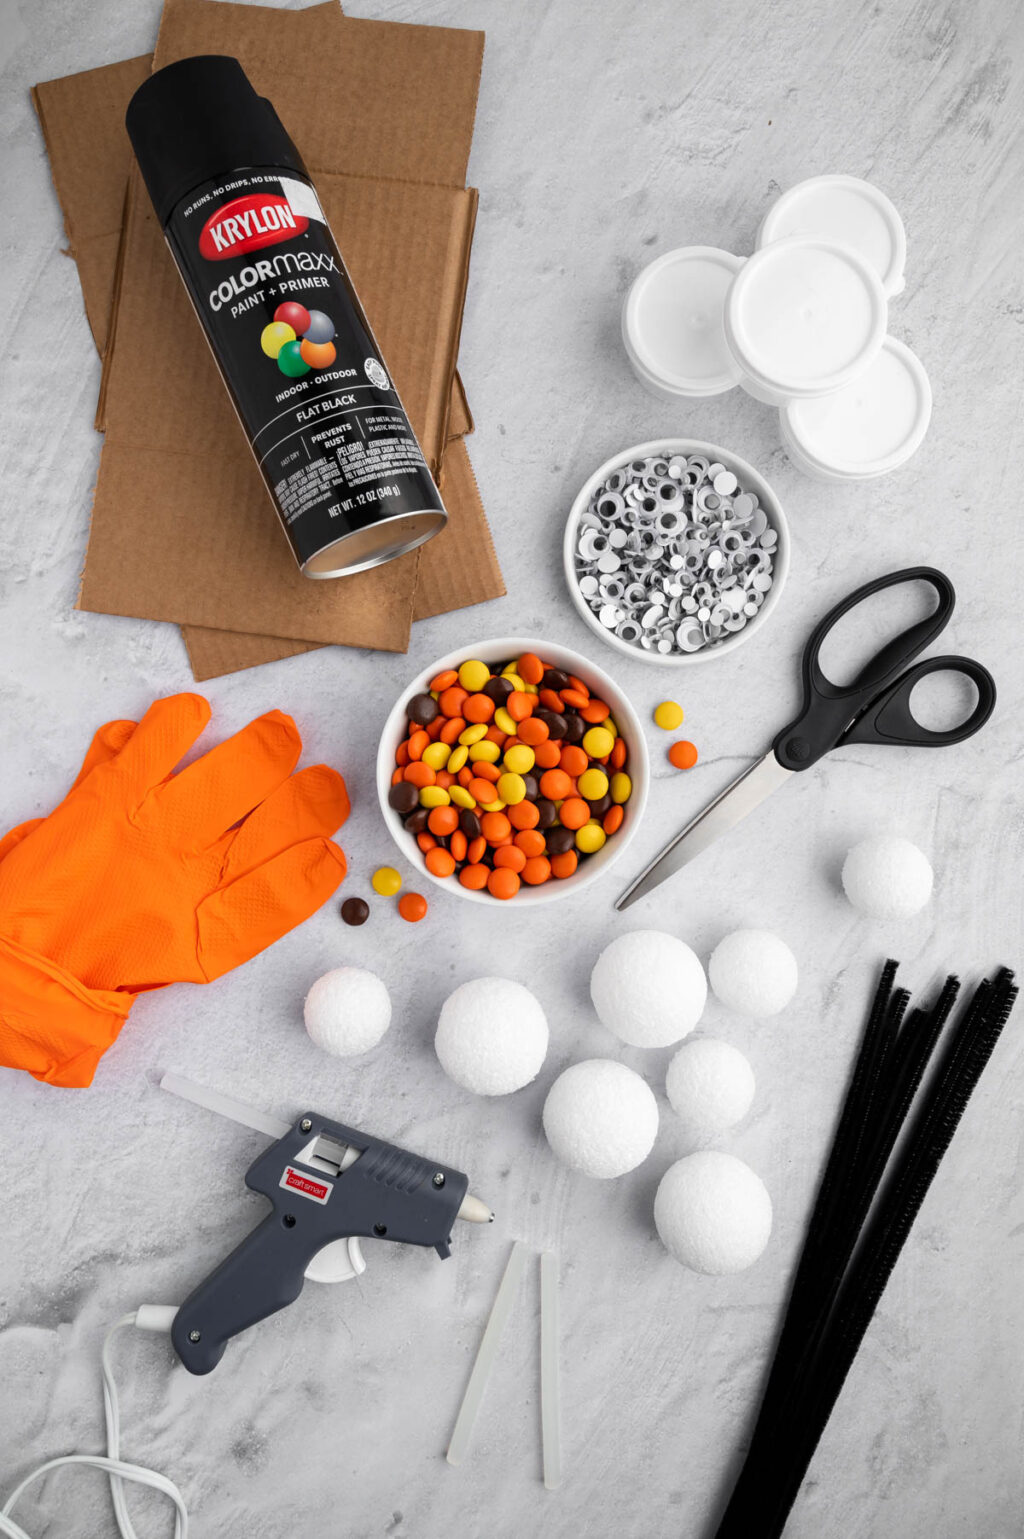
What You Need to Make Spider Treat Containers
- Gloves
- Cardboard box (to spray paint on)
- Black flat or matte spray paint
- Scissors
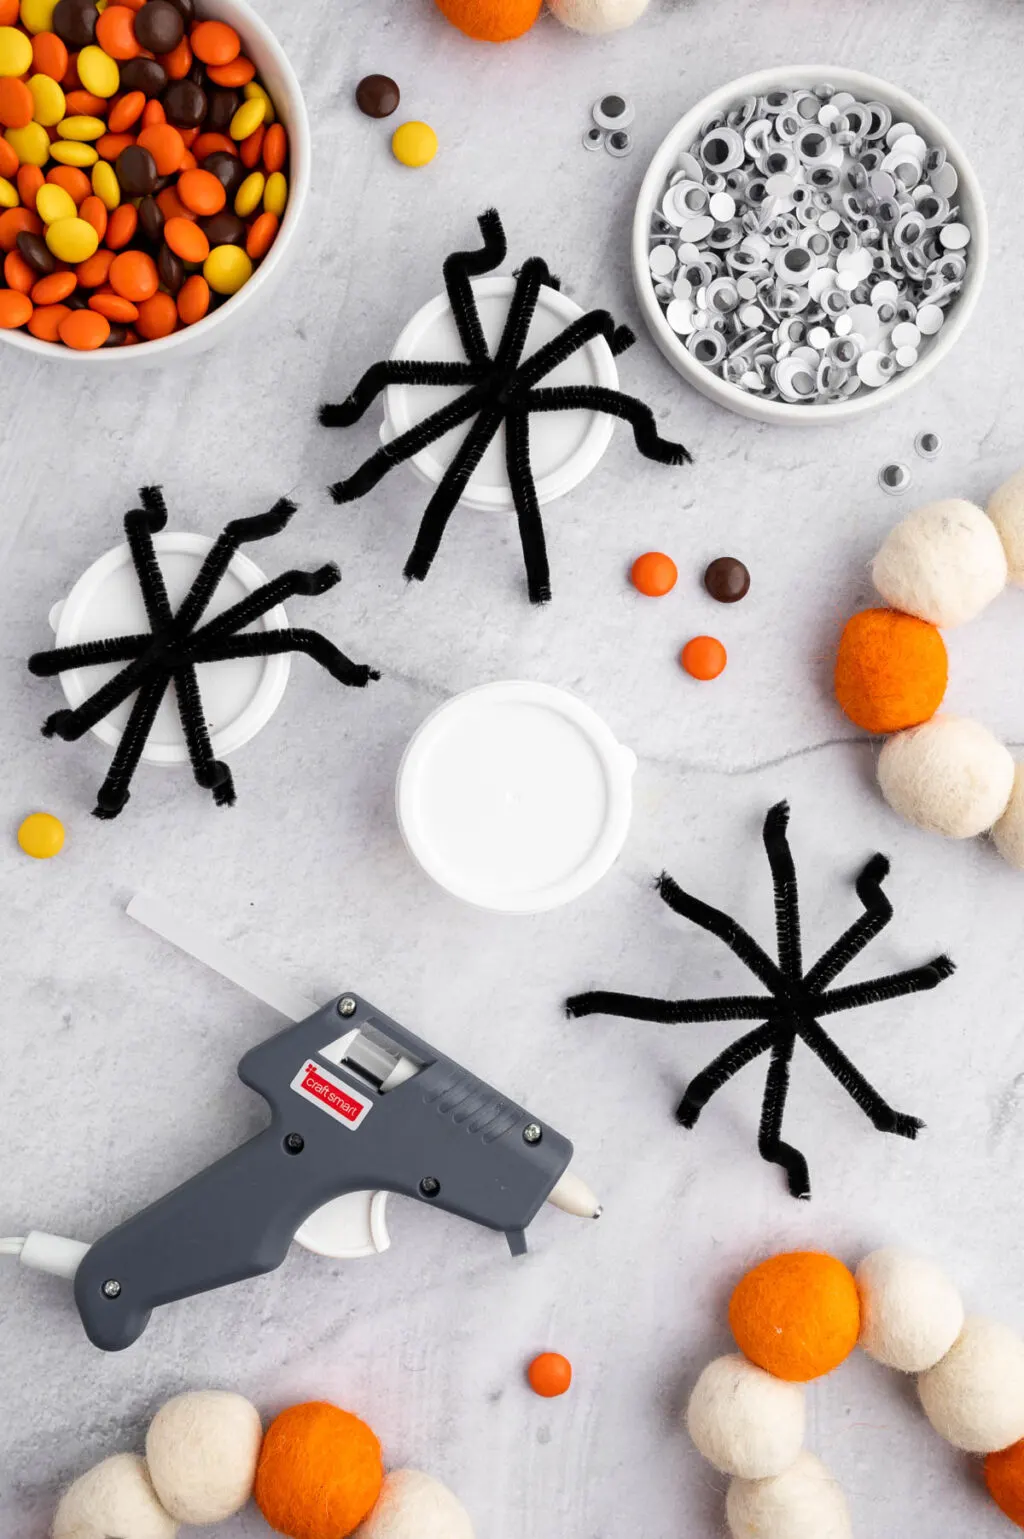
- Glue gun
- Glue sticks
- Small candies (like M&M’s)
- Small treat containers with lids
- Googly eyes
- 1.9 Inch Medium floral foam balls
- 1.4 Inch Small floral foam balls
- 12-inch black pipe cleaners or chenille stems
For each spider treat container, you will use:
- 1 small treat container with lid
- 2 Googly eyes
- 1 Medium floral foam balls
- 1 Small floral foam balls
- 2 12-inch black pipe cleaners or chenille stems

Where can I find supplies for this craft?
Most materials used for this craft can be purchased from the Dollar Tree store (except the spray paint), Walmart, or any craft store. I’ve also provided links above where you can order everything online.
What can I use these treat containers for?
Kids will love these treat containers as a trick-or-treat handout, or to bring to classroom Halloween parties. They will give any treat table a cute and spooky touch.
What kind of treats can be put inside these containers?
The type of treats you can stuff inside these will depend on the size of the containers you have. The ones I used from the Dollar Tree were fairly small but were the perfect size to fit small candies like M&M’s or Reese’s Pieces, mini candy bars, or non-food items like homemade putty or slime, play jewelry, or coins. If you are worried about food allergies, you can opt for non-candy items or even use allergy-friendly candy.

What jobs can younger kids do for this craft?
Because we use hot glue and spray paint, this craft might not be the best for children under 10 years old. Adults can spray paint the foam balls beforehand and assist with the hot glue if needed. If small kids want to help, they can twist the pipe cleaners to make the spider legs. You can also use a different type of glue that is safer for little ones to handle, but it will take longer to dry.
Craft Variations
- Try cutting two triangles out of white paper and gluing them under the eyes to make fangs.
- Acrylic paint can be used instead of spray paint. Acrylic paint with a paintbrush is a friendlier task for young kids, but use gloves and expect a little bit of a mess.
- You can use black pom poms instead of the styrofoam balls if you can find the right sizes.
- Tacky glue or craft glue can be used in place of hot glue, but it will not be as strong of a bond and take longer to dry.
Tips
- Kids may need help spray painting and using the hot glue gun.
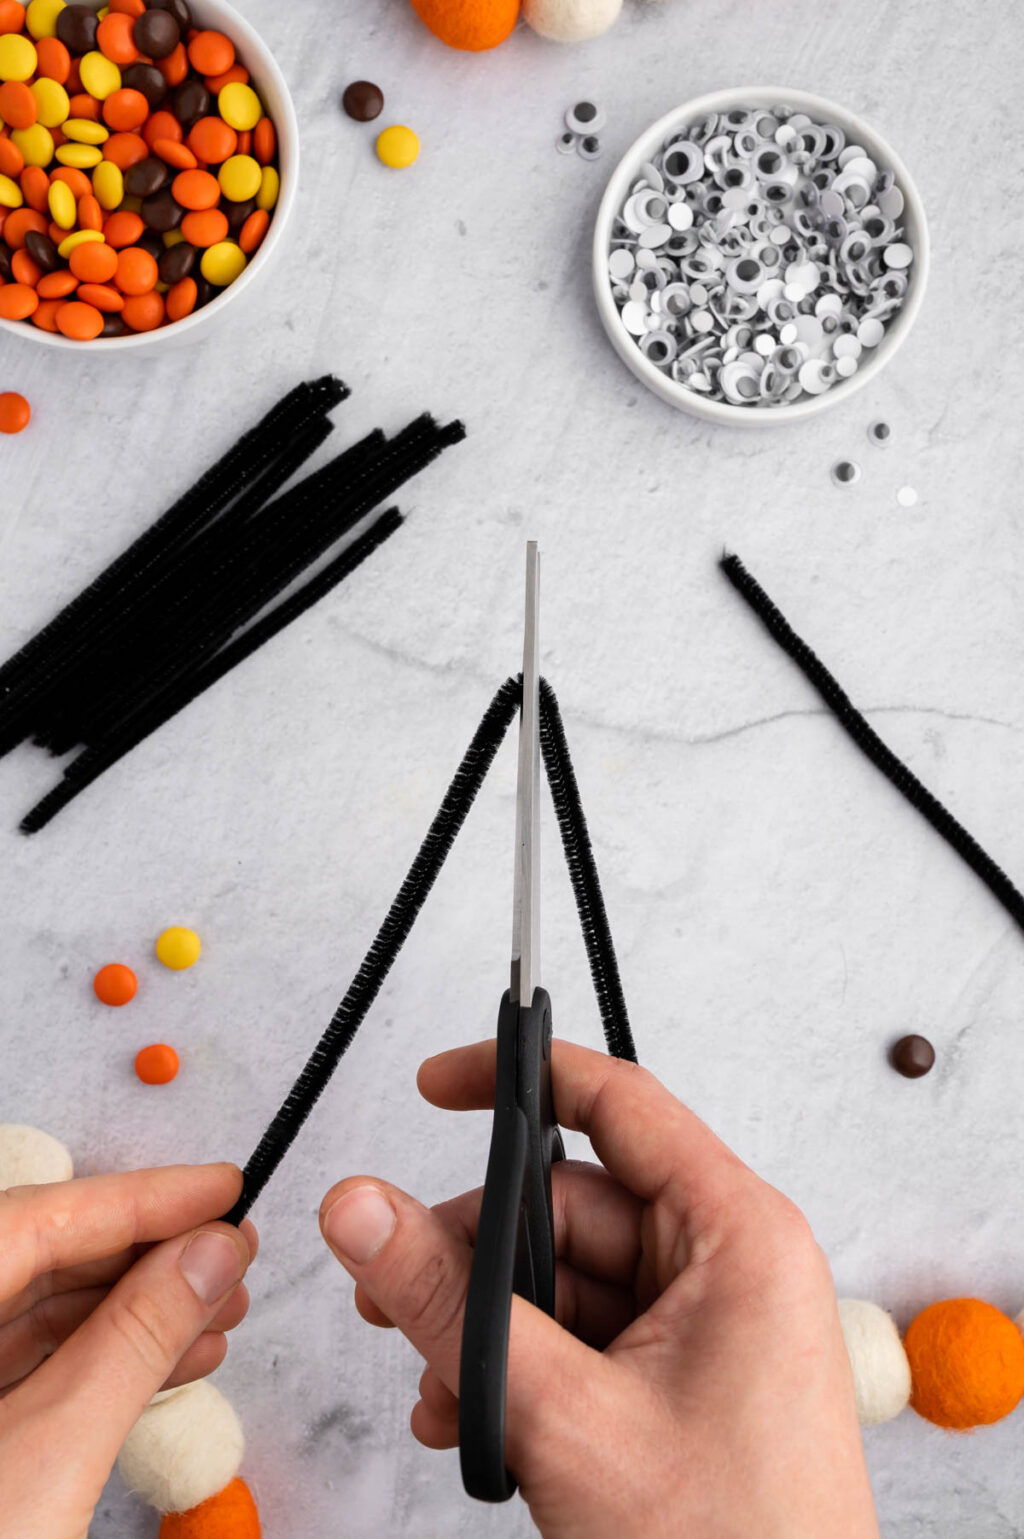
- Bend the pipe cleaners in half and cut right on the bend when making the spider legs so that they are an even length.
- If kids are helping paint, give them a paint smock or apron to avoid ruining clothes.

How to Make Spider Treat Containers
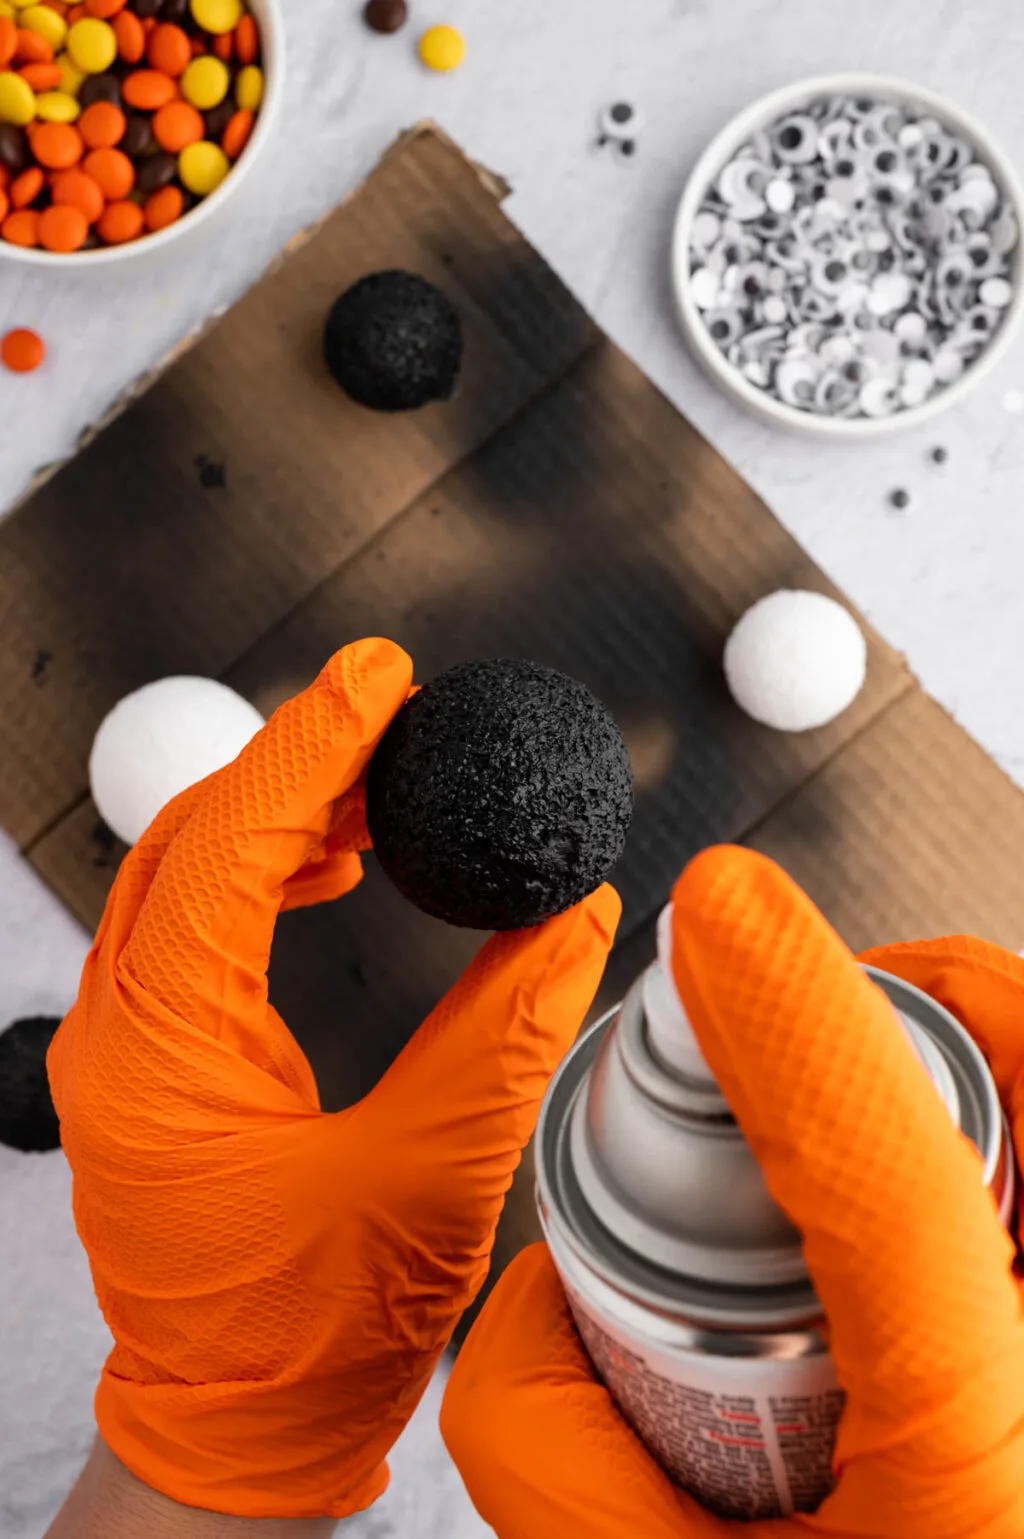
Deconstruct a cardboard box, flattening it out and laying the cardboard down outside in the grass or another working area. The larger area you cover with cardboard the more success you will have keeping the mess contained while spray painting.
Wearing gloves, place the foam balls on the cardboard. Shake the spray paint vigorously and then spray the foam balls until they are fully covered, turning as needed. Once a foam ball is fully painted move it to the side or transfer it to a separate paper plate. Avoid leaving it directly in a puddle of spray paint because it will stick to the cardboard while drying. Once all the balls have been painted allow them to dry, for about 20 minutes. Move the balls around slightly at least once during the drying process to ensure they do not stick to the surface of the cardboard.

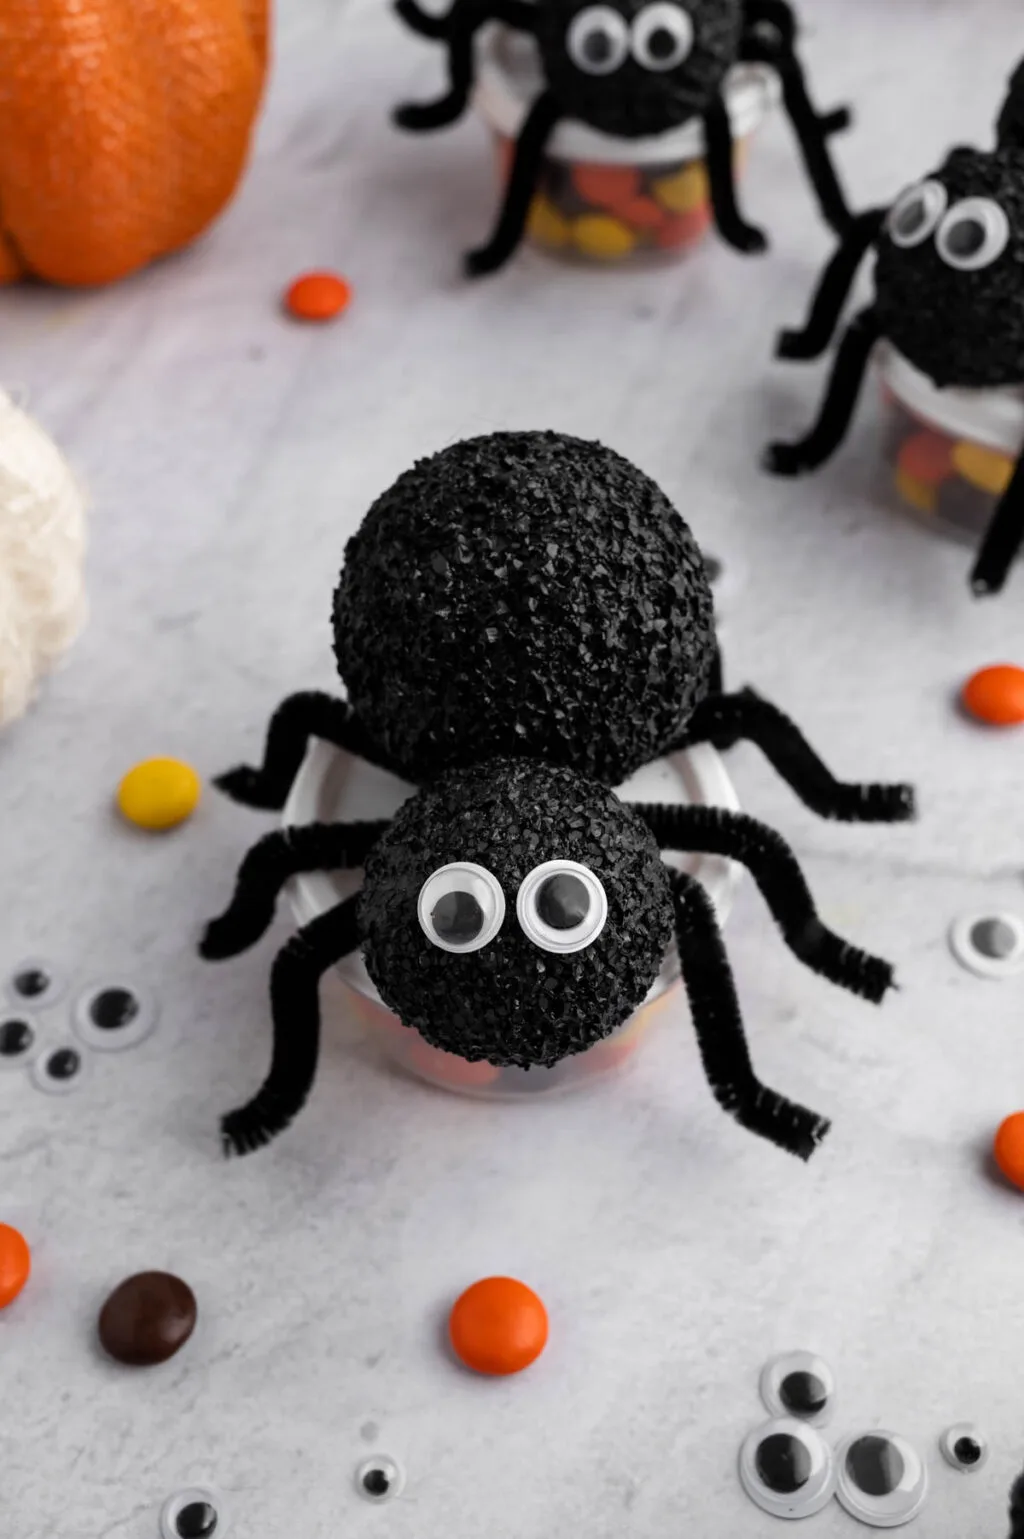
While the spray paint is drying, cut the pipe cleaners in half. For 1 spider, make a plus sign with 2 half pipe cleaners twisting at the center where the pipe cleaners overlap. Repeat with 2 more half pipe cleaners, twisting them around the center where the original pipe cleaners meet, making 8 legs.

At the bottom of each leg make a small bend (to be the foot), and a bend in the middle of each leg (for the knee).

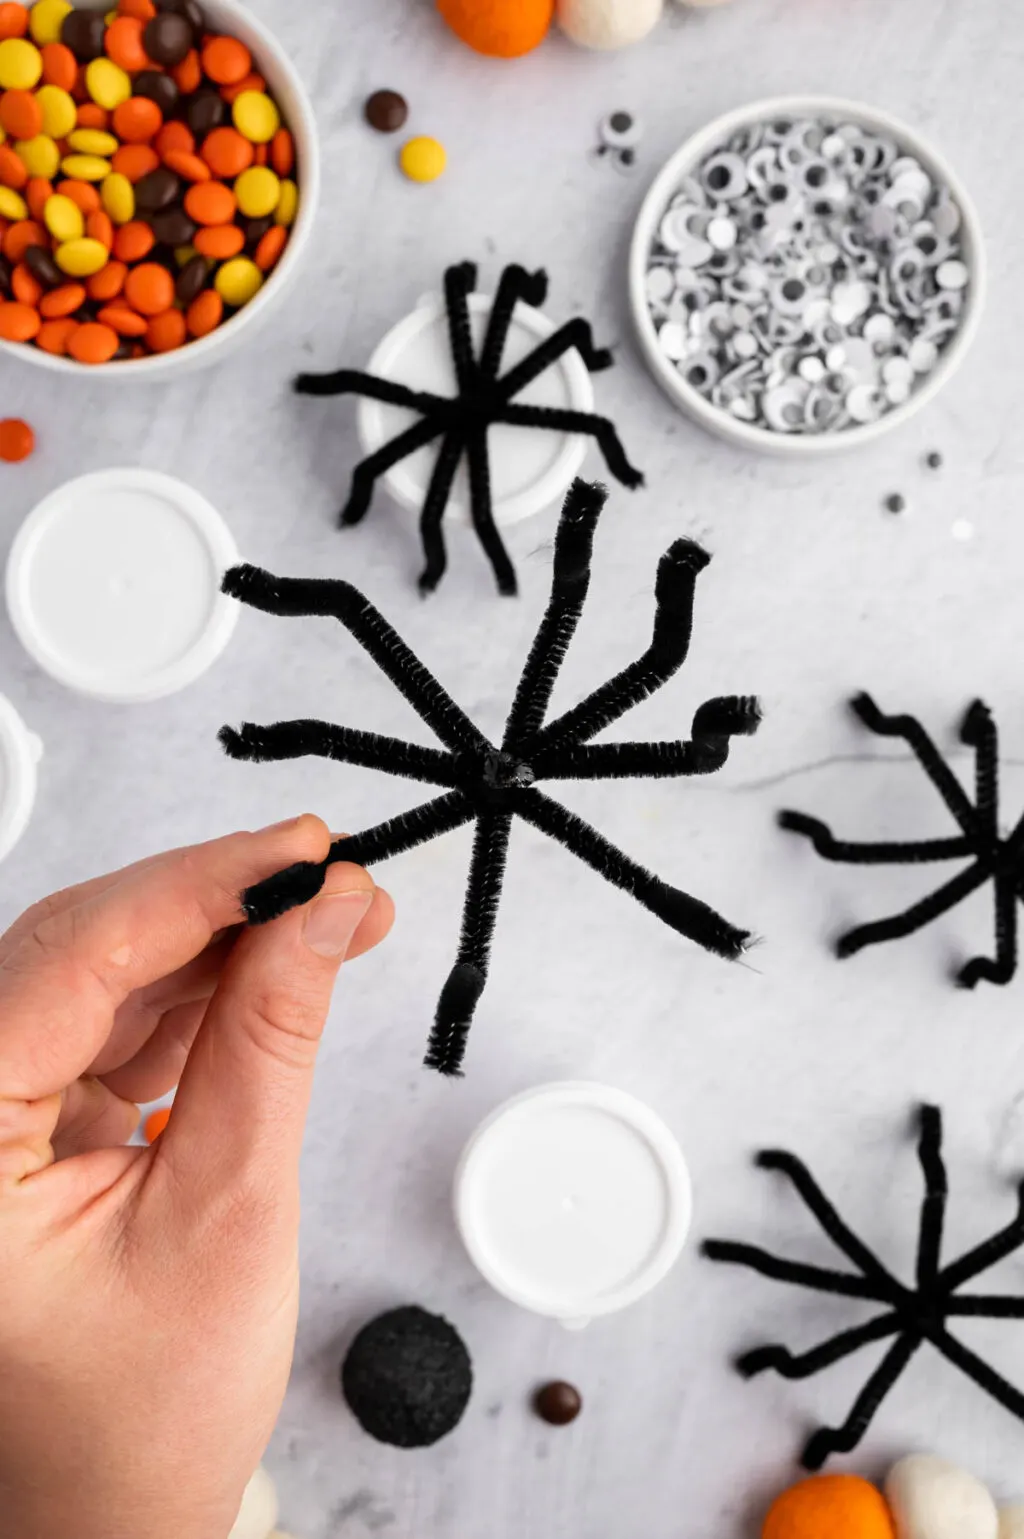
Glue the center point where the legs meet to the lid of the treat jar with hot glue.

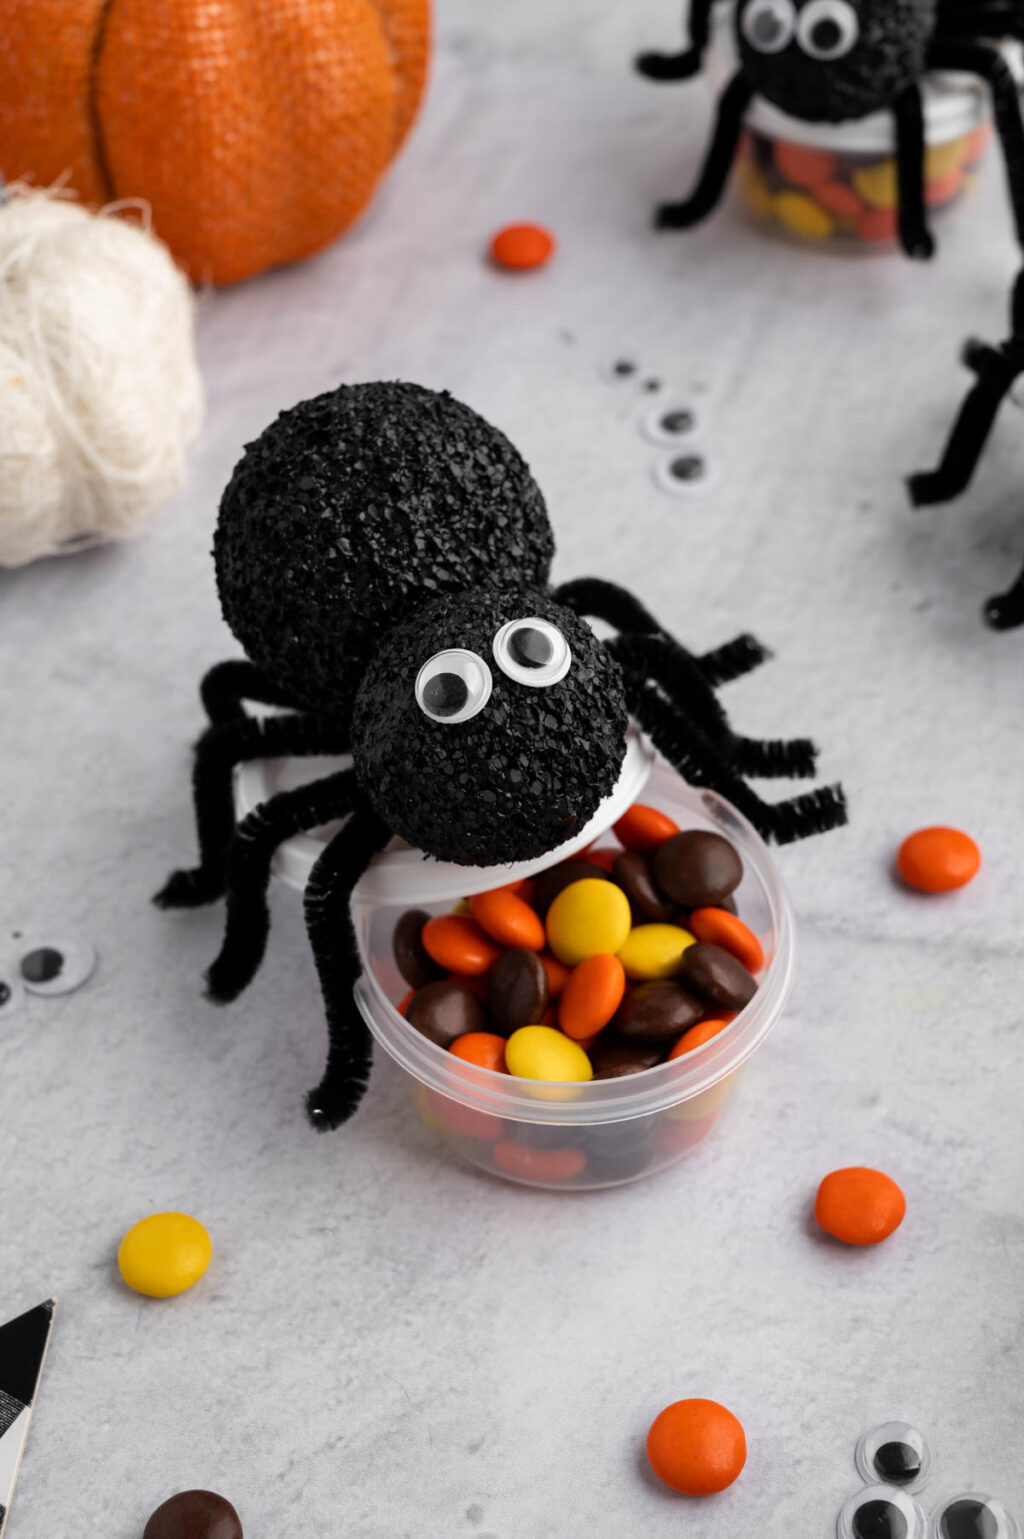
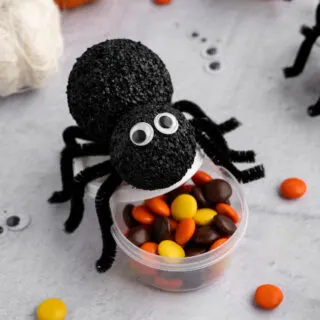
Glue one smaller and one larger painted foam ball together with a small dot of hot glue creating the spider body.

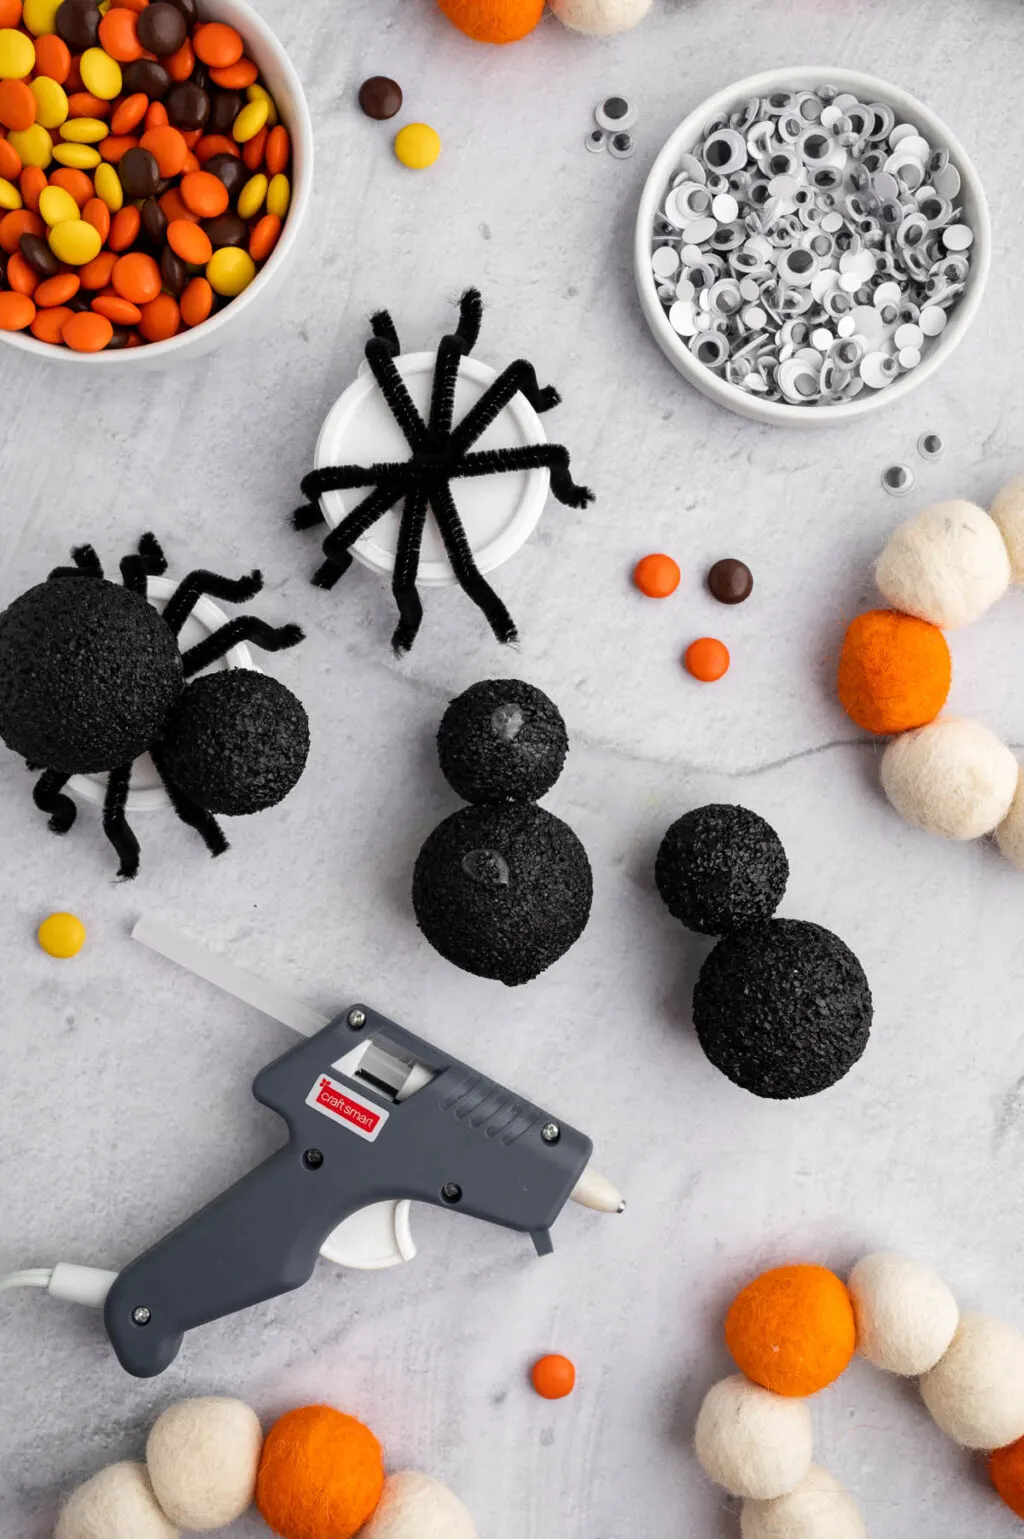
Attach the body to the top of the legs using hot glue. Place a dot of glue on the larger part of the spider body and the smaller part so that there are two points of contact with the container lid, making it more secure.
Glue two eyes to the smaller foam ball.

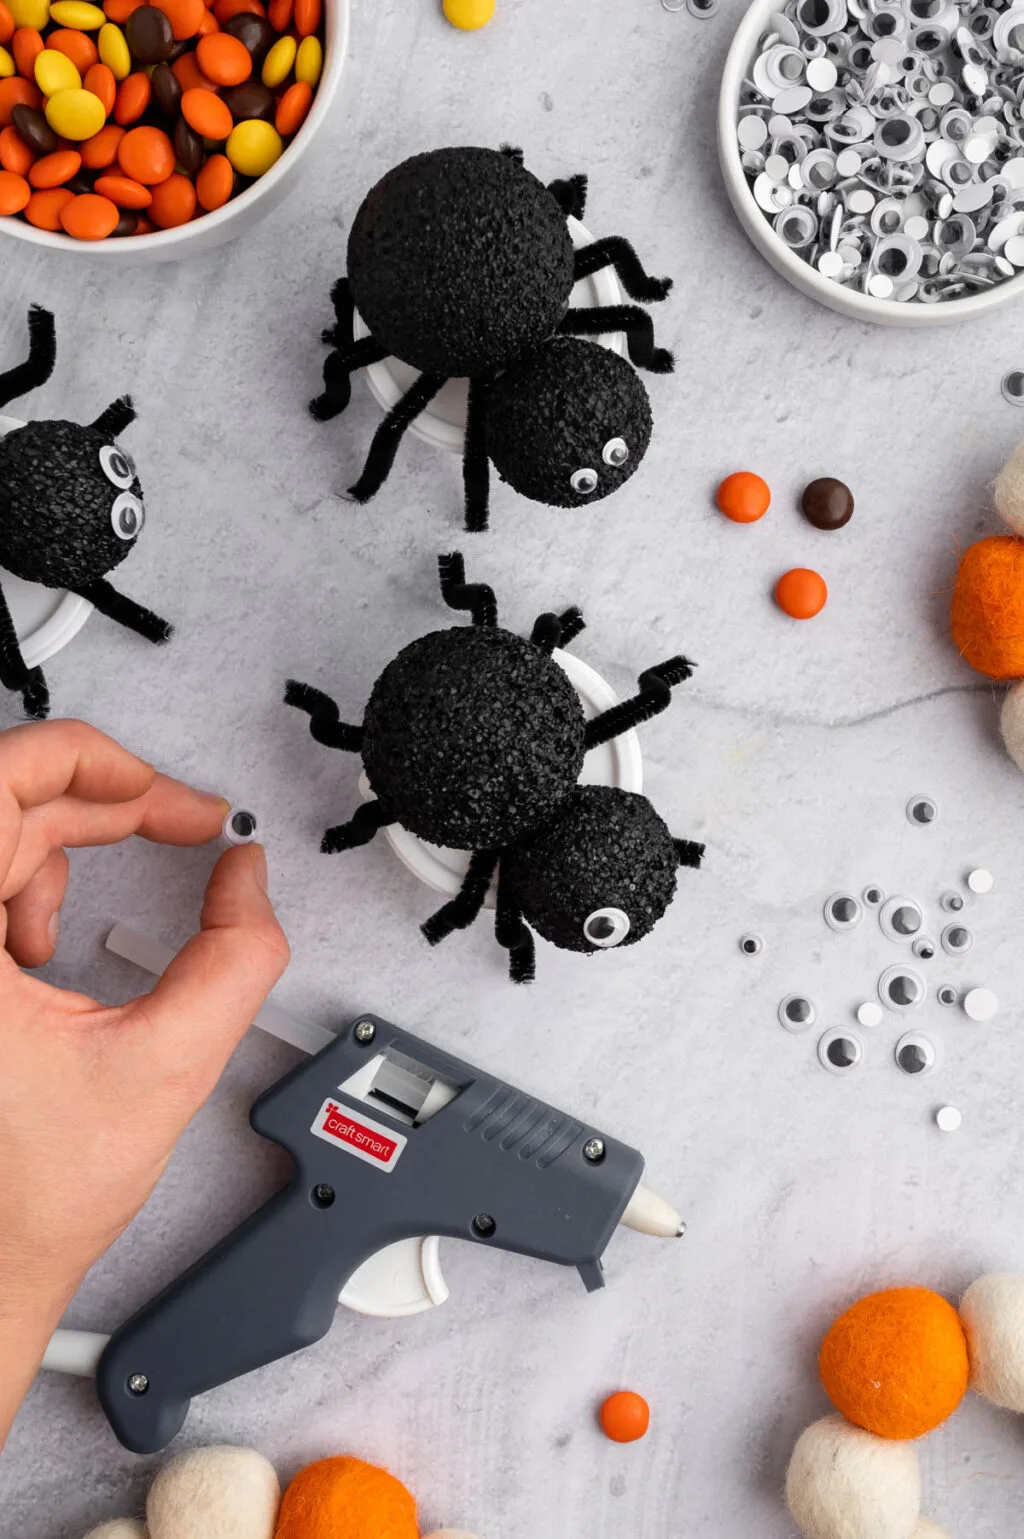
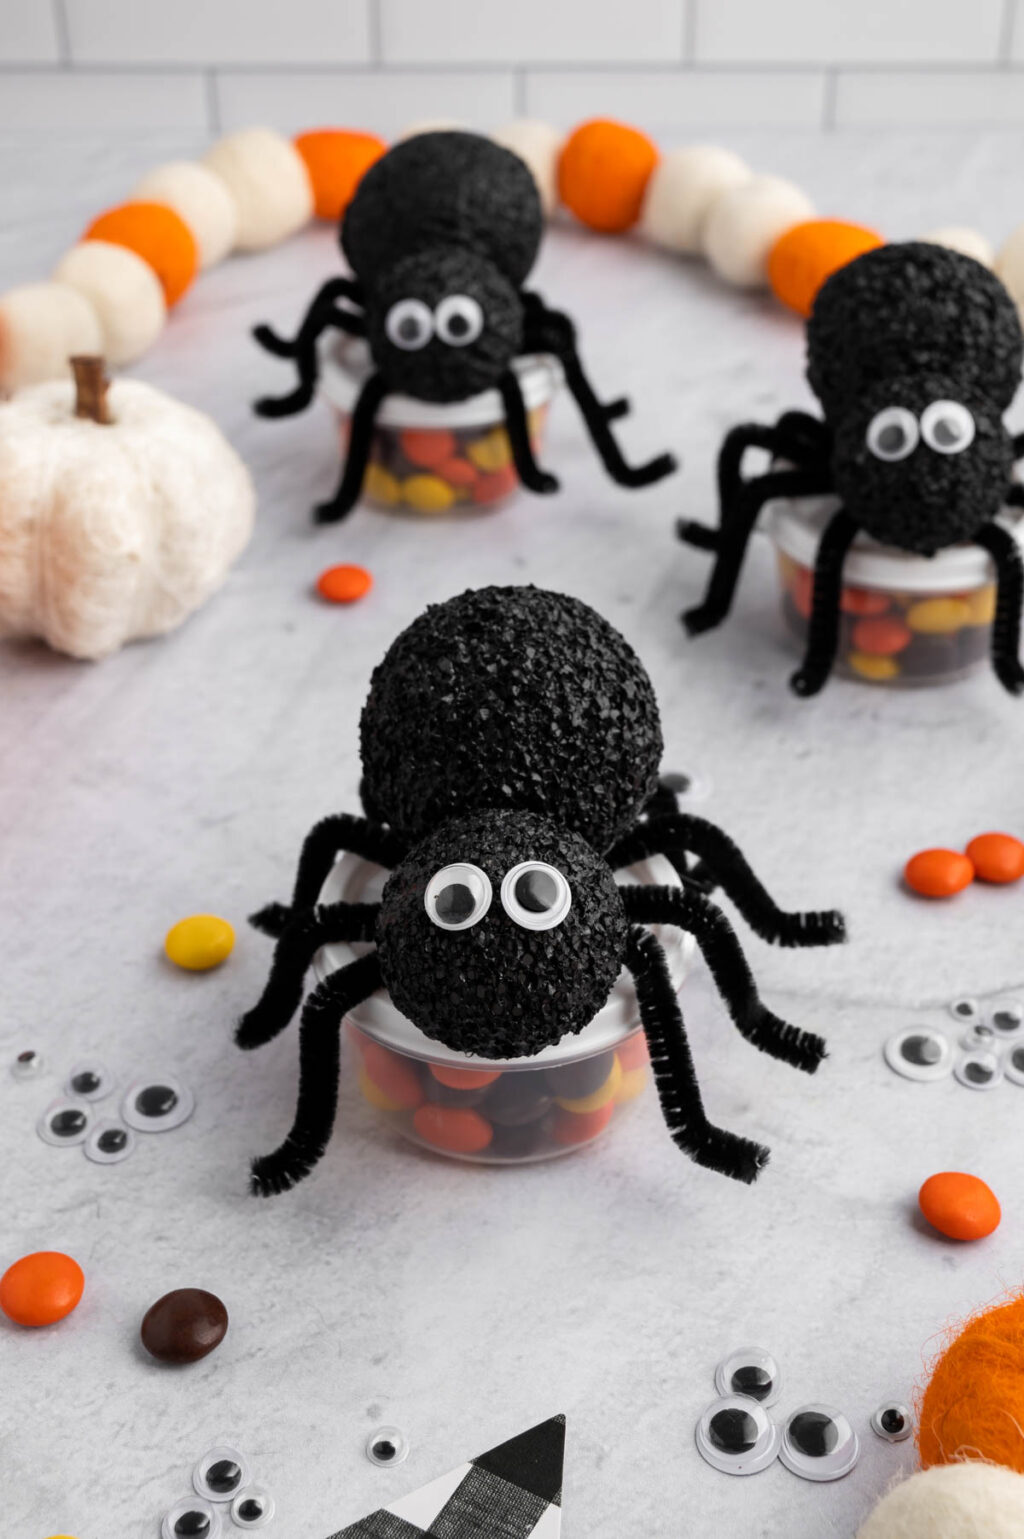
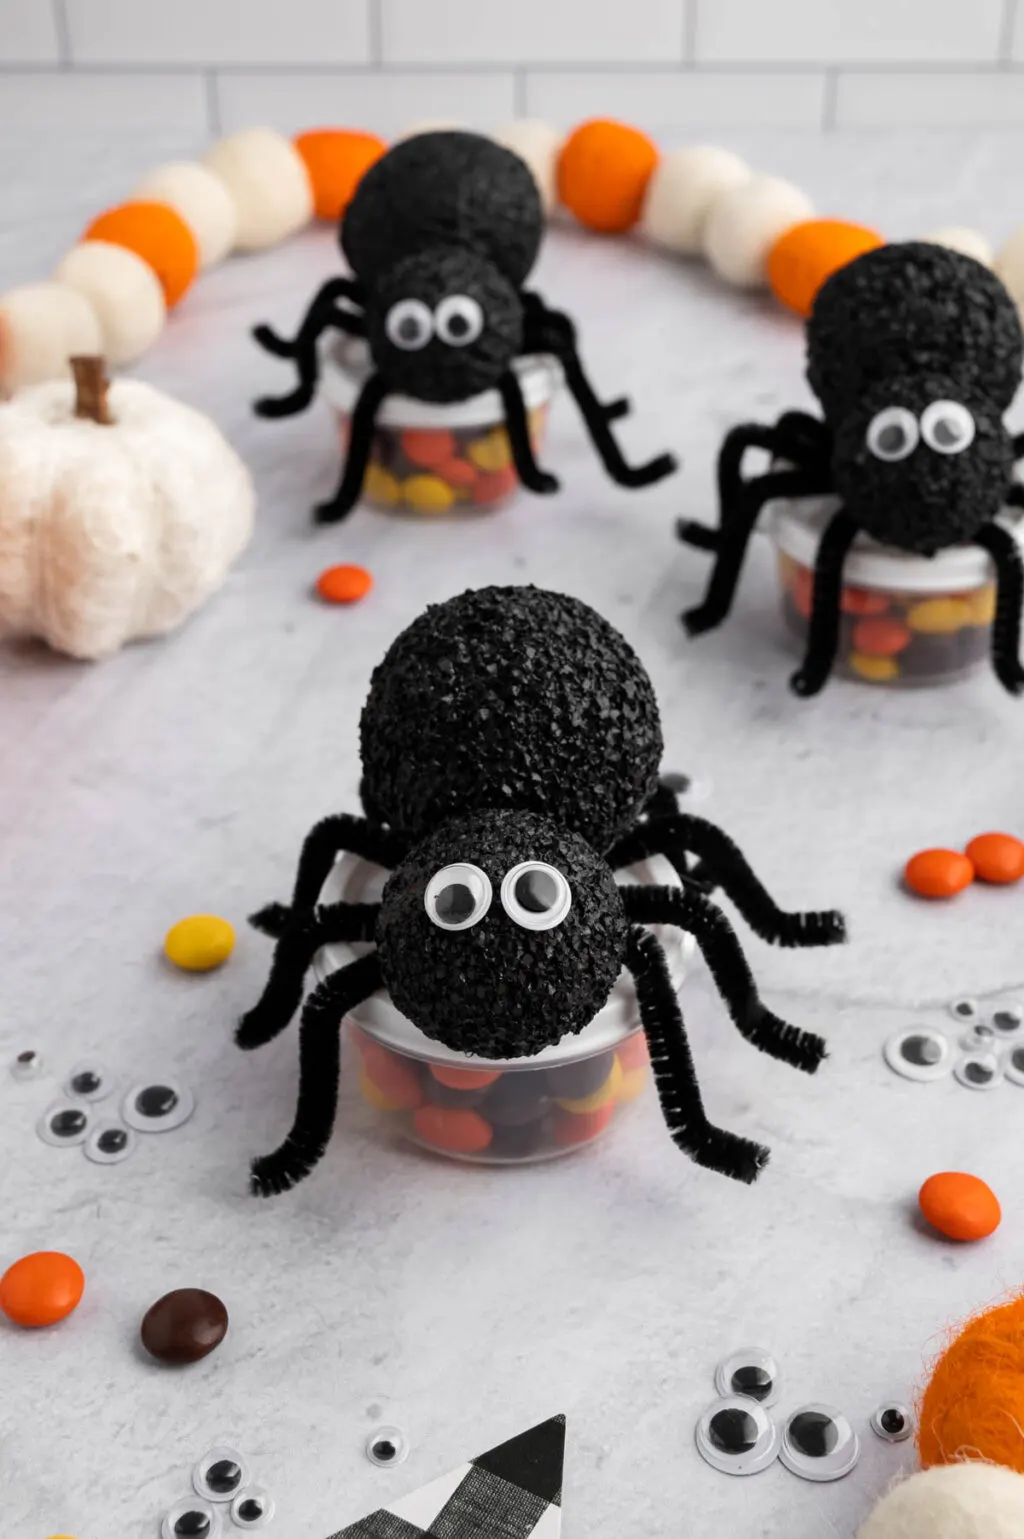
Fill the containers with small candies and close the lid.
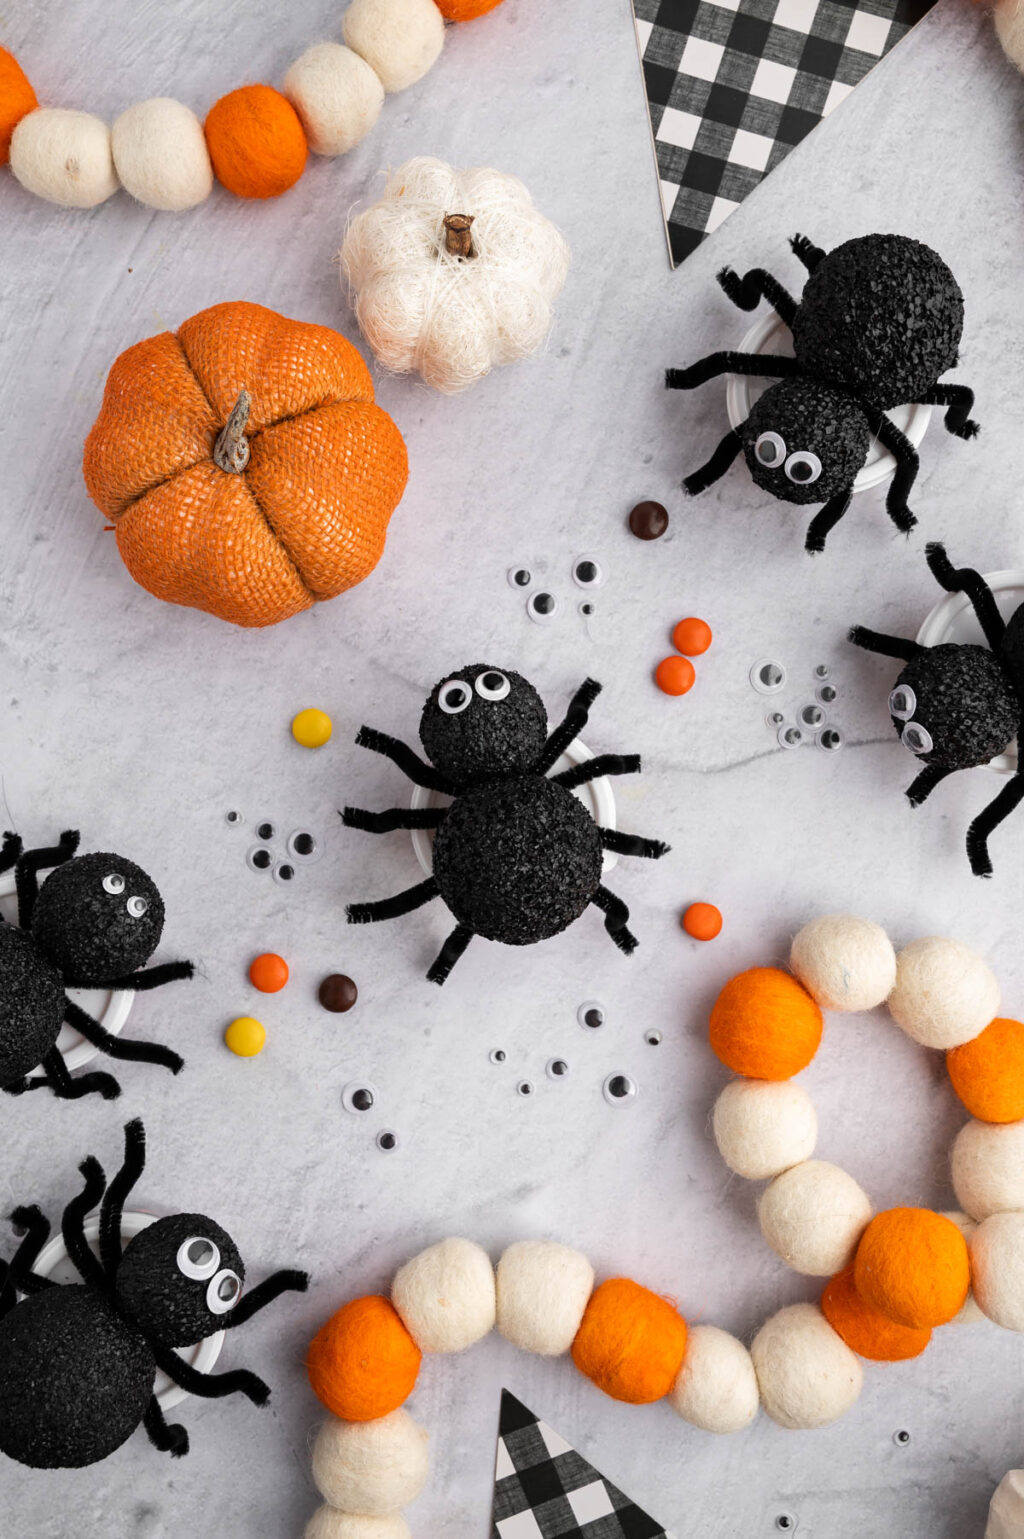
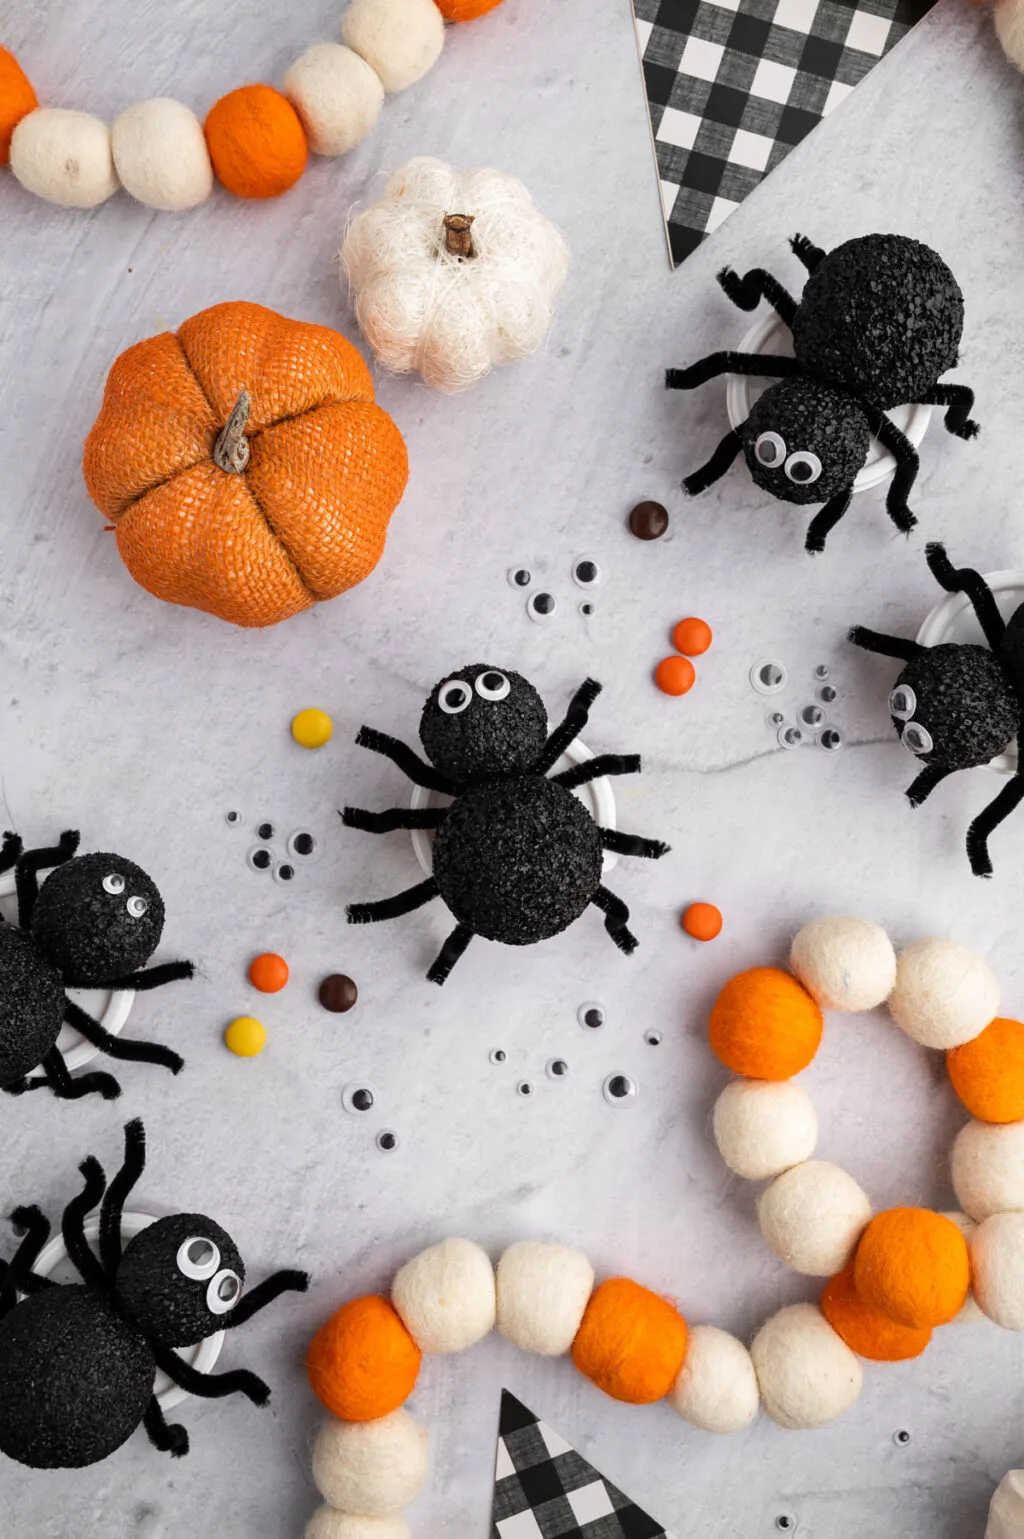
Pass them out to trick or treaters or bring them to a classroom Halloween party!

Spider Treat Containers
Materials
- Gloves
- Cardboard box to spray paint on
- Black flat or matte spray paint
- Scissors
- Glue gun
- Glue sticks
- Small candies like Halloween M&M’s
- Small treat containers with lids
- Googly eyes
- Medium floral foam balls
- Small floral foam balls
- 12- inch black pipe cleaners or chenille stems
Instructions
- Deconstruct a cardboard box, flattening it out and laying the cardboard down outside in the grass or another working area. The larger area you cover with cardboard the more success you will have keeping the mess contained while spray painting.
- Wearing gloves, place the foam balls on the cardboard. Shake the spray paint vigorously and then spray the foam balls until they are fully covered, turning as needed. Once a foam ball is fully painted move it to the side or transfer it to a separate paper plate. Avoid leaving it directly in a puddle of spray paint because it will stick to the cardboard while drying. Once all the balls have been painted allow them to dry, for about 20 minutes. Move the balls around slightly at least once during the drying process to ensure they do not stick to the surface of the cardboard.
- While the spray paint is drying, cut the pipe cleaners in half. For 1 spider, make a plus sign with 2 half pipe cleaners twisting at the center where the pipe cleaners overlap. Repeat with 2 more half pipe cleaners, twisting them around the center where the original pipe cleaners meet, making 8 legs.
- At the bottom of each leg make a small bend (to be the foot), and a bend in the middle of each leg (for the knee).
- Glue the center point where the legs meet to the lid of the treat jar with hot glue.
- Glue one smaller and one larger painted foam ball together with a small dot of hot glue creating the spider body.
- Attach the body to the top of the legs using hot glue. Place a dot of glue on the larger part of the spider body and the smaller part so that there are two points of contact with the container lid, making it more secure.
- Glue two eyes to the smaller foam ball.
- Fill the containers with small candies and close the lid.
- Pass them out to trick or treaters or bring them to a classroom Halloween party!