How to Cut A Hot Chocolate Bomb Mold
Materials
- Your hot chocolate bomb mold
- Scissors
Instructions
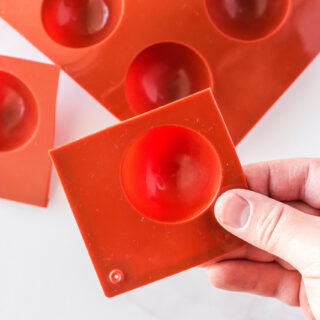
- Start by carefully cutting off two of the cavities of your silicone mold ensuring you don't get too close to any mold (it will cause them to be lopsided or uneven when you use them for chocolate).
- Continue that step above until all of your silicone mold cavities are separated.
- Finally, place each mold onto a flat surface and see if they sit evenly upright. If not, cut off any excess silicone on the sides until you can set it down and it will set upright on it's own (so it's leveled). Be careful not to cut too much of the sides off.
- Once cut, your molds are ready to be used!
- Continue filling these by spooning about 1 tablespoon of melted chocolate or melted candy melts into the bottom. Then use your hand to swirl the chocolate around the sides and set upright and allow to harden.
- I place my molds onto a cookie sheet when placing them in the fridge.
- Hopefully this helps show you how to cut your silicone hot chocolate bomb mold!
Did you try this project?Mention @simplisticallyliving or tag #simplisticallyliving!