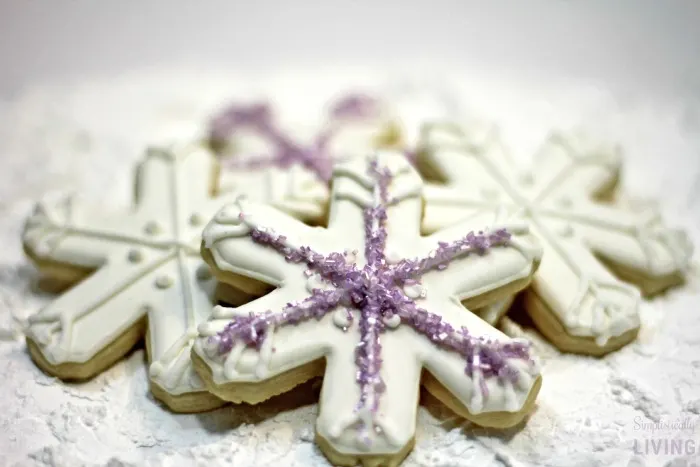
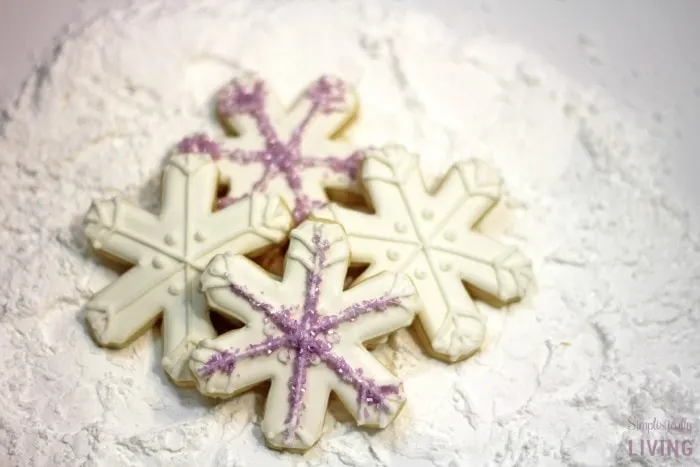
Snow is falling (or it will be soon) so celebrate the holidays with some Homemade Snowflake Sugar Cookies that truly resemble the beauty of them! These are quite easy to make and perfect beginners who haven’t worked with royal icing before.

Supplies Needed for Snowflake Sugar Cookies:
For Cookies:
- 2 1/2 Cup Flour
- 1 Teaspoon Baking Soda
- 1 Teaspoon Cream of Tartar
- 1 1/2 Cup Powdered Sugar
- 1 Egg
- 1 Teaspoon Vanilla
- 1 Cup Unsalted Sweet Cream Butter, Softened
- Snowflake Cookie Cutter
- Purple Sugar Crystals
For Royal Icing:
- 2 Egg Whites
- 1 Cup Powdered Sugar
1/2 Teaspoon Cream of Tartar - 1 Teaspoon of Vanilla Extract
- Purple Gel Food Coloring
- #2 Icing Tip
- Pastry Bags

How to Make Homemade Snowflake Sugar Cookies:
Cookie Directions:
- Cream butter, sugar, vanilla and egg in a mixing bowl until well combined.
- In another small bowl, add the dry ingredients and mix until combined.
- Gradually pour in dry ingredients into the wet ingredients bowl and mix until well combined.
- Once all ingredients are mixed and a dough ball has formed, place dough into a ziplock bag or in a bowl with foil to place on top. (if still sticky add in a half cup of flour and mix until a firm ball of dough forms.)
- Place dough into fridge for 2 hours so that the dough can rise. Note: it won’t double in size like bread dough.
Icing Directions:
- Separate the egg yolk from the whites. Put the egg whites into a mixing bowl and trash the rest of the egg. (You can also use egg whites in a carton and will get the same outcome).
- Add the sugar, cream of tartar and vanilla extract to the egg whites.
- Beat on medium speed for 6 minutes. Note: If the icing has a yellow color and looks like soup add in more powder sugar. (about 1 cup)
- Once the icing is done, pour it into a container that has a lid to it.
- Scoop some white icing into the bowl.
- Scoop a small amount of the white icing into piping bags that have a #2 icing tip on the bottom.
- For the white icing. add in 1-3 tablespoons of water to thin the icing out. you want it to be thick and runny, not soup like. If it is soup like add in 1/4 cup of powder sugar to thicken it. pour into a squeeze bottle
How to Decorate the Snowflake:
- Outline the cookies in the white icing and wait 1 minute before filling it in with the remaining white icing.
- Allow cookie to dry for 2 hours before adding the snowflake details.
- Using the white icing, pipe a line down the snowflake to create a X look.
- On the top of the lines create a arrow.
- Sprinkle on purple sugar crystals.
- Allow the cookies to dry from 5-10 hours before enjoying.

Want another delicious homemade cookie recipe? Check out these Star Wars TIE Fighter Cookies!

Snowflake Sugar Cookies
Snowflake Sugar Cookies
Ingredients
For The Cookies
- 2 ½ Cup Flour
- 1 teaspoon Baking Soda
- 1 teaspoon Cream of Tartar
- 1 ½ Cup Powdered Sugar
- 1 Egg
- 1 teaspoon Vanilla
- 1 Cup Unsalted Sweet Cream Butter Softened
- Snowflake Cookie Cutter
- Purple Sugar Crystals
For The Icing
- 2 Egg Whites
- 1 Cup Powdered Sugar
- ½ teaspoon Cream of Tartar
- 1 teaspoon of Vanilla Extract
- Purple Gel Food Coloring
- #2 Icing Tip
- Pastry Bags
Instructions
Cookie Directions:
- Cream butter, sugar, vanilla and egg in a mixing bowl until well combined.
- In another small bowl, add the dry ingredients and mix until combined.
- Gradually pour in dry ingredients into the wet ingredients bowl and mix until well combined.
- Once all ingredients are mixed and a dough ball has formed, place dough into a ziplock bag or in a bowl with foil to place on top. (if still sticky add in a half cup of flour and mix until a firm ball of dough forms.)
- Place dough into fridge for 2 hours so that the dough can rise. Note: it won’t double in size like bread dough.
Icing Directions:
- Separate the egg yolk from the whites. Put the egg whites into a mixing bowl and trash the rest of the egg. (You can also use egg whites in a carton and will get the same outcome).
- Add the sugar, cream of tartar and vanilla extract to the egg whites.
- Beat on medium speed for 6 minutes. Note: If the icing has a yellow color and looks like soup add in more powder sugar. (about 1 cup)
- Once the icing is done, pour it into a container that has a lid to it.
- Scoop some white icing into the bowl.
- Scoop a small amount of the white icing into piping bags that have a #2 icing tip on the bottom.
- For the white icing. add in 1-3 tablespoons of water to thin the icing out. you want it to be thick and runny, not soup like. If it is soup like add in 1/4 cup of powder sugar to thicken it. pour into a squeeze bottle
How to Decorate the Snowflake:
- Outline the cookies in the white icing and wait 1 minute before filling it in with the remaining white icing.
- Allow cookie to dry for 2 hours before adding the snowflake details.
- Using the white icing, pipe a line down the snowflake to create a X look.
- On the top of the lines create a arrow.
- Sprinkle on purple sugar crystals.
- Allow the cookies to dry from 5-10 hours before enjoying.
Nutrition information is a rough estimate only; actual values will vary based on the exact ingredients used and amount of recipe prepared.
Did you try this recipe?Mention @simplisticallyliving or tag #simplisticallyliving!

40+ Enjoyable Christmas Treats To Make With Your Household - Pecunia Way
Sunday 20th of November 2022
[…] Simplistically Dwelling‘s Snowflake Cookies are so dainty and chic. They’re nearly too fairly to eat! […]
40+ Fun Christmas Treats To Make With Your Family - Arix Corner | Amazon Affiliate Store
Saturday 20th of November 2021
[…] Simplistically Living‘s Snowflake Cookies are so dainty and elegant. They are almost too pretty to eat! […]
40+ Fun Christmas Treats To Make With Your Family – Indiatips.in
Saturday 20th of November 2021
[…] Simplistically Living‘s Snowflake Cookies are so dainty and elegant. They are almost too pretty to eat! […]
40+ Fun Christmas Treats To Make With Your Family – Kidelp Shop
Tuesday 5th of January 2021
[…] Simplistically Living‘s Snowflake Cookies are so dainty and elegant. They are almost too pretty to eat! […]
40+ Fun Christmas Treats To Make With Your Family - Toys Are Yours
Tuesday 1st of December 2020
[…] Simplistically Living‘s Snowflake Cookies are so dainty and elegant. They are almost too pretty to eat! […]