

This DIY Dollar Tree Halloween Fence will transform your home into a haunted haven. Using affordable materials from your local Dollar Tree, this is a budget-friendly way to section off your yard and outdoor Halloween decor for spooky season.

Every year we go big for Halloween and every year, I think about adding a fence that helps keep people off our lawn and on the sidewalk when visiting our house.
But the dilemma has always been, fencing isn’t cheap and cheaper options like a DIY pallet fence, is a lot of work.
So, this year, I thought long and hard and I came up with this DIY Dollar Tree Halloween Fence that ended up costing us about $120 but can be done much cheaper depending on the size of yard you are working with.
In the end, it is a great, inexpensive solution for a DIY fence that is also easy to take down and store and I’m excited to share with you how to make it.
Keep in mind, most items are from Dollar Tree but some items are not.

What You Need to Make A Dollar Tree Halloween Fence
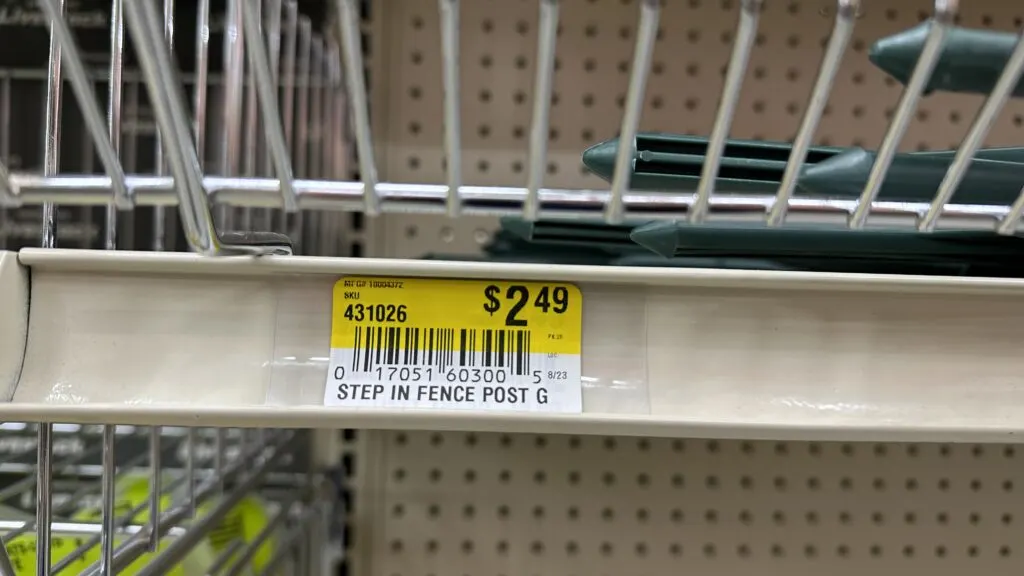
- Step in Fence Posts – As many as you need to evenly space them apart in your yard
- Dollar Tree Plastic Halloween Chains
- Black Zip Ties
- Spray Paint (if using) – We used black and silver but you can spray it any color you’d like
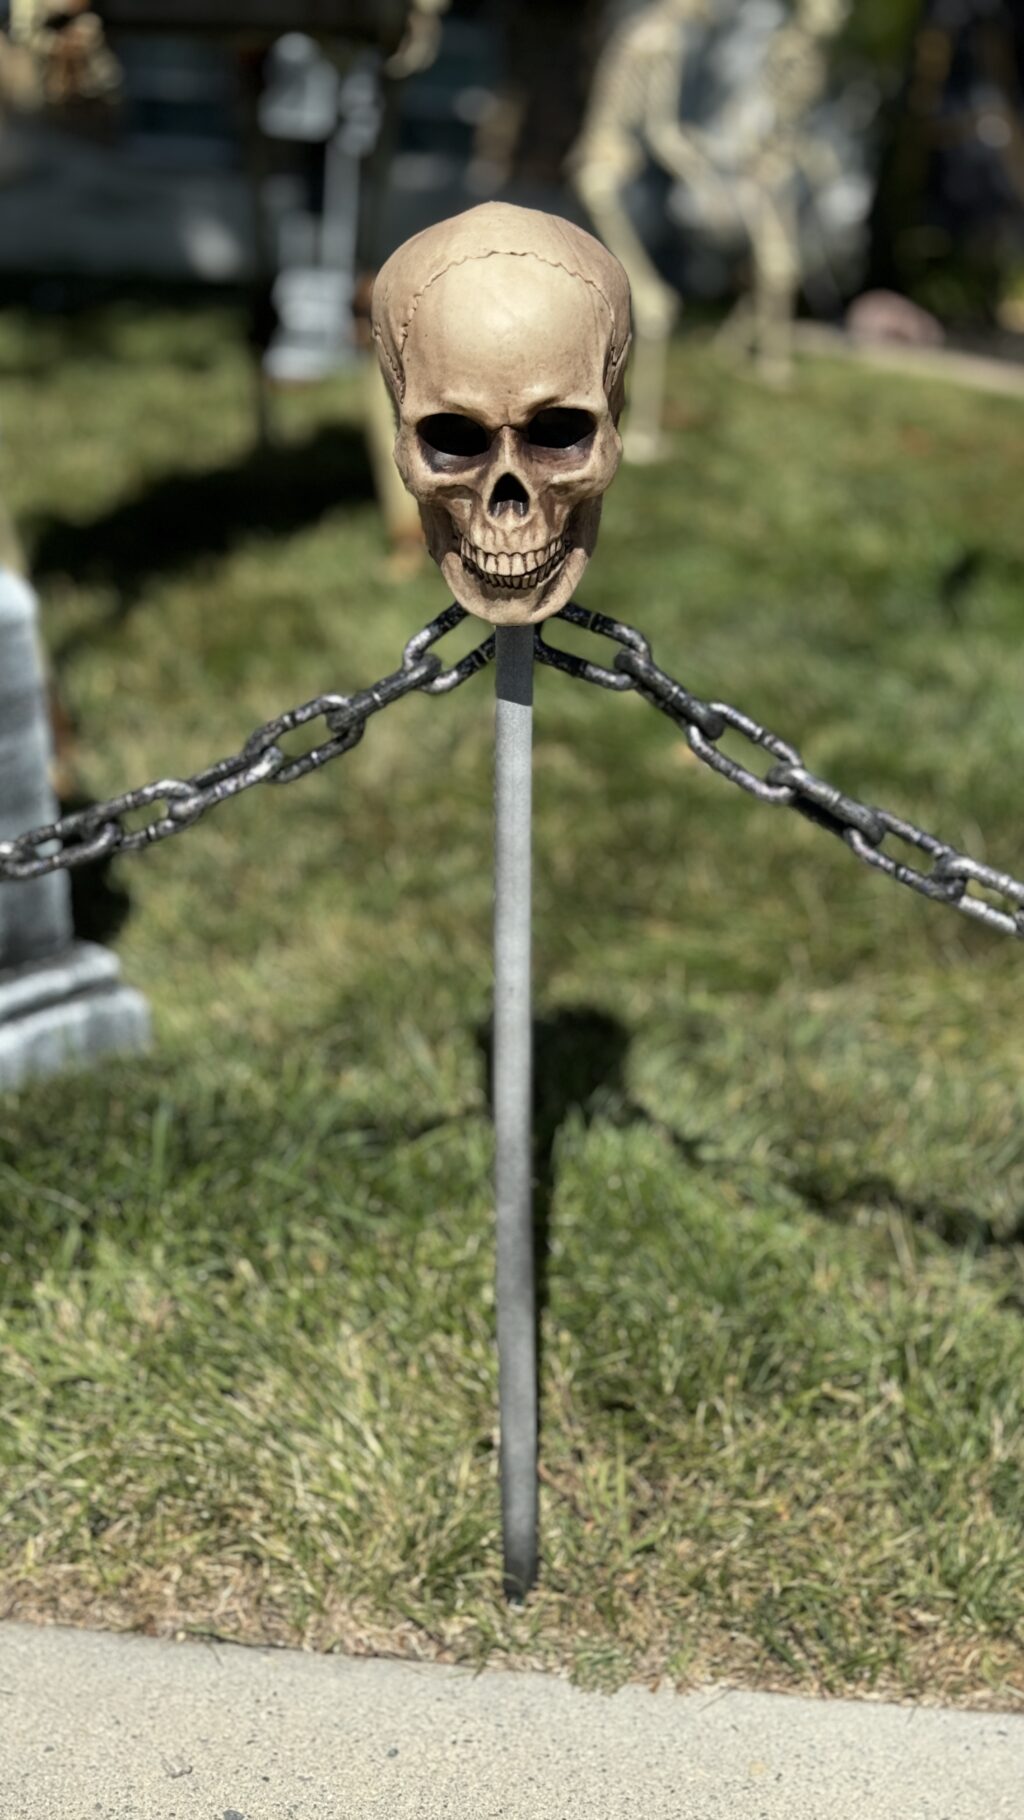
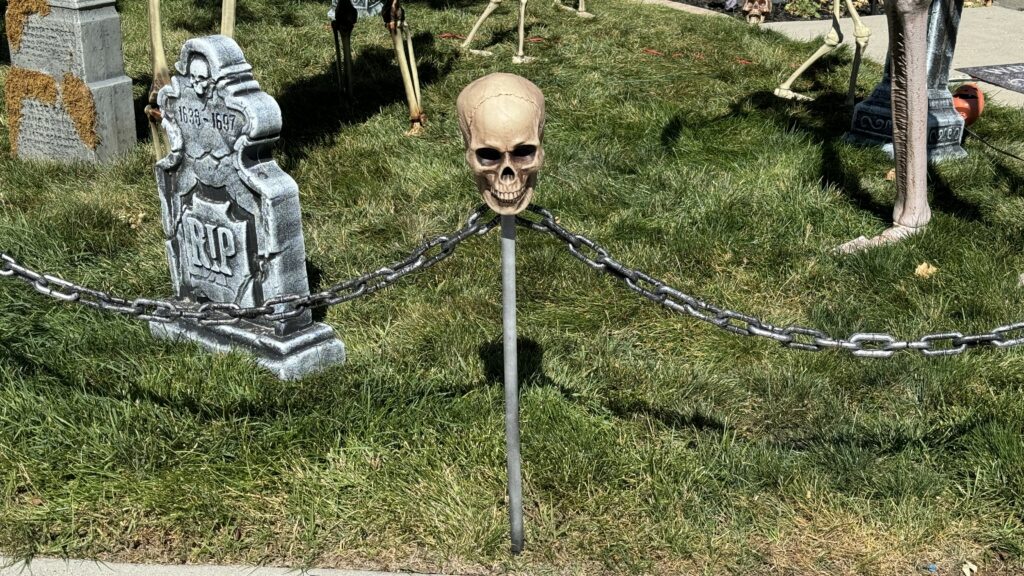
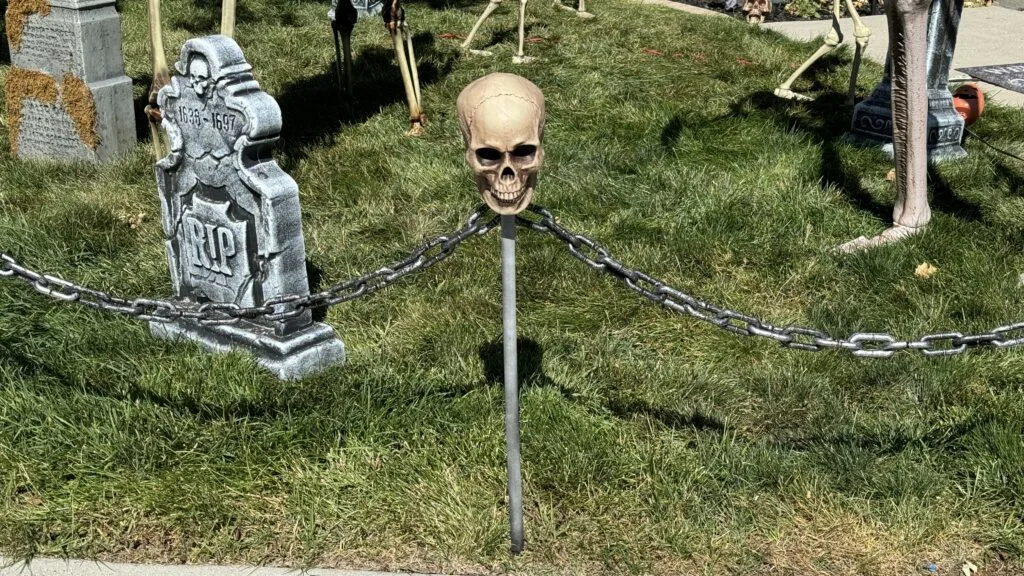
- Skulls (enough for each fence post) – Found at Dollar Tree
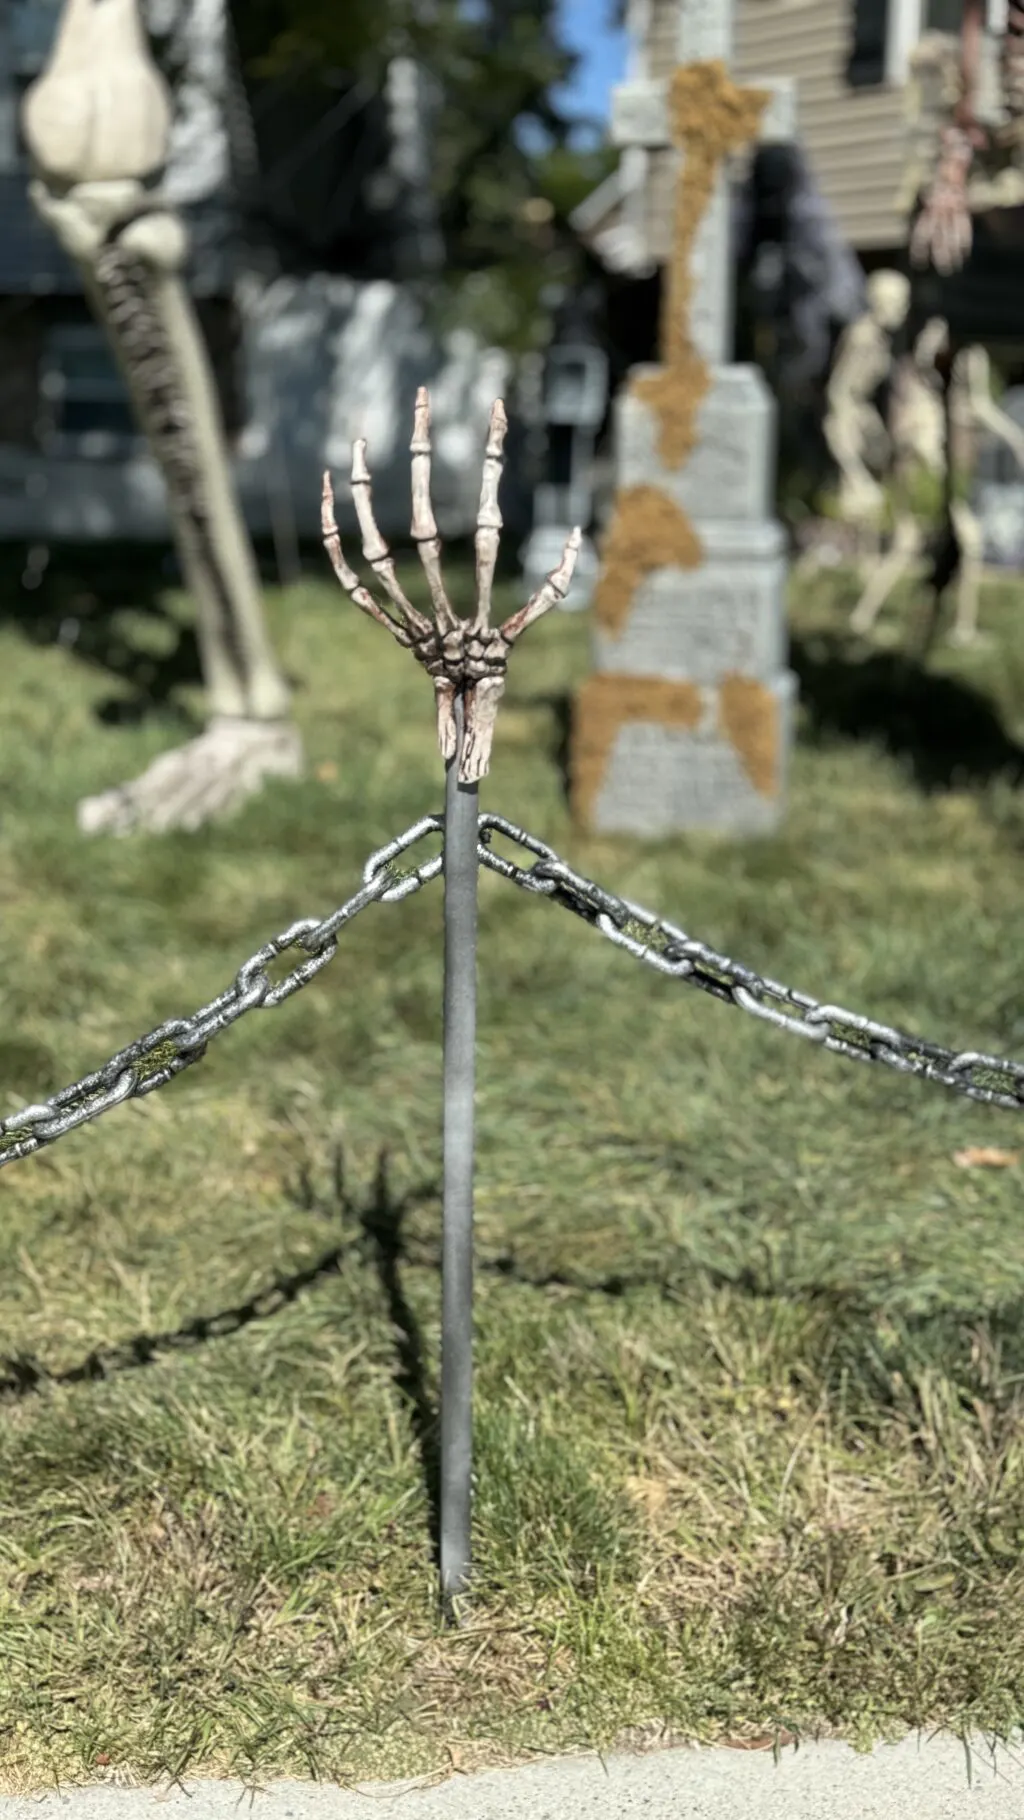
- Skeleton hands (enough for each fence post) – Found at Dollar Tree
- Wood Stain (optional but changes the look of the skulls)
- Hot Glue Gun
These were the step in fence posts we found at our local C-A-L Ranch store.

Things to Note:
- The step in fence posts come in a variety of heights, colors and some are metal versus plastic. Choose whatever fits your budget and covers the amount of area you need for your yard.
- If you can find black or grey step in fence posts, you can skip the spray paint and the cost.
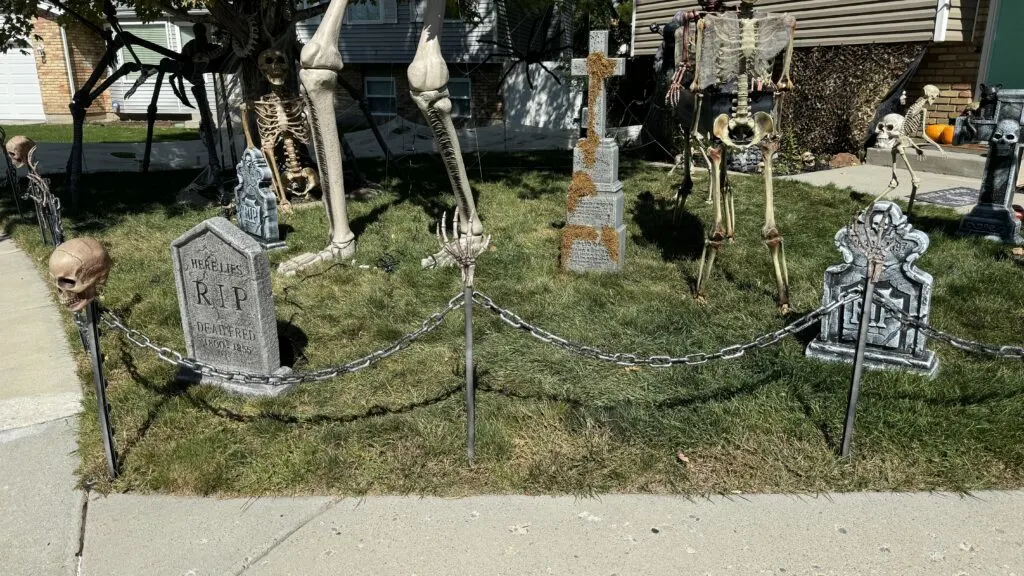
- Each chain at Dollar Tree is 40 inches in length. We spaced our fence posts out enough so 1 chain fit in between each fence post.
- We used wood stain to make the skulls and skeleton hands look weathered. We actually found a can at Home Depot for $0.50 that was made wrong.
- If you end up not using the wood stain and spray paint, you can keep the cost down.

How to Make a Dollar Tree Halloween Fence
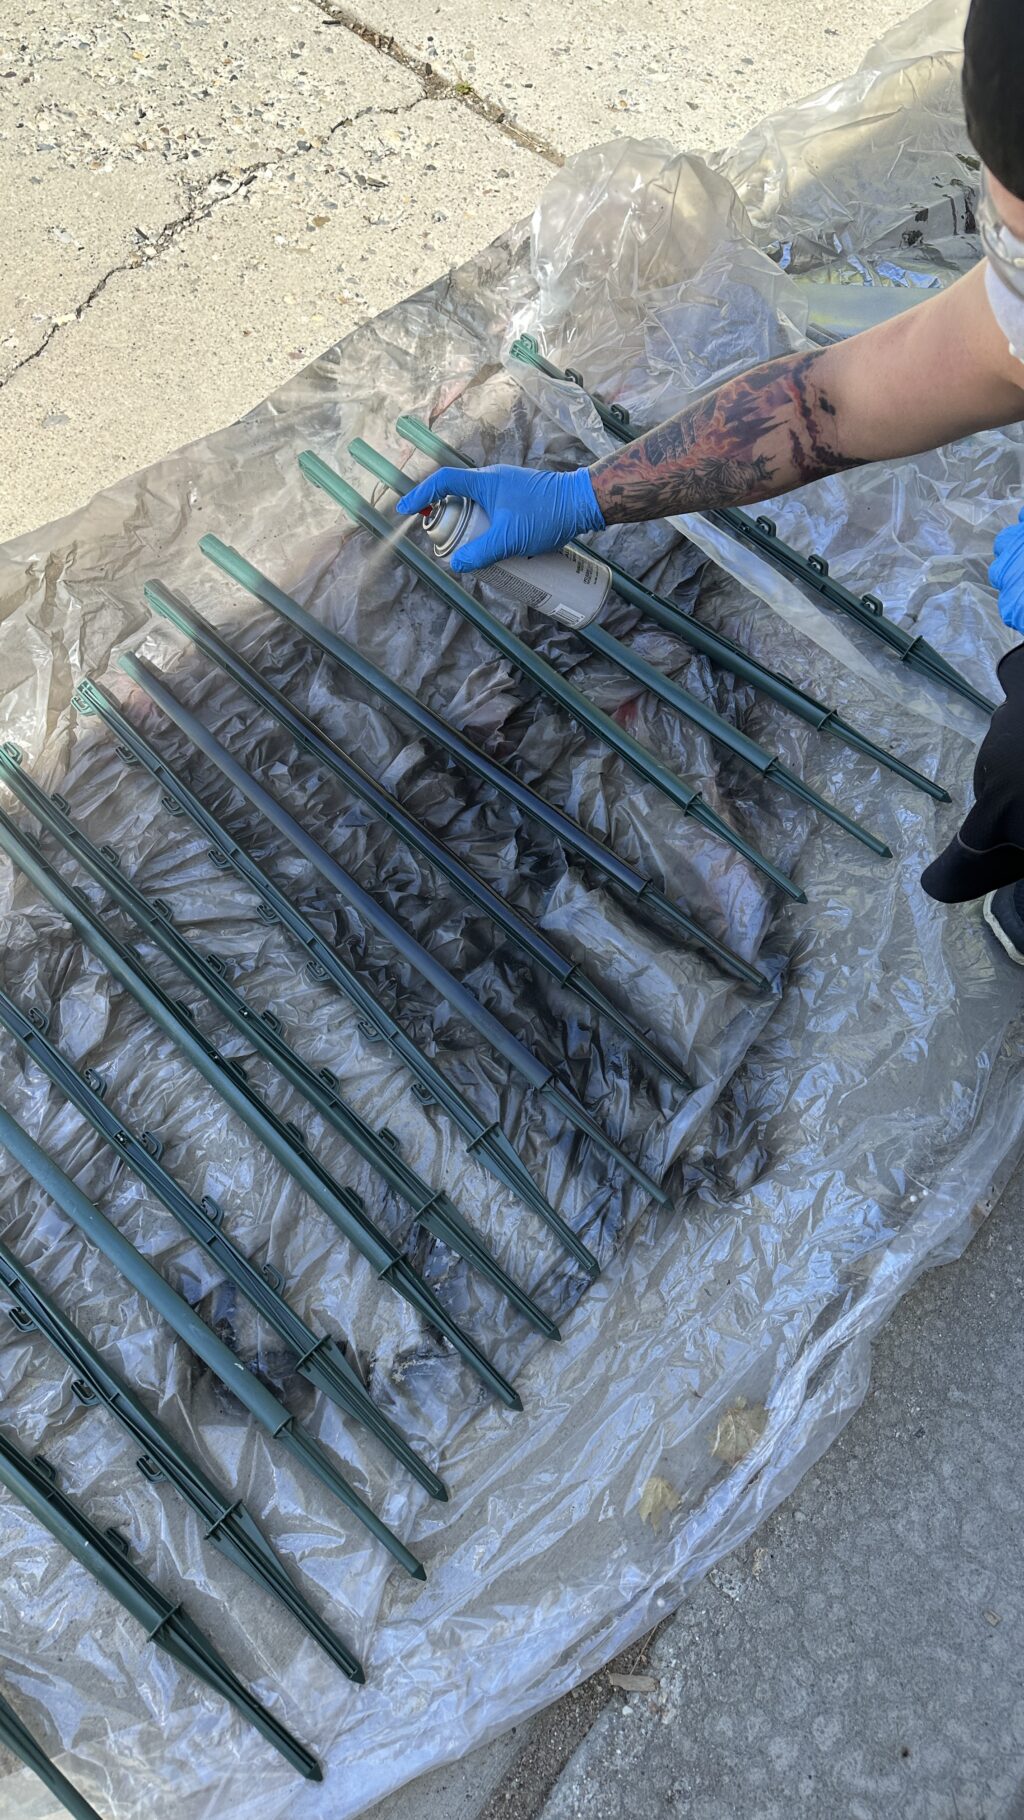
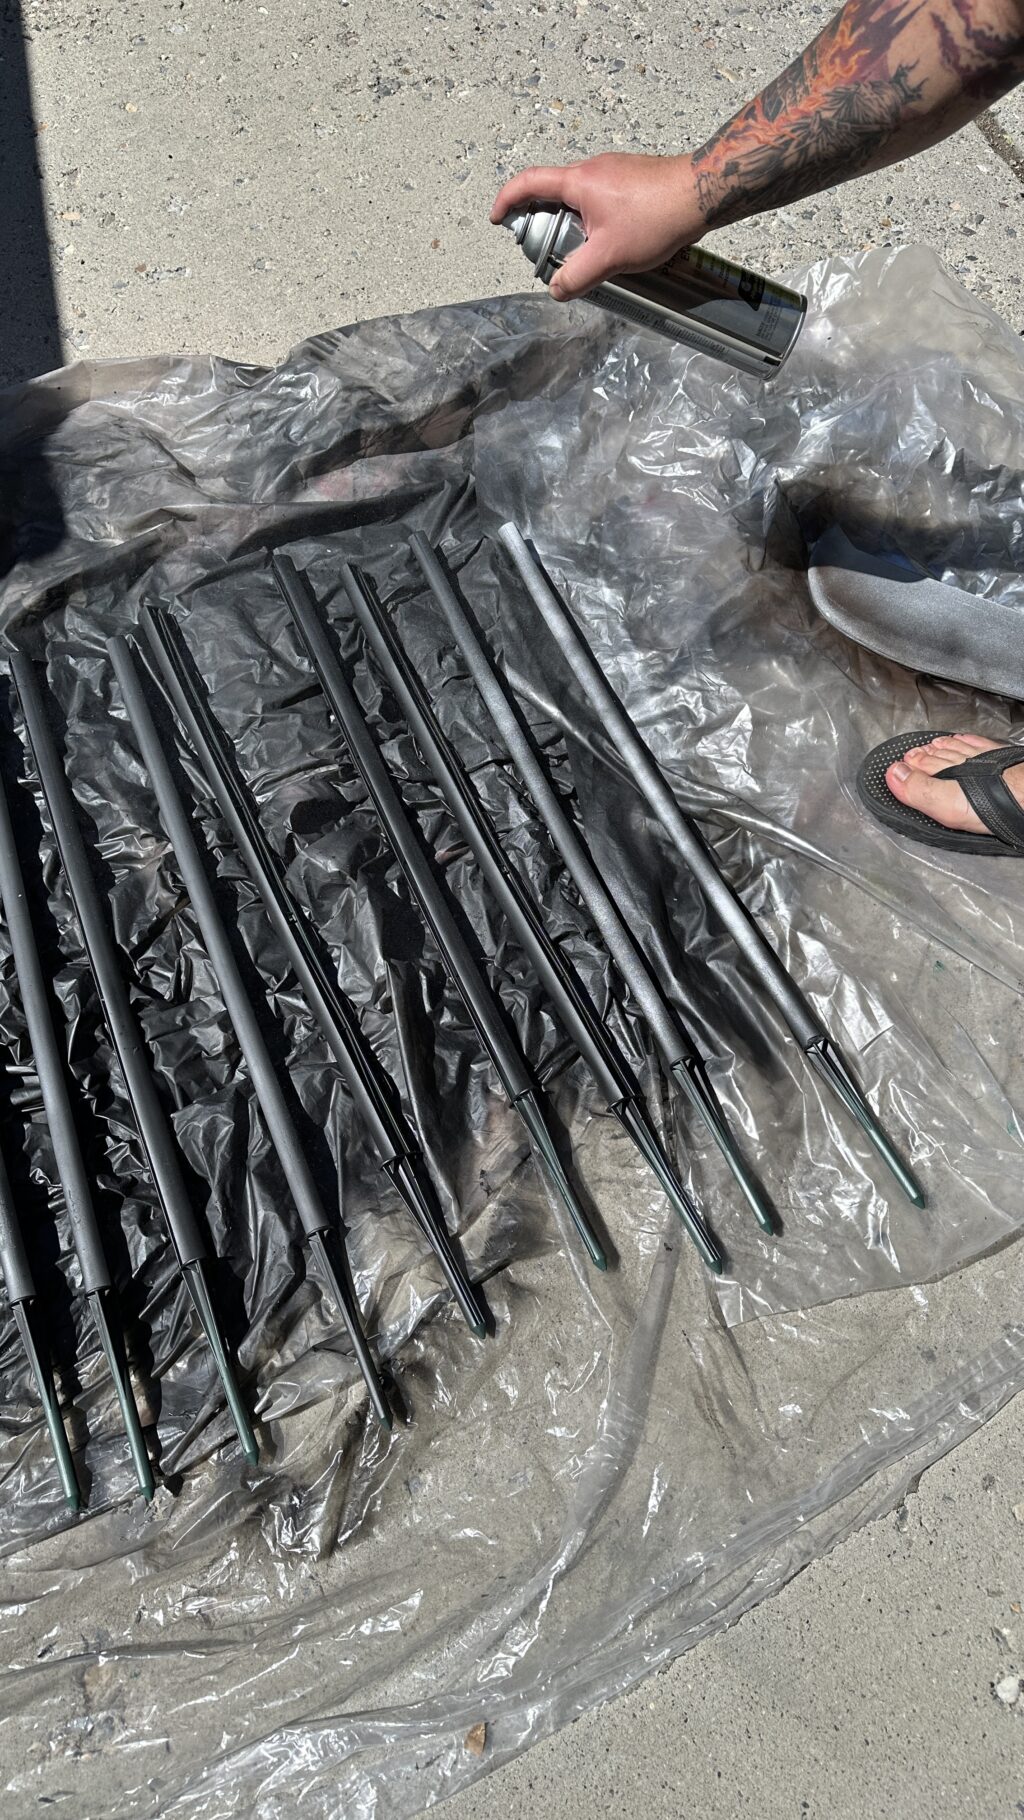
Start by covering your work area with plastic or something to keep the spray paint from getting everywhere. Once covered, begin spray painting your fence posts. Keep in mind you don’t need to spray paint the pointed tips as that will be in the ground. We first spray painted with a matte black paint then went over a little bit of silver to give it a metal look.


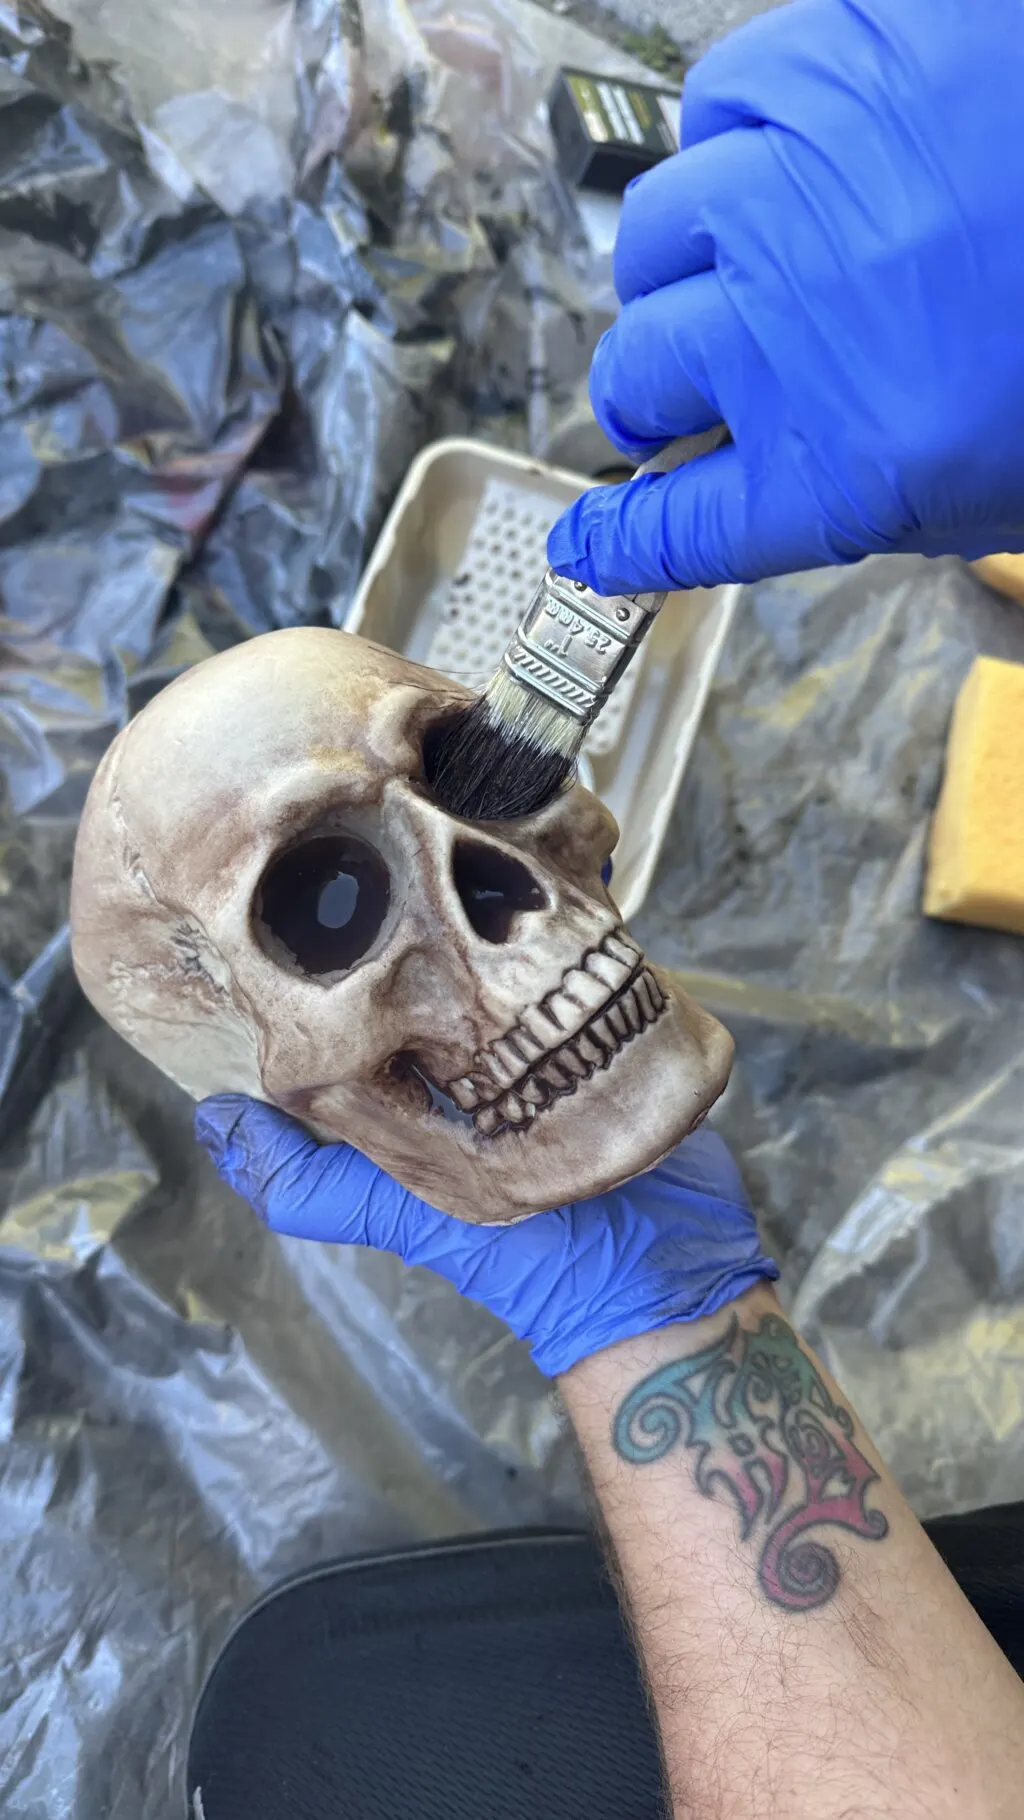
While your fence posts are drying, you can work on staining the skulls and skeleton hands if you are wanting that weathered, old look. Set aside to dry.

Once everything is dry, you can begin assembling the fence.
We started by evenly measuring out the fence posts using the chains (one chain was in between each post) but you can do this any way you’d like.
Stick the fence posts into the ground and then begin attaching the chains using zip ties. They easily attach to the notches in the back of the fence posts.

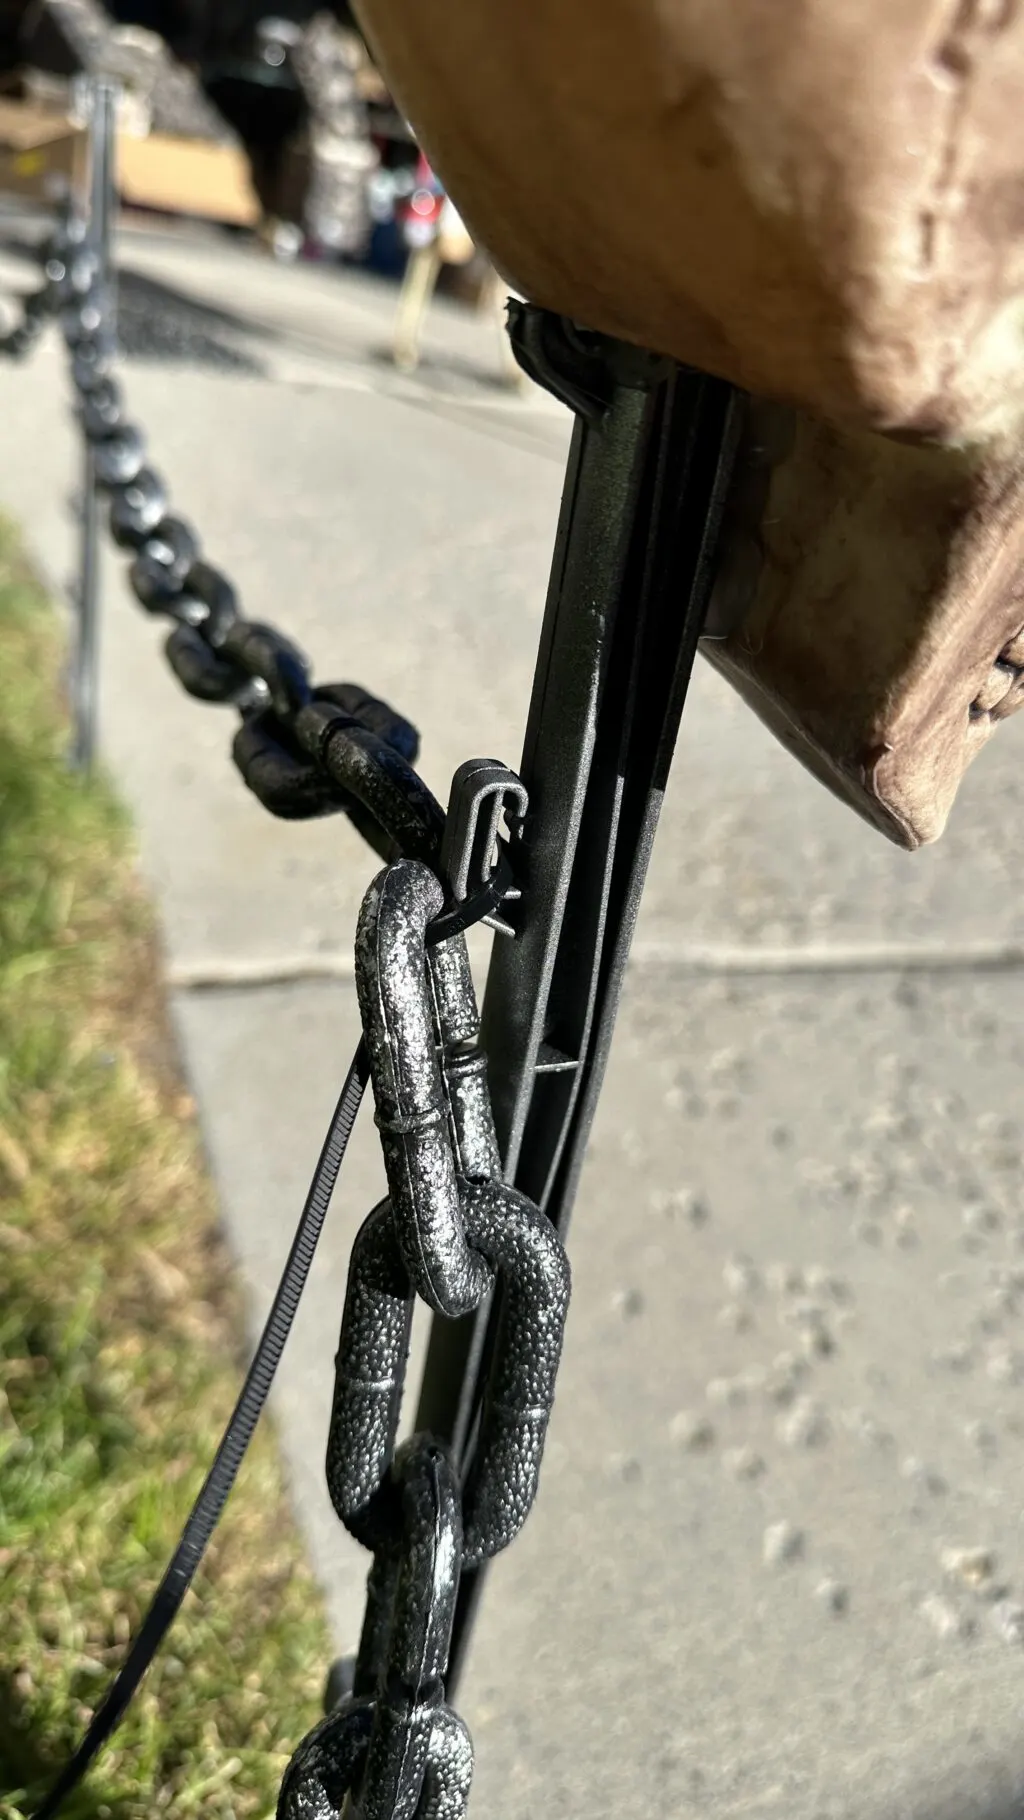
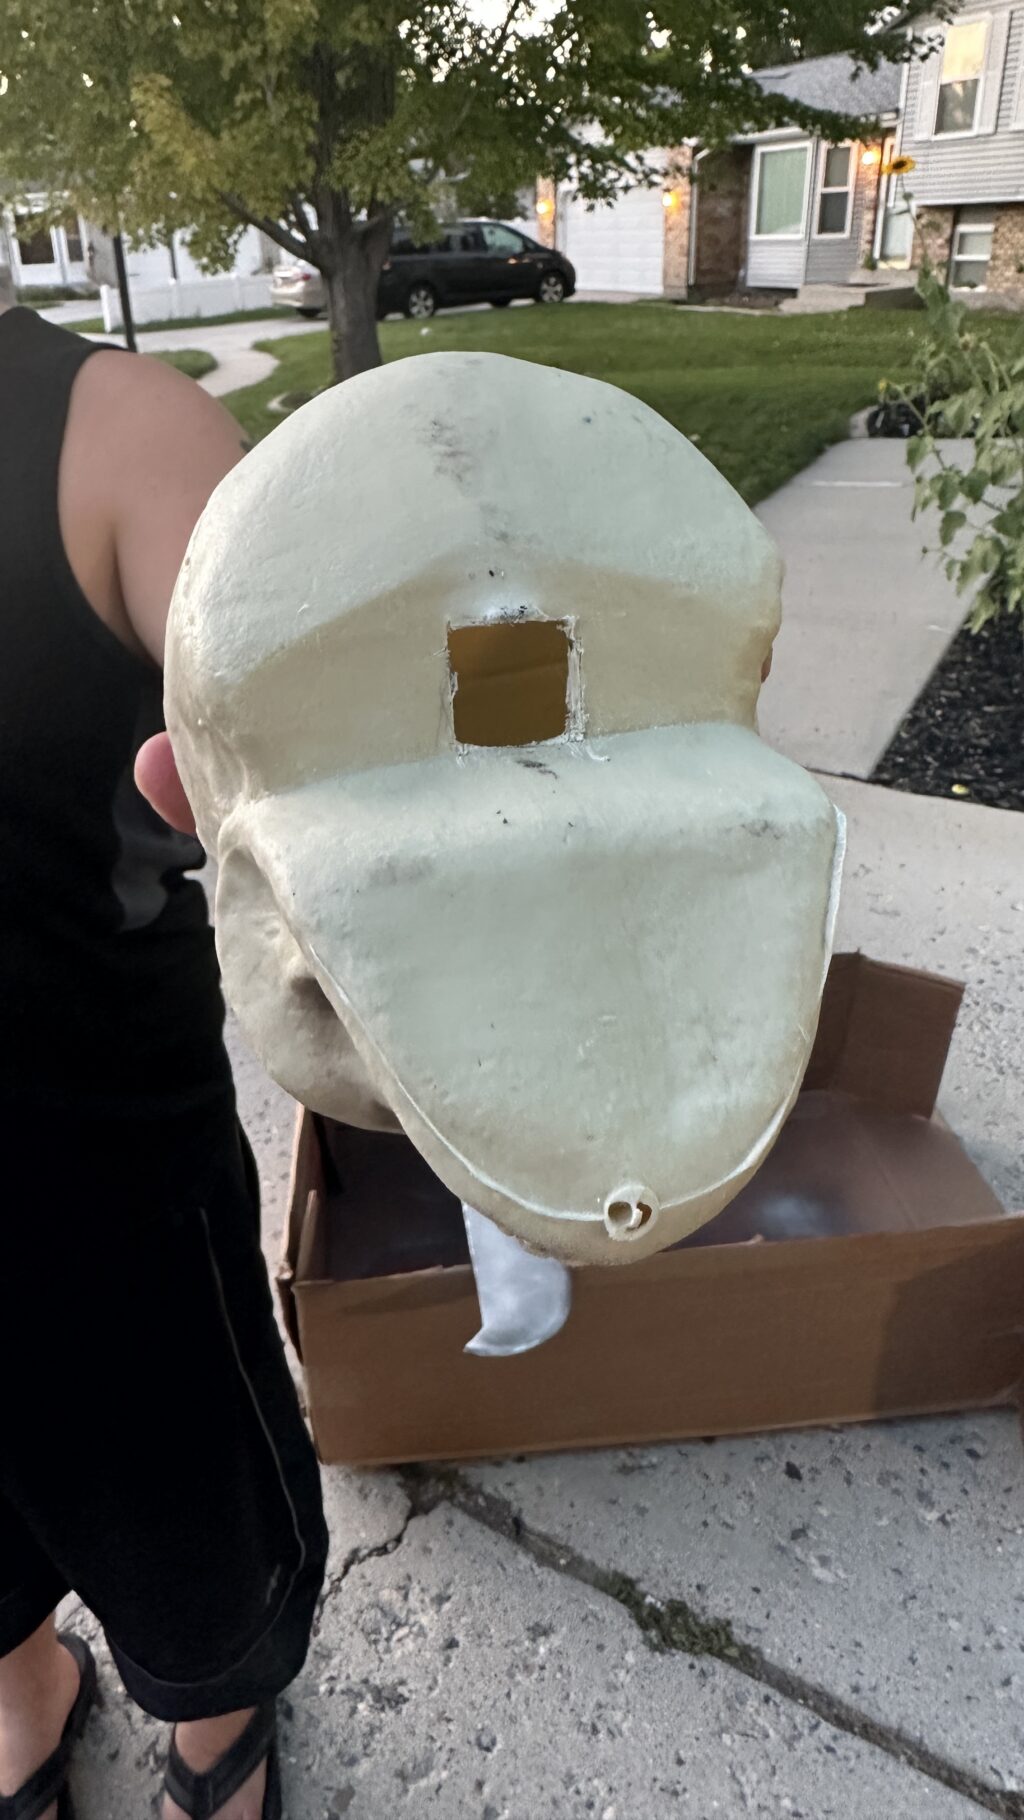
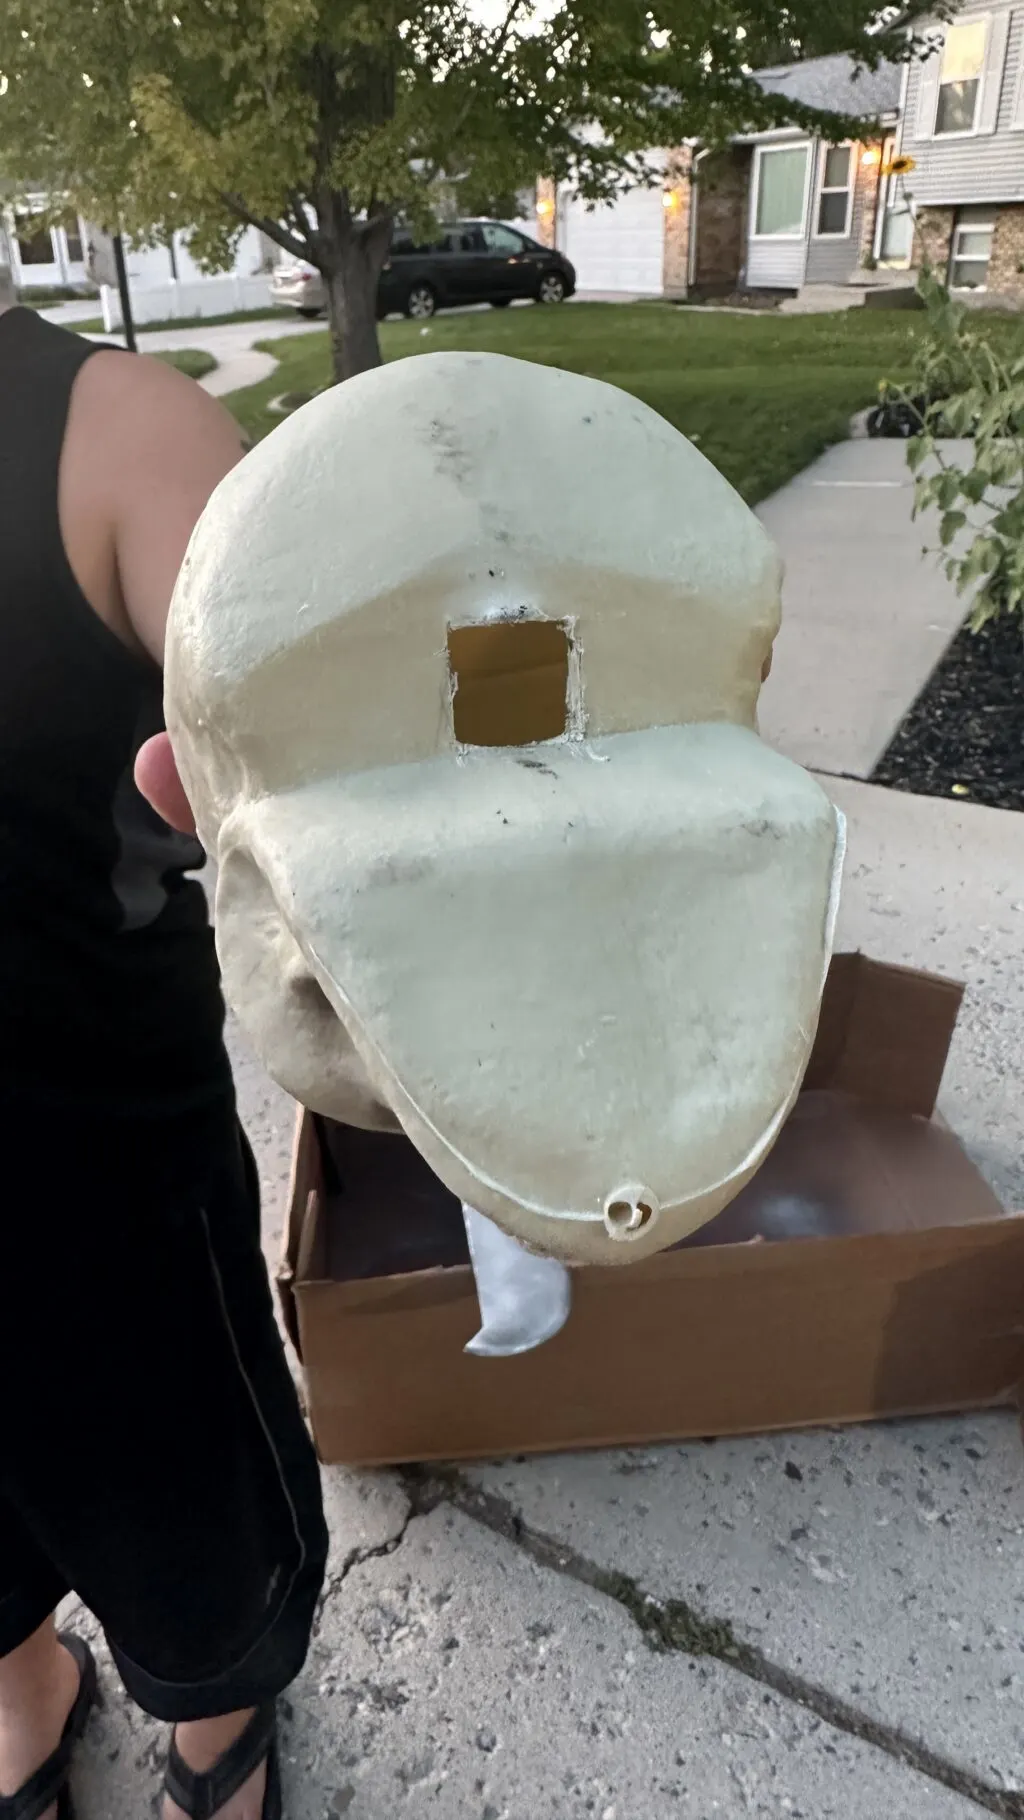
Once that is all assembled, add the finishing touches of the skulls and hands. We hot glued the hands on the top of the fence posts. The skulls had a small square hold cut out and then we applied hot glue to make sure they were secure.
That’s it! You now have a spooky Halloween fence on a budget! Enjoy and Happy Halloween!
Want more Dollar Tree Ideas? Check out:
- How to Find The Best Dollar Tree Stores In Your Area
- The Best and Worst Days To Shop at Dollar Tree
- 5 New Things at Dollar Tree That Cost Way More at Target
- 5 Things at Dollar Tree That Cost Way More at Walmart
- Here’s 5 Things to Always Buy at Dollar Tree According to Superfans
- Dollar Tree Items You Should Always Buy if You See Them
- Dollar Tree Grocery Items That Can Save You Hundreds of Dollars On Your Grocery Bill


DIY Dollar Tree Halloween Fence
Materials
- Step in Fence Posts – As many as you need to evenly space them apart in your yard
- Dollar Tree Plastic Halloween Chains
- Black Zip Ties
- Spray Paint if using – We used black and silver but you can spray it any color you’d like
- Skulls enough for each fence post – Found at Dollar Tree
- Skeleton hands enough for each fence post – Found at Dollar Tree
- Wood Stain optional but changes the look of the skulls
- Hot Glue Gun
Instructions
- Start by covering your work area with plastic or something to keep the spray paint from getting everywhere. Once covered, begin spray painting your fence posts. Keep in mind you don't need to spray paint the pointed tips as that will be in the ground. We first spray painted with a matte black paint then went over a little bit of silver to give it a metal look.
- While your fence posts are drying, you can work on staining the skulls and skeleton hands if you are wanting that weathered, old look. Set aside to dry.
- Once everything is dry, you can begin assembling the fence.
- We started by evenly measuring out the fence posts using the chains (one chain was in between each post) but you can do this any way you'd like.
- Stick the fence posts into the ground and then begin attaching the chains using zip ties. They easily attach to the notches in the back of the fence posts.
- Once that is all assembled, add the finishing touches of the skulls and hands. We hot glued the hands on the top of the fence posts. The skulls had a small square hold cut out and then we applied hot glue to make sure they were secure.
- That's it! You now have a spooky Halloween fence on a budget! Enjoy and Happy Halloween!