

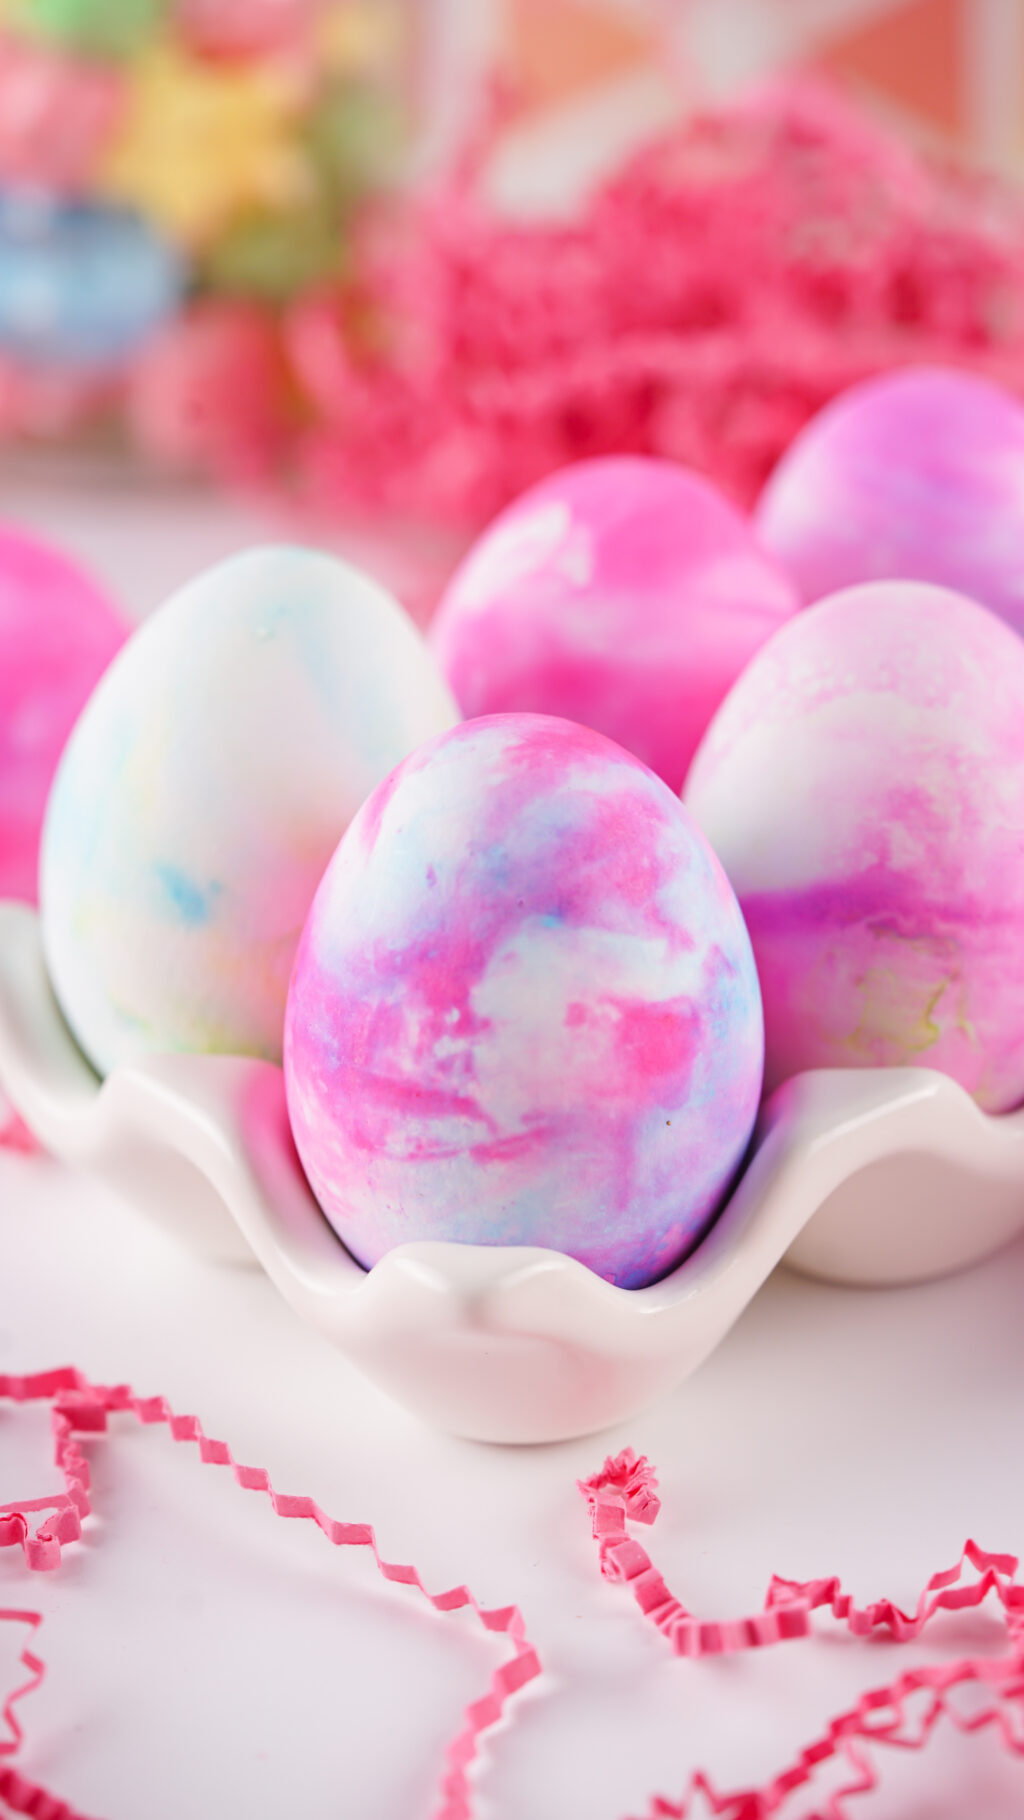
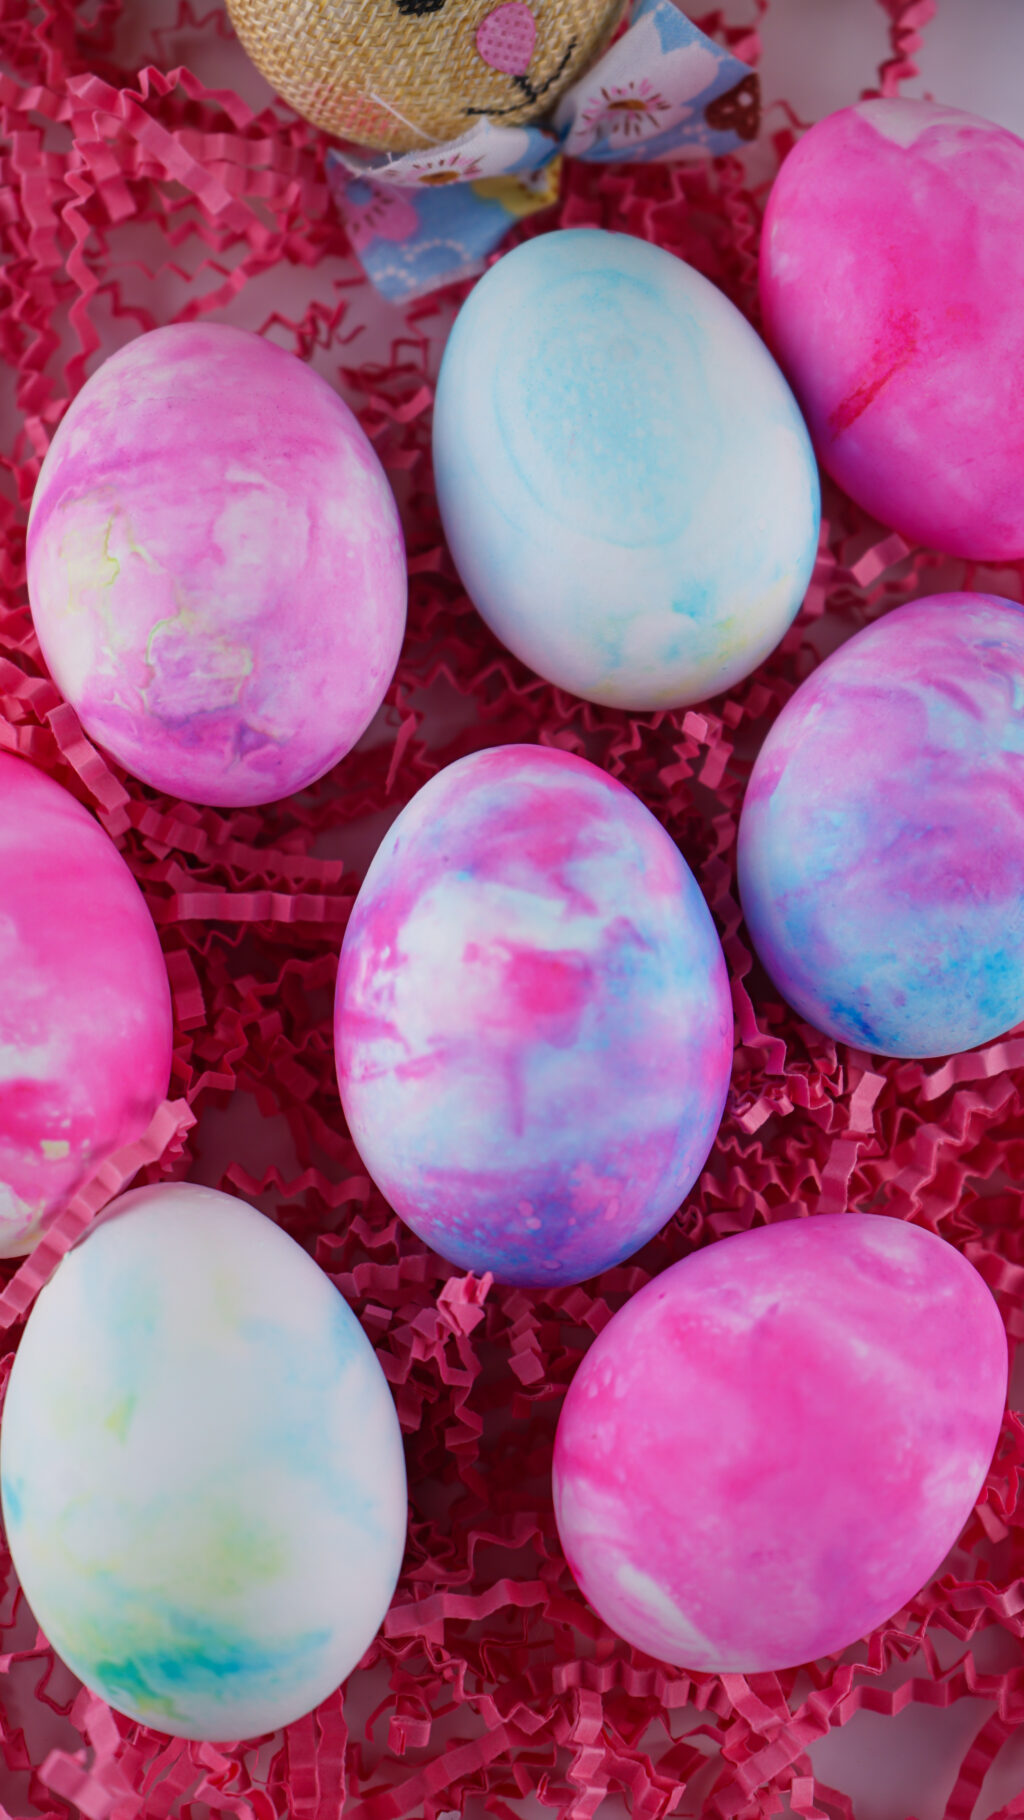
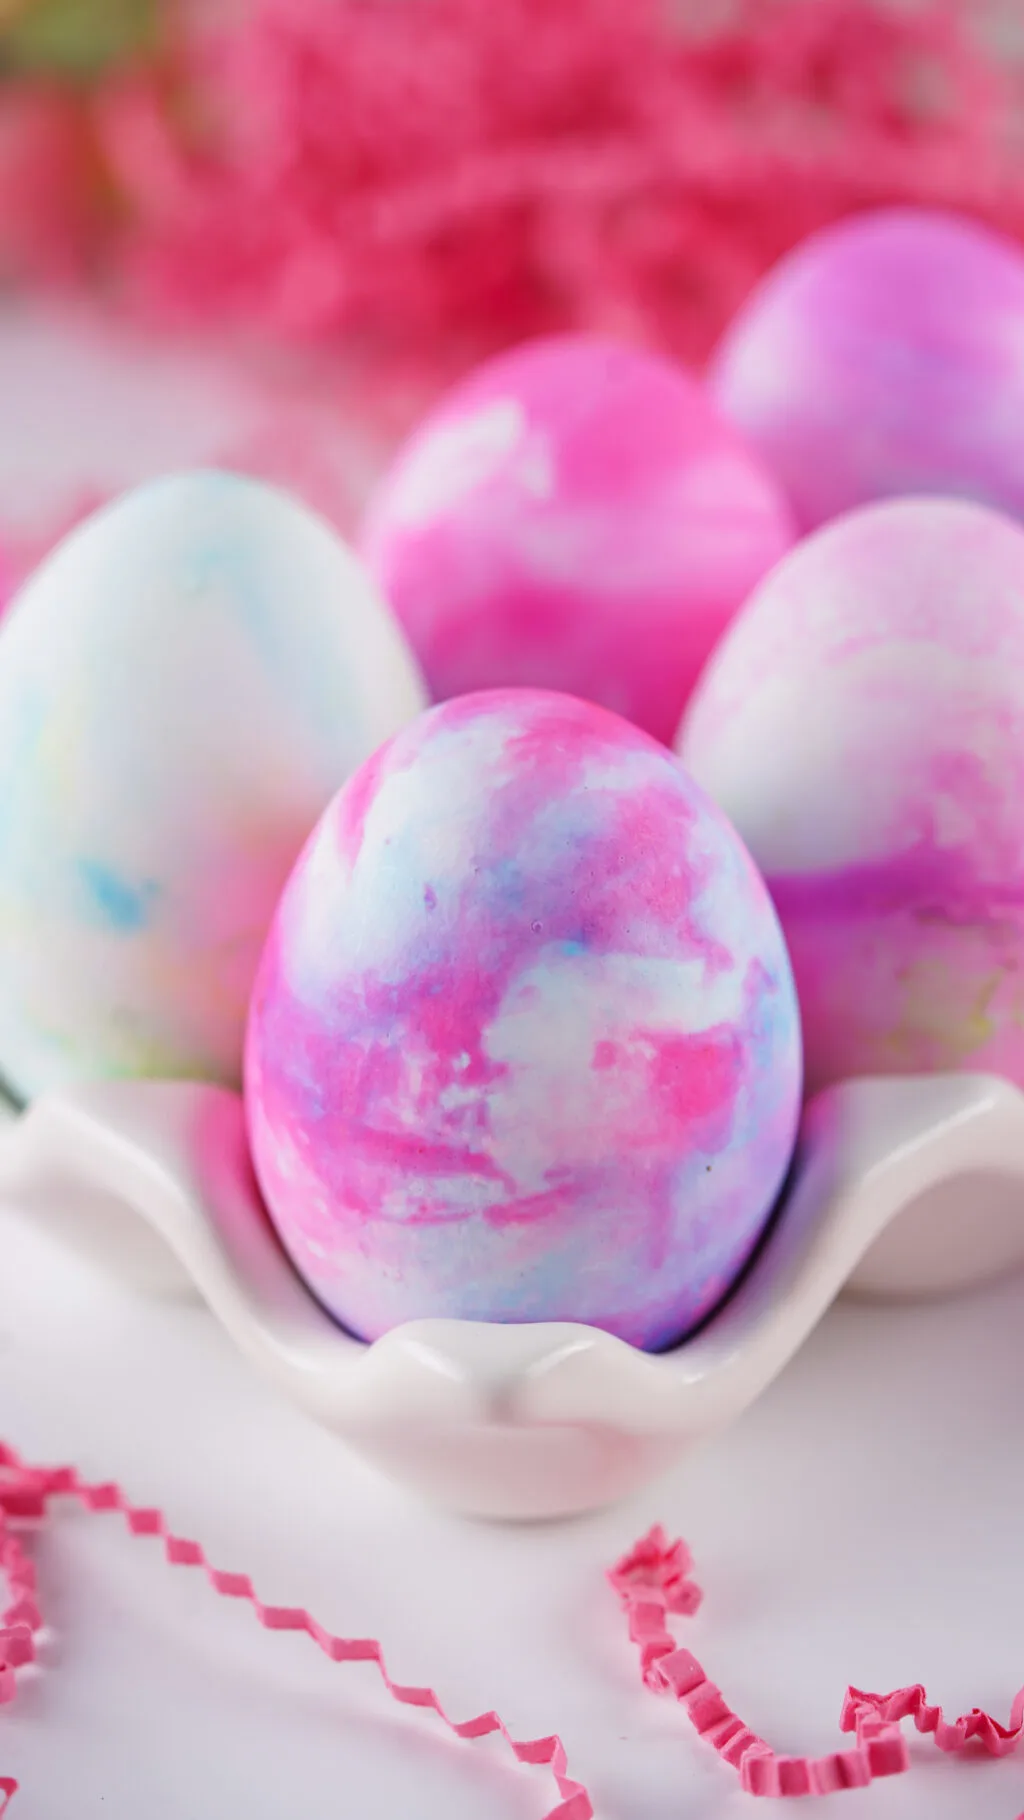
Forget the traditional way of dyeing eggs for Easter and learn How to Make Shaving Cream Easter Eggs! It’s a fun way to get a marbled look using regular food dye and colored shaving cream.

Shaving Cream Eggs
When it comes to dyed eggs for Easter, there is so many different ways to do it.
So far, our family has tried Kool-Aid Dyed Eggs, Dyed Eggs with Food Coloring, Dyed Easter Eggs with Fabric, Natural Yellow Egg Dye, Dyeing Easter Eggs with Rice, Dyeing Easter Eggs with Glitter and we’ve even made Easter Egg Dyed Potatoes!
This year we decided to give the shaving cream method a try and we ended up loving the cool marbled effect it gave! It’s such a fun way to color eggs and it’s a perfect Easter activity for a little kid or older children too!

What You Need to Make Shaving Cream Easter Eggs
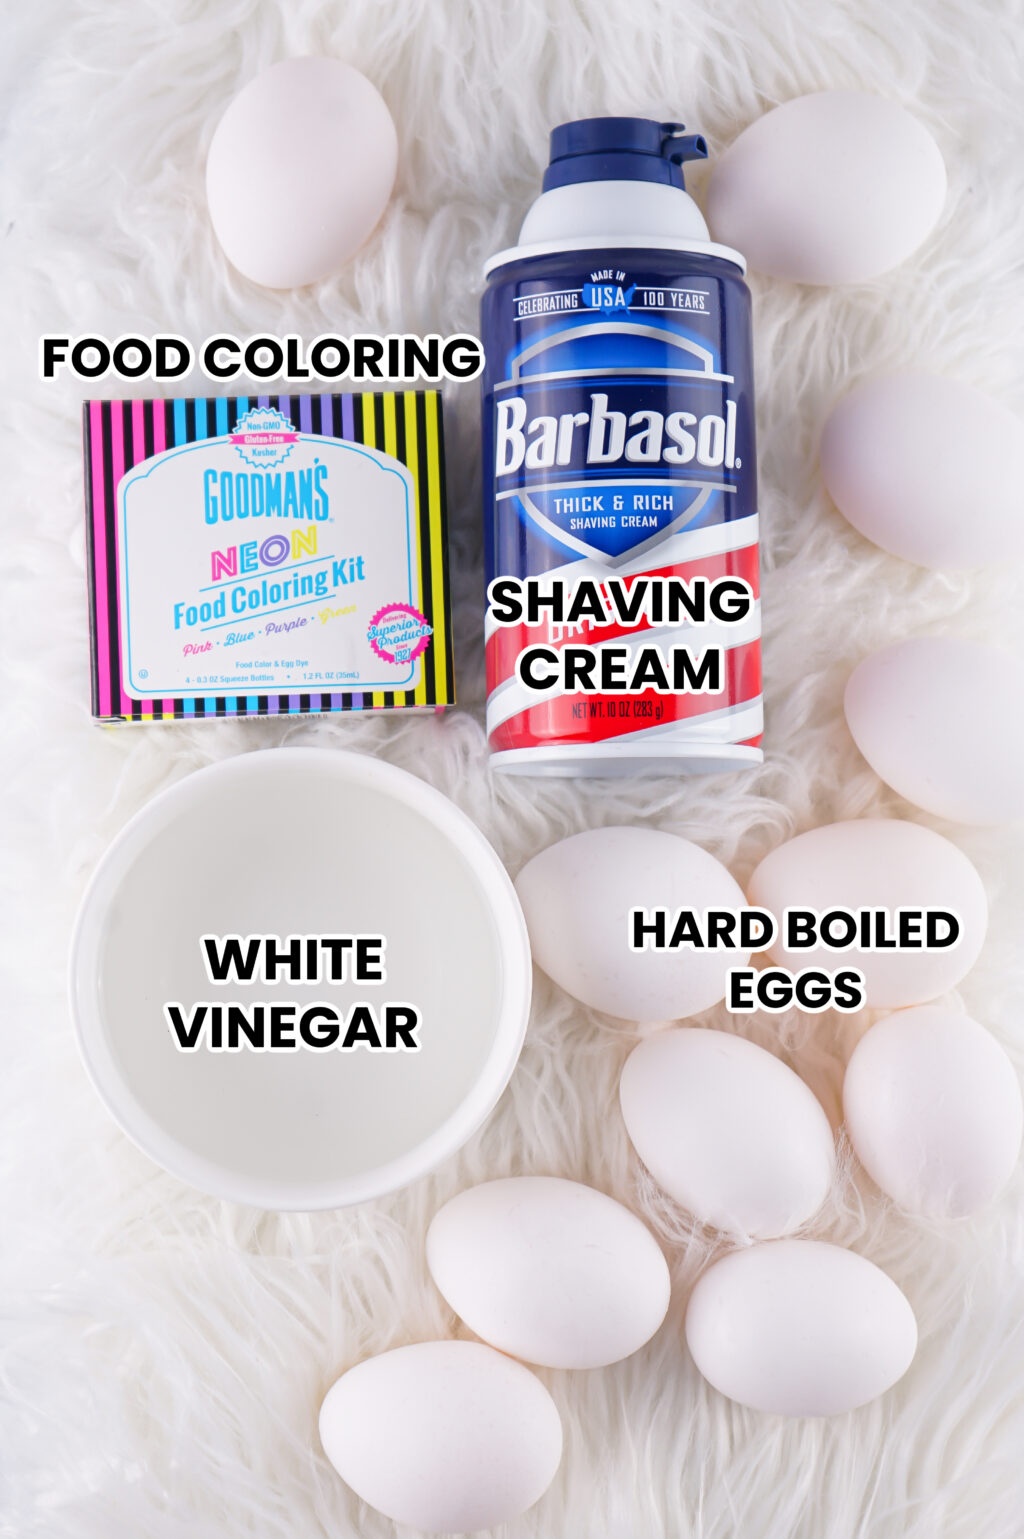
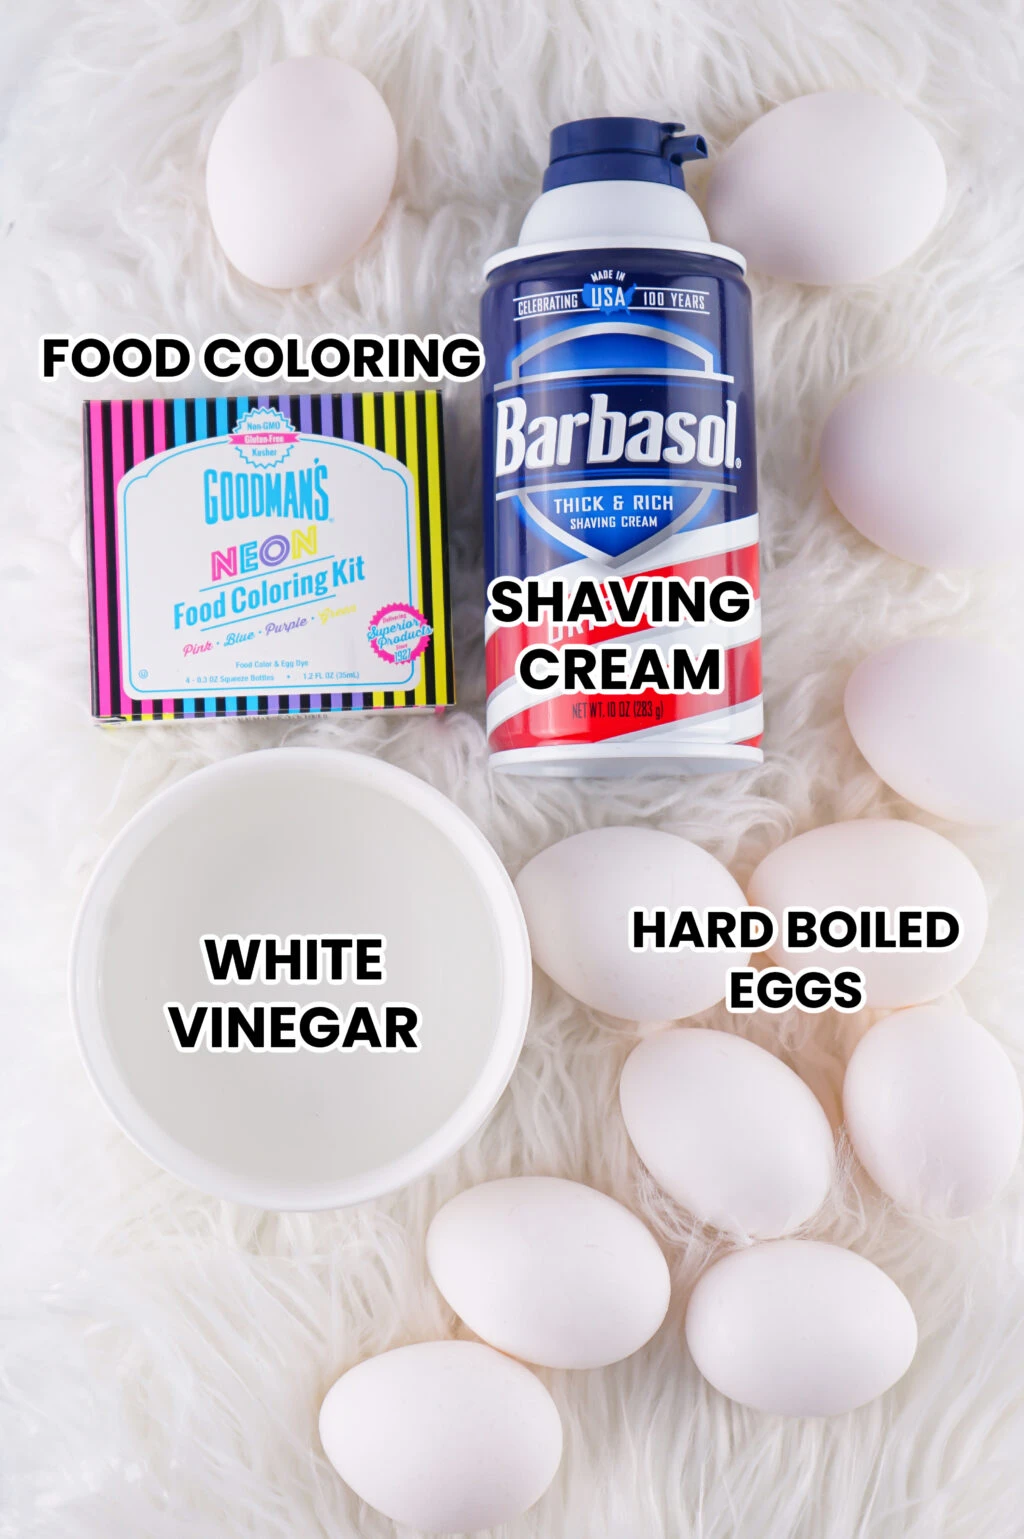
- Hard-boiled Eggs – Make your eggs ahead of time and ensure they are cool. Try our recipe for the Best Hard Boiled Eggs Ever.
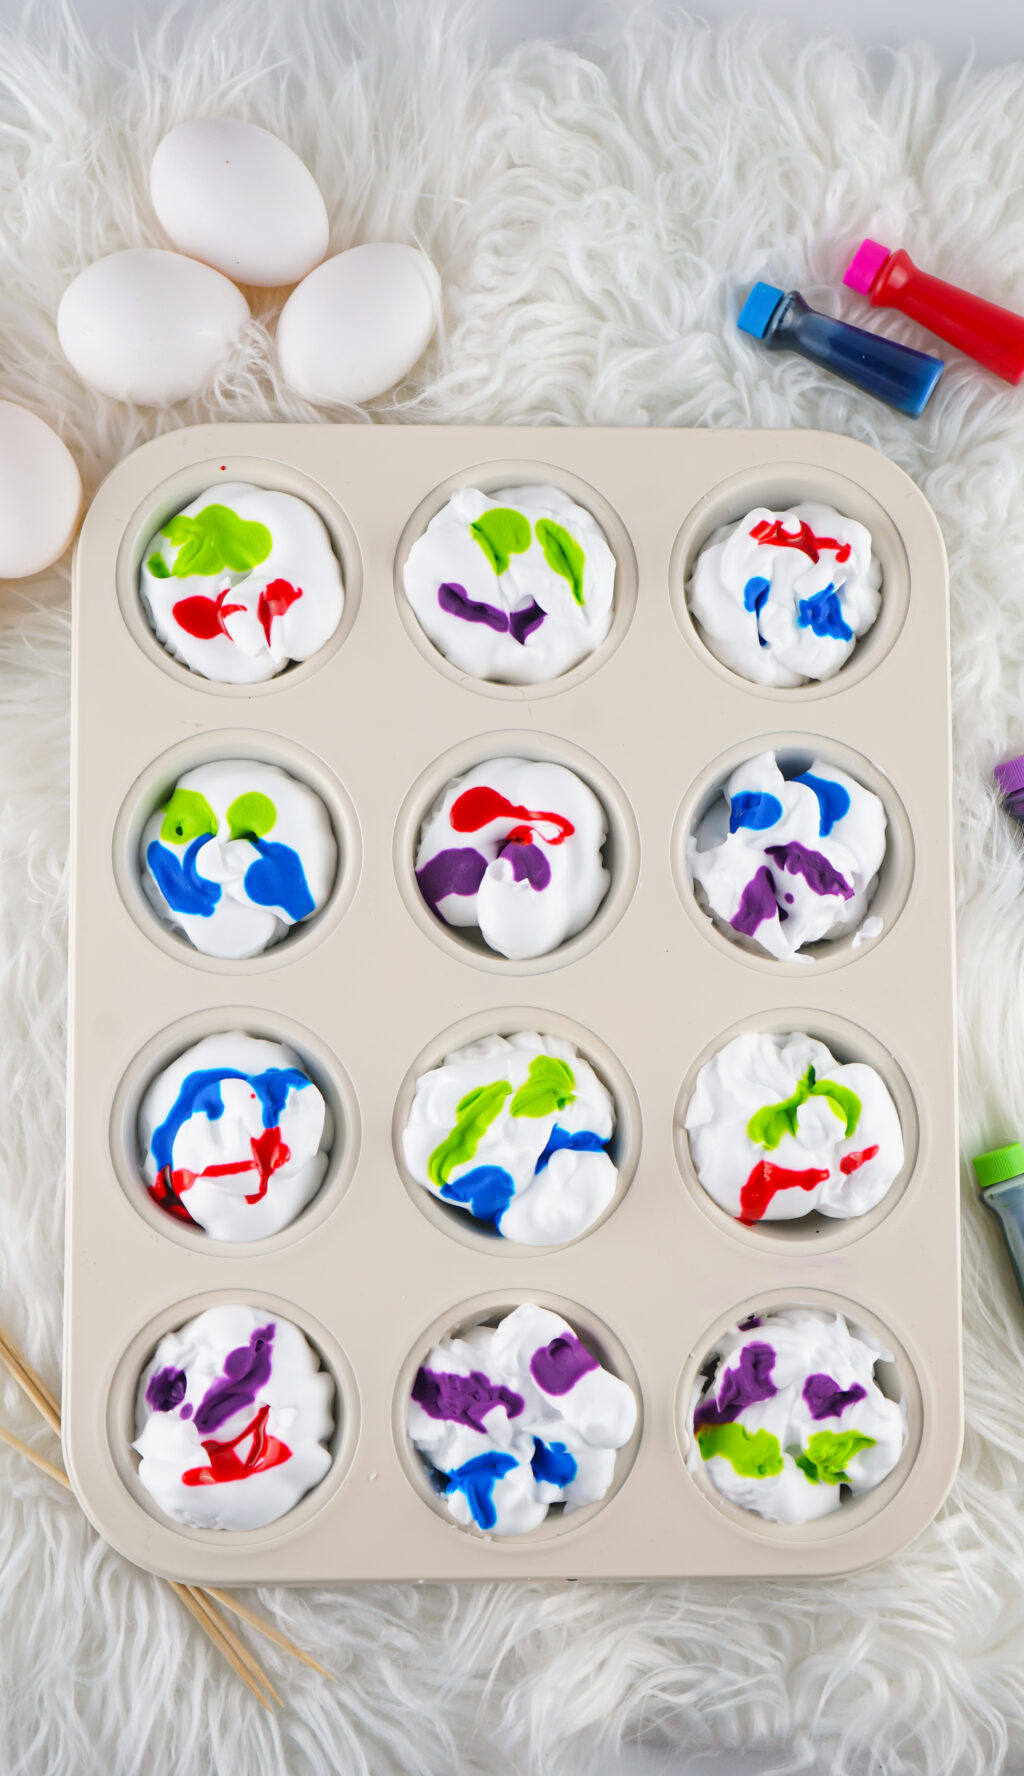
- Shaving Cream – You want the white foam shaving cream (not gel shaving cream) for best results.
- White Vinegar– This helps adhere the color to the egg shells.
- Food Coloring – You can use any food dye you wish. I prefer liquid food coloring for this project as it mixes well with the shaving cream and makes the most vibrant colors.
You will also need: - Large Bowl
- Paper Towels
- Rubber Gloves
- Toothpicks
- Average Sized Muffin Tin
How long do you leave eggs in shaving cream?
You are going to let the eggs sit in the shaving cream mixture for 10-15 minutes. The longer you allow them to sit, the darker and more vibrant the color will be.
Is shaving cream or Cool Whip better for eggs?
If you plan to consume (eat) the eggs after dyeing, you will want to use Cool Whip. Egg shells are porous so you want to ensure the materials you use are safe to consume which shaving cream is not.
See how to make cool whip easter eggs.


Is it safe to eat dyed Easter Eggs?
Depending on the method, dyed Easter eggs are safe to consume. As long as the method of dyeing is safe for consumption, the eggs are safe to eat. In this case, I would not eat the eggs after dyeing with shaving cream.
How do I store leftovers?
Store any leftovers in an airtight container in the fridge for a few days.
Helpful Tips
- I do not recommend eating these eggs after you have created them.
- The gel dye colors are much stronger than the liquid dyes, so beware and remember that a little goes a long way.
- The rubber gloves help keep the shaving cream out of the eyes and keeps dye from staining the hands.
- Do not leave the eggs in the vinegar for longer than 20 minutes or the vinegar will start to eat away at the egg shell. If this starts to happen, simply remove from the vinegar and rinse well before use.
- Do not leave the eggs to sit in the shaving cream too long or it will start to eat away at the shell.
- You can use other containers to color your eggs, a muffin tin isn’t required, just an easy way to keep the colors separated for the kids.

How to Make Shaving Cream Easter Eggs
Begin by placing your hard boiled eggs into your bowl of white vinegar. Allow to sit for roughly 10 minutes.
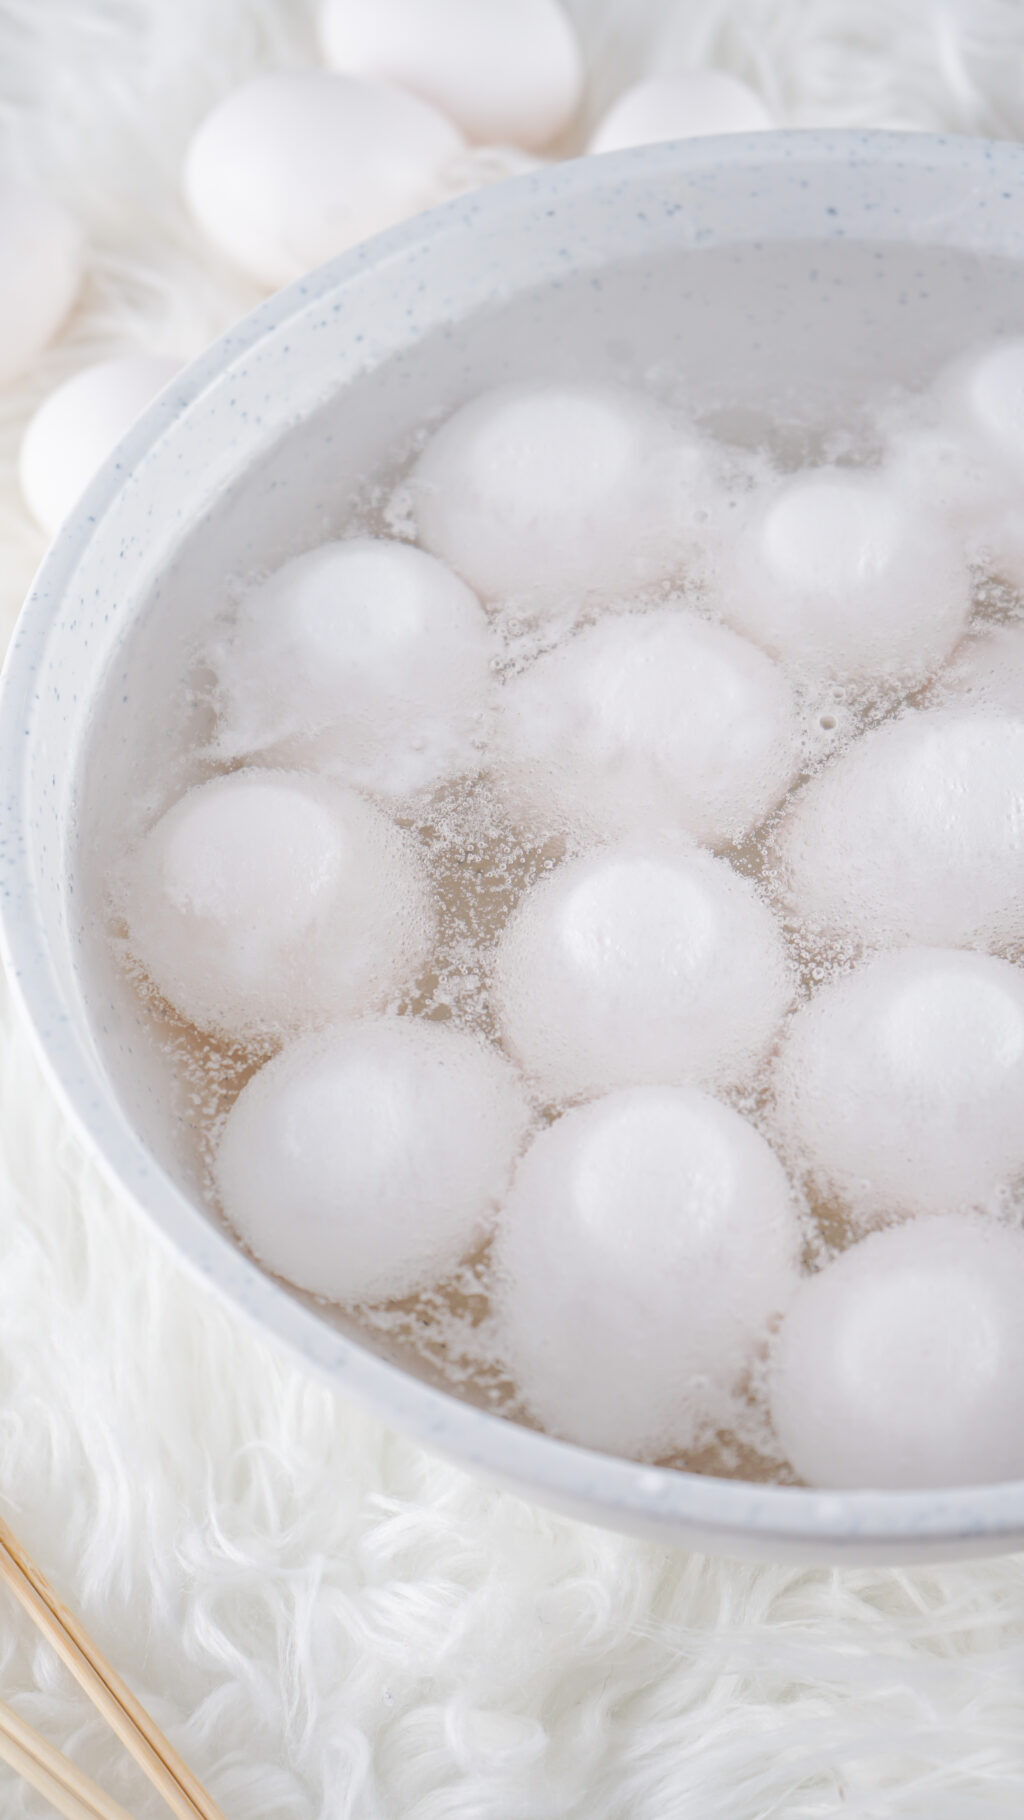
Rinse eggs and let dry before moving onto next step.
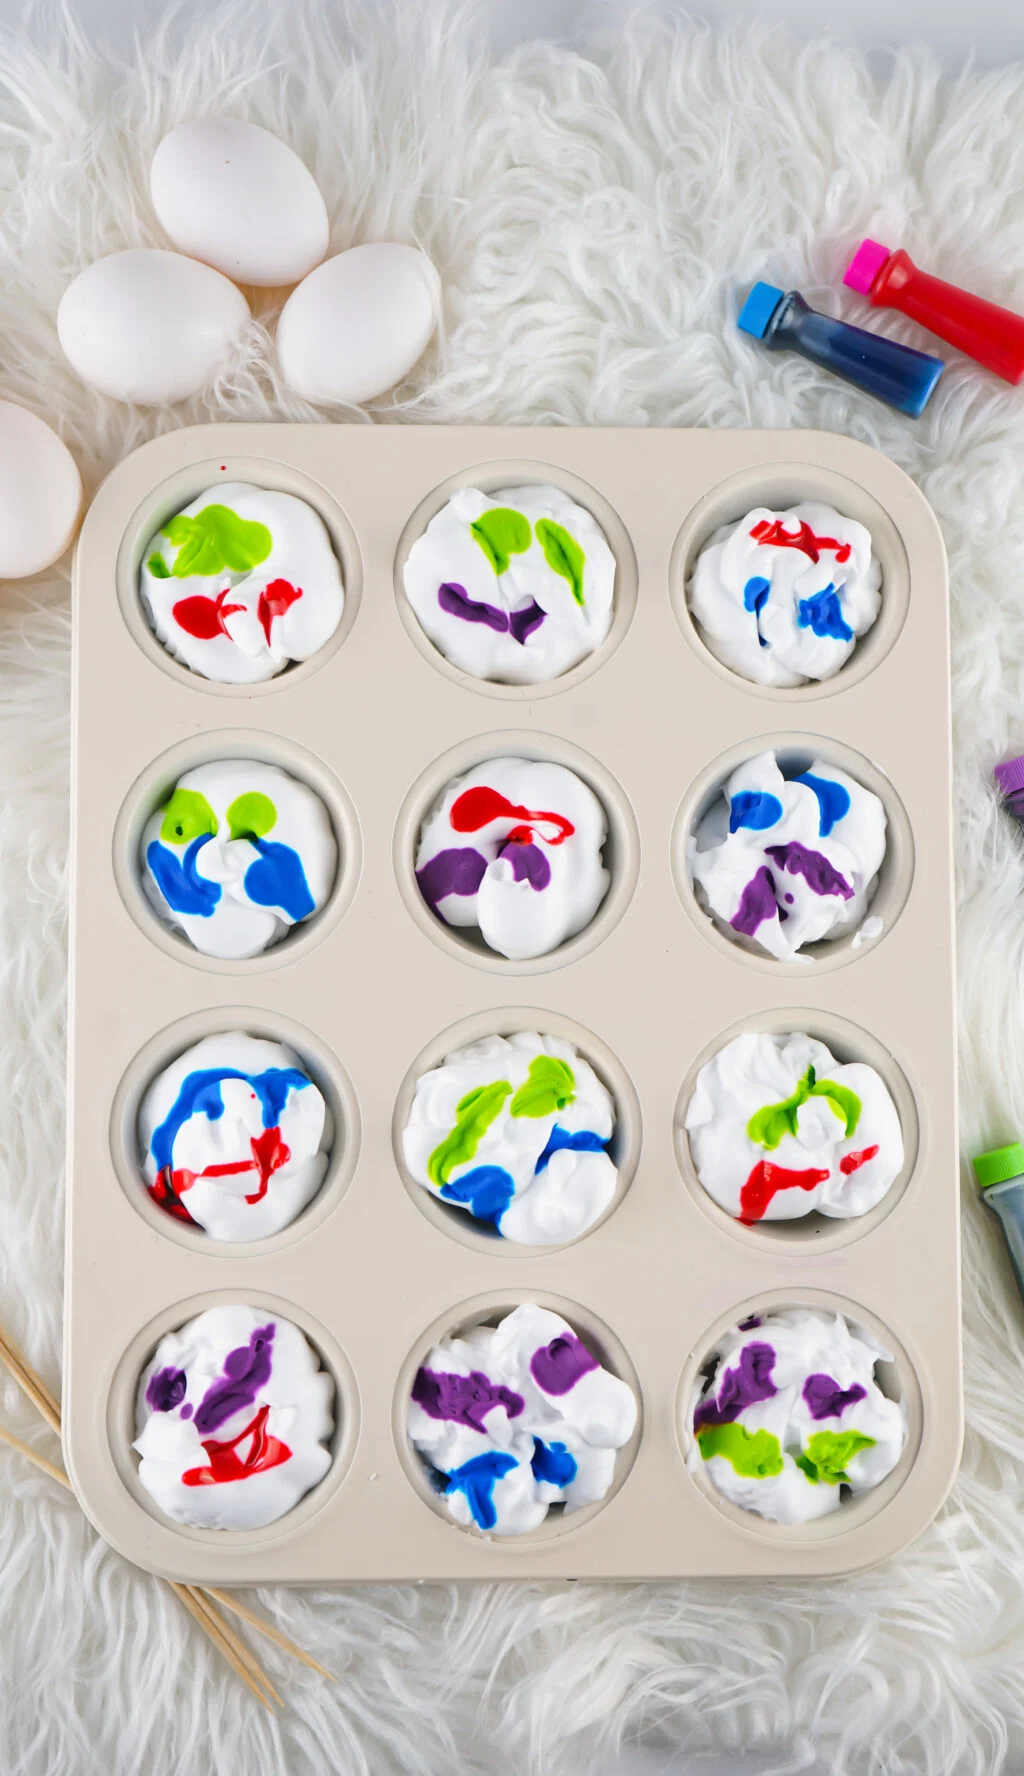
Once dry, squeeze some shaving cream into each cavity of your muffin tin and add a few drops of food coloring to each one.
Use a toothpick to swirl the food coloring into the shaving cream.
Roll your eggs into the mixture allowing them to sit in it for roughly 10 minutes.
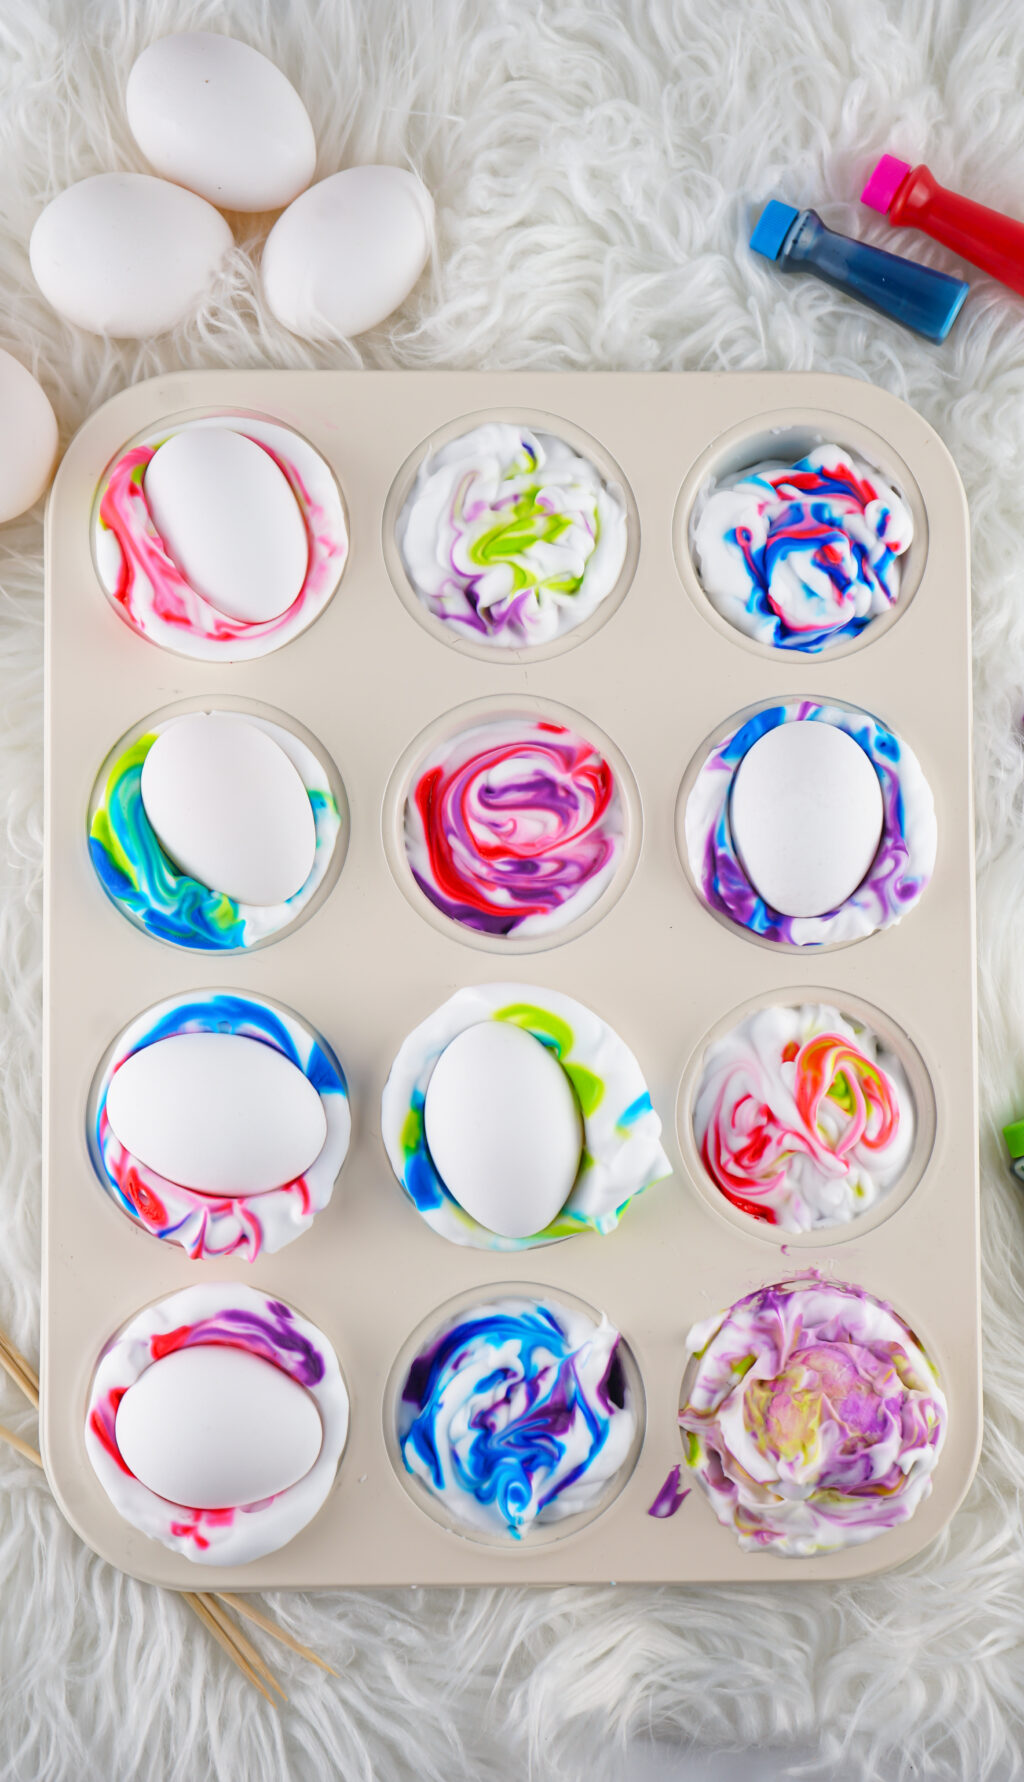

Carefully remove eggs (wear gloves during this step) rinse and allow to dry on a paper towel.
You can leave these out for the Easter Bunny or discard them after making them.


Shaving Cream Easter Eggs
Ingredients
- Boiled Eggs as many as you like
- 1 Container Shaving Cream
- Vinegar
- Liquid Water Based Food Dye
Instructions
- Add the boiled eggs to a bowl of vinegar and let them sit for about 10 minutes. Then remove and pat dry. Let dry fully before dyeing, this takes about 20 minutes. The amount of vinegar you need depends on the amount of eggs you’re dyeing and the size/shape of your container the eggs will be soaking in. I tend to grab a large jug of vinegar and then store the egg vinegar, after the eggs have finished soaking, in a separate container for the following year.
- Fill each spot in the muffin tin with shaving cream. You will get quite a bit from the one container of shaving cream, so don’t be afraid to use plenty. I did a few dozen and had barely put a dent in the can.
- If using gel dye, add one drop of each color to a spot. If using liquid dye, use two drops, in each spot in the tin. I prefer and recommend liquid dyes over gel, for this craft. I like to do various colors or even single colors and change it up from spot to spot. This is up to you and the kiddos!
- Use a toothpick to swirl the colors together in the shaving cream.
- Using rubber gloves, roll the boiled eggs around in the shaving cream and completely cover them. Let them sit for at least 10-15 minutes.
- After resting, rinse the eggs, DO NOT rub them, just rinse gently, and place on a paper towel to fully dry. This takes about 20 minutes.
- Once dry, enjoy!
NUTRITION
Nutrition information is a rough estimate only; actual values will vary based on the exact ingredients used and amount of recipe prepared.